メインコンテンツにスキップ

Canon Vixia HF S10 Camcorder Mini Advance Shoe Replacement

必要な工具と部品

  1. Canon Vixia HF S10 Camcorder Mini Advance Shoe Replacement, Mini Advance Shoe: 手順 1、 1の画像 1
    • Flip the camcorder upside down and remove the three 3x4 mm Phillips screws highlighted in the diagram.

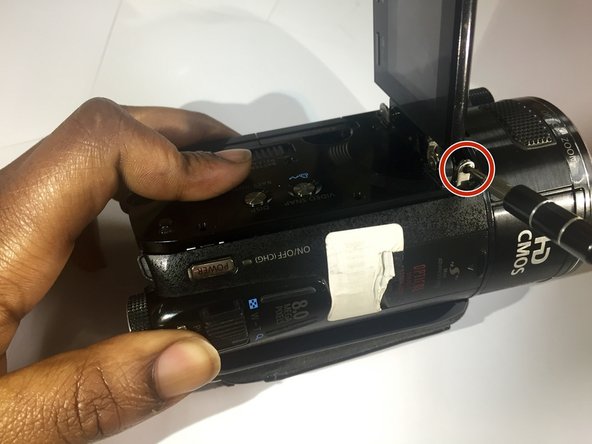
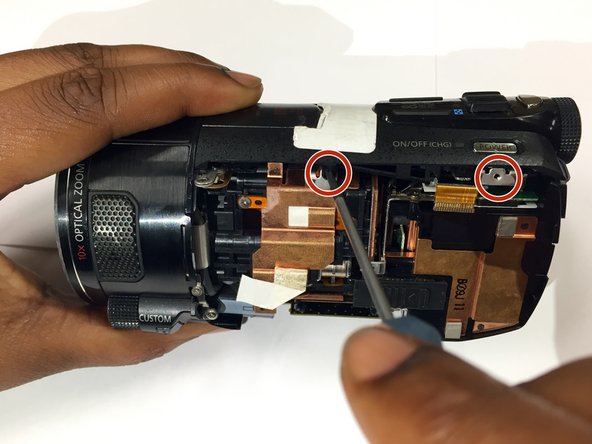
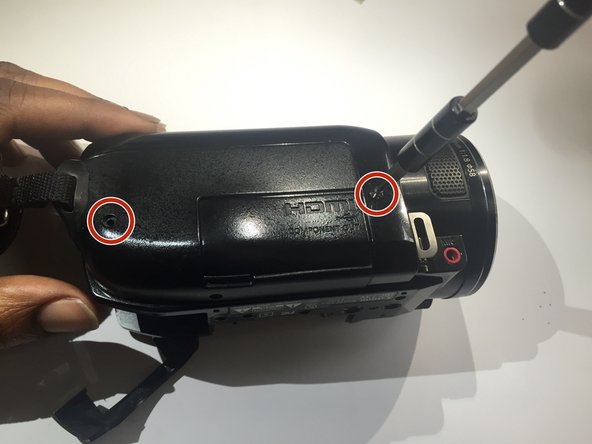
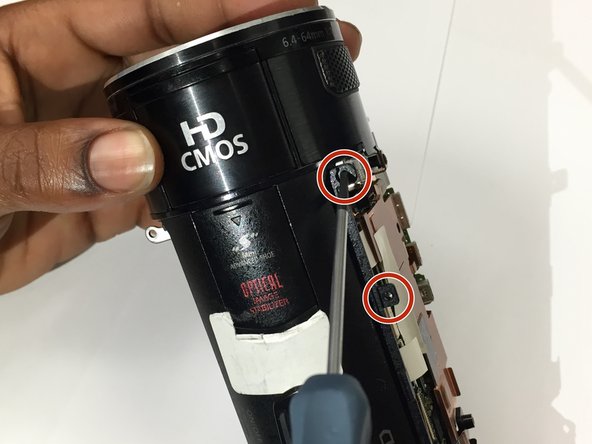
  2. Canon Vixia HF S10 Camcorder Mini Advance Shoe Replacement: 手順 2、 3の画像 1 Canon Vixia HF S10 Camcorder Mini Advance Shoe Replacement: 手順 2、 3の画像 2 Canon Vixia HF S10 Camcorder Mini Advance Shoe Replacement: 手順 2、 3の画像 3
    • Open the LCD screen.

    • Remove the three 3x4 mm Phillips screws securing the black panel plastic case.

    • From the inner corner in between the panel and the LCD screen, remove the two 2x2.5 mm Phillips screws and the 3x4 mm Phillips screw.

  3. Canon Vixia HF S10 Camcorder Mini Advance Shoe Replacement: 手順 3、 2の画像 1 Canon Vixia HF S10 Camcorder Mini Advance Shoe Replacement: 手順 3、 2の画像 2
    • With the canon logo facing you, remove the plastic casing located in the back of the lens. Underneath this casing, you will find a hinge with a screw.

    • Remove the 2x2.5 mm Phillips screw holding hinge in place.

  4. Canon Vixia HF S10 Camcorder Mini Advance Shoe Replacement: 手順 4、 2の画像 1 Canon Vixia HF S10 Camcorder Mini Advance Shoe Replacement: 手順 4、 2の画像 2
    • Using your hands, remove the inside panel.

    • After removing the panel, remove the two 1x2.5 mm Phillips screws.

  5. Canon Vixia HF S10 Camcorder Mini Advance Shoe Replacement: 手順 5、 1の画像 1
    • Turn the camcorder back to step one position and remove remaining screws on the bottom platform. There will be four 2x2.5 mm Phillips screws.

  6. Canon Vixia HF S10 Camcorder Mini Advance Shoe Replacement: 手順 6、 2の画像 1 Canon Vixia HF S10 Camcorder Mini Advance Shoe Replacement: 手順 6、 2の画像 2
    • Remove the strap from mount.

    • Remove the two 1x2.5 mm Phillips screws revealed under the strap on the side panel.

  7. Canon Vixia HF S10 Camcorder Mini Advance Shoe Replacement: 手順 7、 2の画像 1 Canon Vixia HF S10 Camcorder Mini Advance Shoe Replacement: 手順 7、 2の画像 2
    • Pry the side panel from the base of the camcorder by using the plastic opening tool.

    • Remove the two 2x2.5mm Phillips screws located at the top.

  8. Canon Vixia HF S10 Camcorder Mini Advance Shoe Replacement: 手順 8、 1の画像 1
    • Remove the two 3x4 mm Phillips screws located under the coverings labeled AV & DCIN. These covers can be found when the back of the camera is facing you.

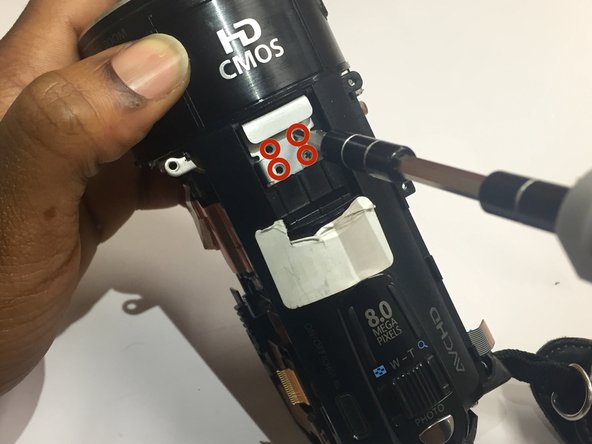
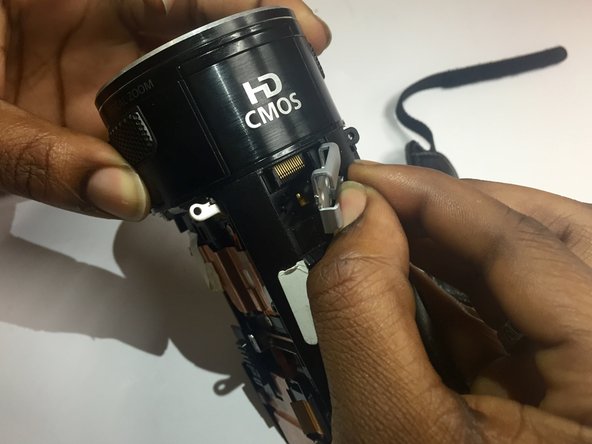
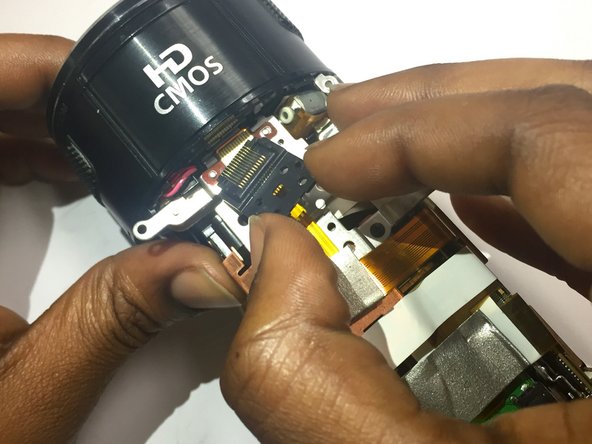
  9. Canon Vixia HF S10 Camcorder Mini Advance Shoe Replacement: 手順 9、 3の画像 1 Canon Vixia HF S10 Camcorder Mini Advance Shoe Replacement: 手順 9、 3の画像 2 Canon Vixia HF S10 Camcorder Mini Advance Shoe Replacement: 手順 9、 3の画像 3
    • Slide open the "Optical Image Stabilizer" cover located at the top of the camcorder.

    • Remove the four 3x2.5 mm Phillips screws underneath.

    • Using your fingers, remove the metal casing.

  10. Canon Vixia HF S10 Camcorder Mini Advance Shoe Replacement: 手順 10、 2の画像 1 Canon Vixia HF S10 Camcorder Mini Advance Shoe Replacement: 手順 10、 2の画像 2
    • Lift the top cover of the camcorder using your fingers.

    • Remove the the Mini Advance Shoe with your fingers

終わりに

To reassemble your device, follow these instructions in reverse order.

ある他の人がこのガイドを完成しました。

作成者

4人の作成者と共同で作成されました。

Briana

メンバー登録日: 03/03/15

116 ポイント

1ガイドが承認済み

チーム

Sam Houston State, Team 13-1, Blackburne Winter 2015 Sam Houston State, Team 13-1, Blackburne Winter 2015人のメンバー

SHSU-BLACKBURNE-W15S13G1

4 メンバー

9のガイドは作成済み

0 件のコメント

コメントを追加

統計データ:

過去 24時間: 0

過去 7 日: 0

過去 30 日: 2

今までの合計 589