はじめに
For this particular fix you will need a few items; your hands, a plastic opening tool, a Phillips screw, and a magnetic mat to keep the screws in place. As well as a marker to organize where each screw needs to be placed when reassembling. It is important to have the audio speaker replaced so that the camcorder will have sound.
必要な工具と部品
-
-
-
From the inner corner in between the panel and the LCD screen, remove the two 2x2.5 mm Phillips screws and the 3x4 mm Phillips screw.
-
Remove the black plastic covering with your fingers. Underneath the covering, you will find a screw hinge.
-
Remove the 2x2.25 mm Phillips screw located at the top of the screw hinge.
-
-
-
Using your fingers, remove the panel from the base of the camcorder.
-
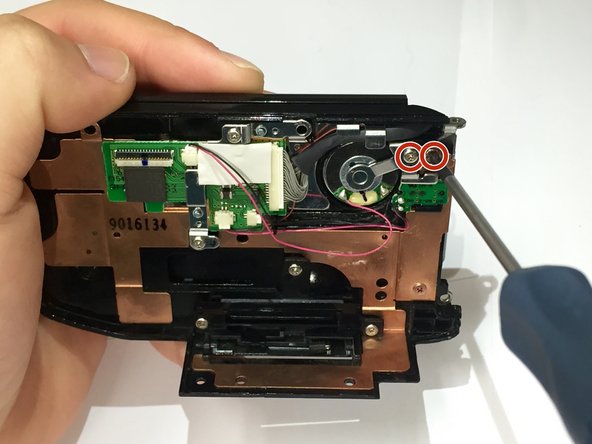
After removing the panel, remove the two 2x2.25 mm Phillips screws located at the top right of the inside of the panel.
-
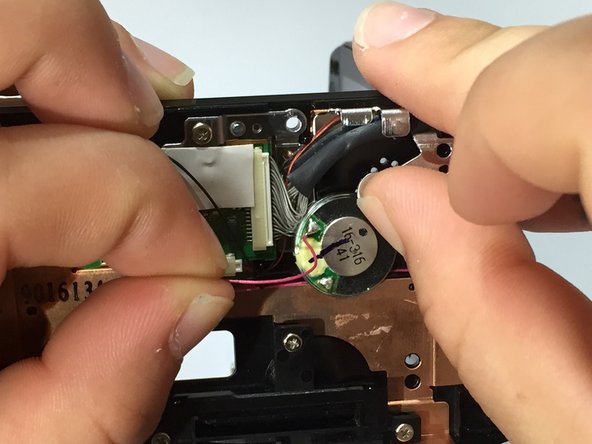
Using one hand, gently move the silver piece holding the speaker down while using the other hand to remove the speaker.
-


To reassemble your device, follow these instructions in reverse order.
To reassemble your device, follow these instructions in reverse order.
チーム

Sam Houston State, Team 13-1, Blackburne Winter 2015 Sam Houston State, Team 13-1, Blackburne Winter 2015人のメンバー
SHSU-BLACKBURNE-W15S13G1
4 メンバー
9のガイドは作成済み