メインコンテンツにスキップ

Canon Vixia HF R62 Motherboard Replacement

必要な工具と部品

  1. Canon Vixia HF R62 Motherboard Replacement, Outer Shell: 手順 1、 2の画像 1 Canon Vixia HF R62 Motherboard Replacement, Outer Shell: 手順 1、 2の画像 2
    • Remove the strap by undoing the Velcro and pulling it through the thread points.

    • Remove the external battery pack by pressing down on the slide release and sliding it out.

  2. Canon Vixia HF R62 Motherboard Replacement: 手順 2、 2の画像 1 Canon Vixia HF R62 Motherboard Replacement: 手順 2、 2の画像 2
    • Remove the three 5mm Phillips #000 screws on the bottom of the device.

  3. Canon Vixia HF R62 Motherboard Replacement: 手順 3、 2の画像 1 Canon Vixia HF R62 Motherboard Replacement: 手順 3、 2の画像 2
    • On the side of the device, remove the following Phillips #000 screws:

    • One 3mm screw

    • One 5mm screw

  4. Canon Vixia HF R62 Motherboard Replacement: 手順 4、 2の画像 1 Canon Vixia HF R62 Motherboard Replacement: 手順 4、 2の画像 2
    • Remove the panel opposite the display by pulling up perpendicular to the side.

  5. Canon Vixia HF R62 Motherboard Replacement: 手順 5、 1の画像 1
    • Remove the 4mm Phillips #000 screw that was exposed after taking off the side panel.

  6. Canon Vixia HF R62 Motherboard Replacement: 手順 6、 2の画像 1 Canon Vixia HF R62 Motherboard Replacement: 手順 6、 2の画像 2
    • Remove the three 4mm Phillips #000 screws shown.

    • There will be foam covers protecting some or all of these screws. These will need to be removed before you will be able to unscrew them.

  7. Canon Vixia HF R62 Motherboard Replacement: 手順 7、 3の画像 1 Canon Vixia HF R62 Motherboard Replacement: 手順 7、 3の画像 2 Canon Vixia HF R62 Motherboard Replacement: 手順 7、 3の画像 3
    この手順で使用する道具:
    Tweezers
    $4.99
    購入する
    • Using tweezers, disconnect this ribbon cable by pulling straight out.

  8. Canon Vixia HF R62 Motherboard Replacement: 手順 8、 3の画像 1 Canon Vixia HF R62 Motherboard Replacement: 手順 8、 3の画像 2 Canon Vixia HF R62 Motherboard Replacement: 手順 8、 3の画像 3
    • Repeat step seven (7) for the remaining three wires shown.

  9. Canon Vixia HF R62 Motherboard Replacement: 手順 9、 3の画像 1 Canon Vixia HF R62 Motherboard Replacement: 手順 9、 3の画像 2 Canon Vixia HF R62 Motherboard Replacement: 手順 9、 3の画像 3
    • Grasp the top of the camera and pull straight up to remove the top panel.

  10. Canon Vixia HF R62 Motherboard Replacement, Lens: 手順 10、 1の画像 1
    • Remove the 5mm Phillips #000 screw on top of the inner case.

  11. Canon Vixia HF R62 Motherboard Replacement: 手順 11、 2の画像 1 Canon Vixia HF R62 Motherboard Replacement: 手順 11、 2の画像 2
    • Remove the two 5mm Phillips #000 screws near the display panel.

  12. Canon Vixia HF R62 Motherboard Replacement: 手順 12、 2の画像 1 Canon Vixia HF R62 Motherboard Replacement: 手順 12、 2の画像 2
    • Disconnect the small bundled cable connector on the side of the lens cover by pulling it straight out.

  13. Canon Vixia HF R62 Motherboard Replacement: 手順 13、 2の画像 1 Canon Vixia HF R62 Motherboard Replacement: 手順 13、 2の画像 2
    • Remove the lens cover by pulling straight away from the body.

  14. Canon Vixia HF R62 Motherboard Replacement: 手順 14、 2の画像 1 Canon Vixia HF R62 Motherboard Replacement: 手順 14、 2の画像 2
    • Remove the three 6mm Phillips #000 screws shown.

  15. Canon Vixia HF R62 Motherboard Replacement: 手順 15、 2の画像 1 Canon Vixia HF R62 Motherboard Replacement: 手順 15、 2の画像 2
    • Remove the lens by pulling straight away from the main body.

    • Be aware of the small rubber gasket around the lens as it may come loose.

  16. Canon Vixia HF R62 Motherboard Replacement, Internal Battery and SD Card Reader: 手順 16、 3の画像 1 Canon Vixia HF R62 Motherboard Replacement, Internal Battery and SD Card Reader: 手順 16、 3の画像 2 Canon Vixia HF R62 Motherboard Replacement, Internal Battery and SD Card Reader: 手順 16、 3の画像 3
    • Remove the two 3mm Phillips #000 screws.

    • Remove the 4mm Phillips #000 screw.

  17. Canon Vixia HF R62 Motherboard Replacement: 手順 17、 2の画像 1 Canon Vixia HF R62 Motherboard Replacement: 手順 17、 2の画像 2
    • Disconnect the ribbon cable shown.

  18. Canon Vixia HF R62 Motherboard Replacement: 手順 18、 1の画像 1
    • Remove the 4mm Phillips #000 screw at the bottom of the camera.

  19. Canon Vixia HF R62 Motherboard Replacement: 手順 19、 3の画像 1 Canon Vixia HF R62 Motherboard Replacement: 手順 19、 3の画像 2 Canon Vixia HF R62 Motherboard Replacement: 手順 19、 3の画像 3
    • Place the spudger under the tab shown.

    • While prying the tab up with the spudger, pull the case away.

  20. Canon Vixia HF R62 Motherboard Replacement, Central Capturing Unit: 手順 20、 3の画像 1 Canon Vixia HF R62 Motherboard Replacement, Central Capturing Unit: 手順 20、 3の画像 2 Canon Vixia HF R62 Motherboard Replacement, Central Capturing Unit: 手順 20、 3の画像 3
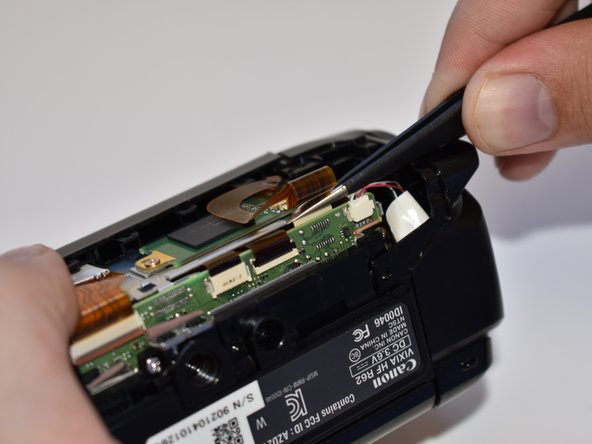
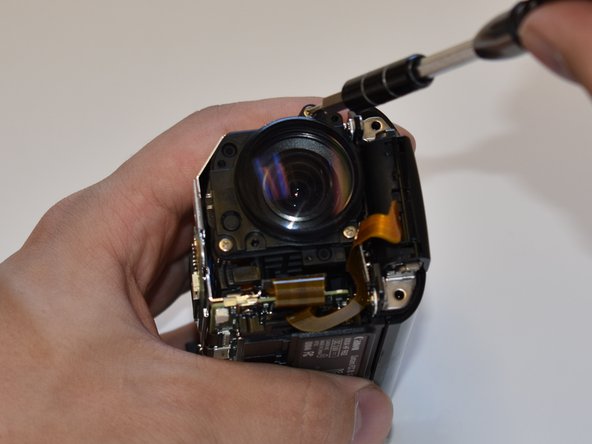
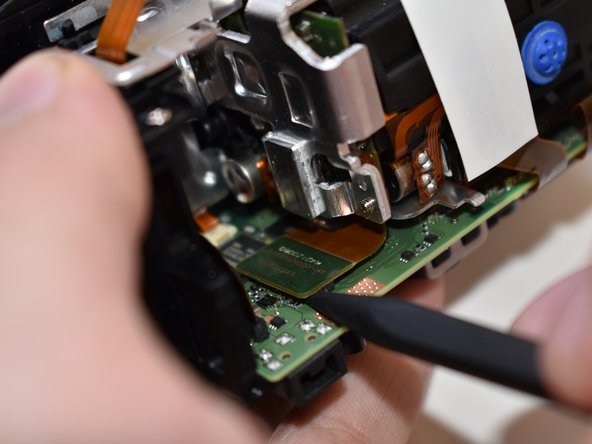
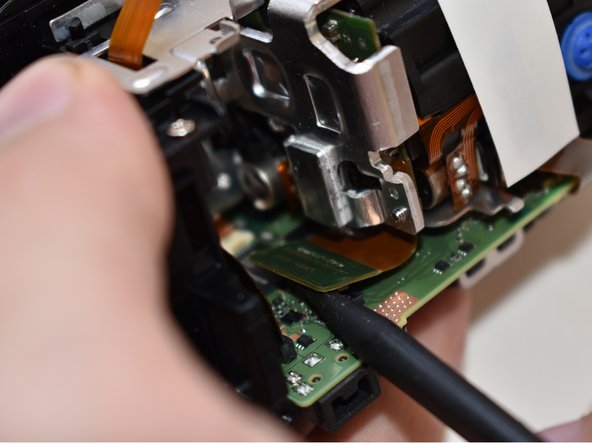
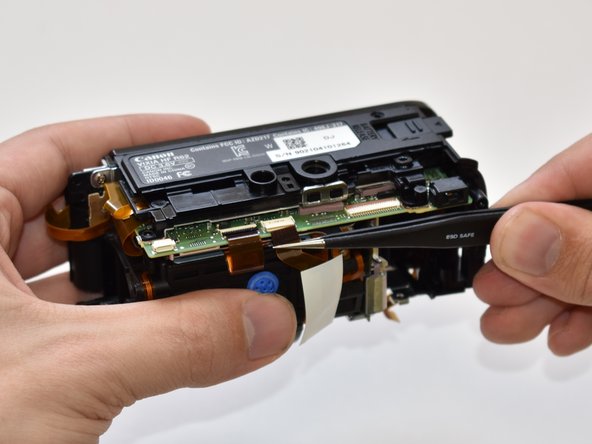
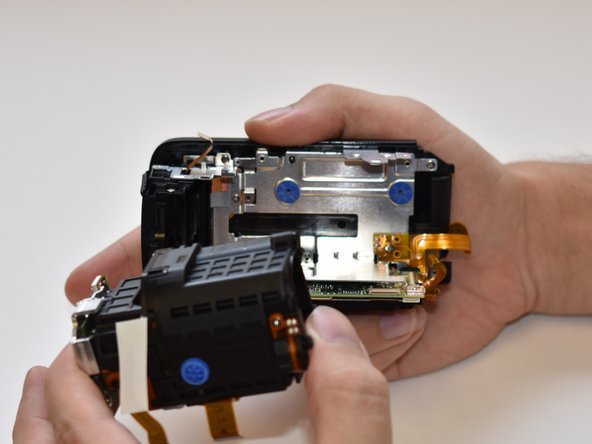
    • Using a spudger, disconnect the ribbon cable connector from the PC board shown in the picture.

  21. Canon Vixia HF R62 Motherboard Replacement: 手順 21、 2の画像 1 Canon Vixia HF R62 Motherboard Replacement: 手順 21、 2の画像 2
    この手順で使用する道具:
    Tweezers
    $4.99
    購入する
    • Using tweezers, disconnect the ribbon cable shown in the picture by pulling straight out.

  22. Canon Vixia HF R62 Motherboard Replacement: 手順 22、 3の画像 1 Canon Vixia HF R62 Motherboard Replacement: 手順 22、 3の画像 2 Canon Vixia HF R62 Motherboard Replacement: 手順 22、 3の画像 3
    • Using a spudger, gently pry up the top tab on the ZIF connector. The wire will now disconnect with no force needed.

    • When reassembling you will need to place the ribbon wire tightly against the tab in order to properly secure it.

  23. Canon Vixia HF R62 Motherboard Replacement: 手順 23、 3の画像 1 Canon Vixia HF R62 Motherboard Replacement: 手順 23、 3の画像 2 Canon Vixia HF R62 Motherboard Replacement: 手順 23、 3の画像 3
    • Using your fingers, firmly grasp both ends of the capturing device and gently pull the assembly straight out.

  24. Canon Vixia HF R62 Motherboard Replacement, Motherboard: 手順 24、 2の画像 1 Canon Vixia HF R62 Motherboard Replacement, Motherboard: 手順 24、 2の画像 2
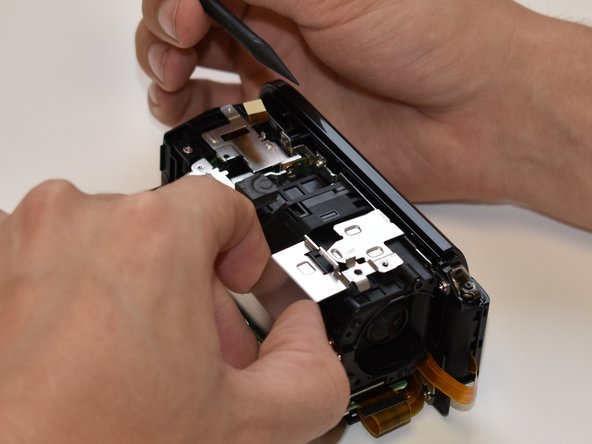
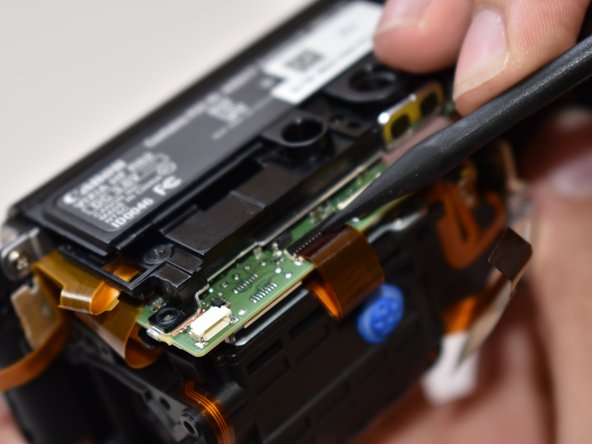
    • Remove the four screws on the metal plate using the Phillips #000 screwdriver. Each screw should be approximately 3 mm long.

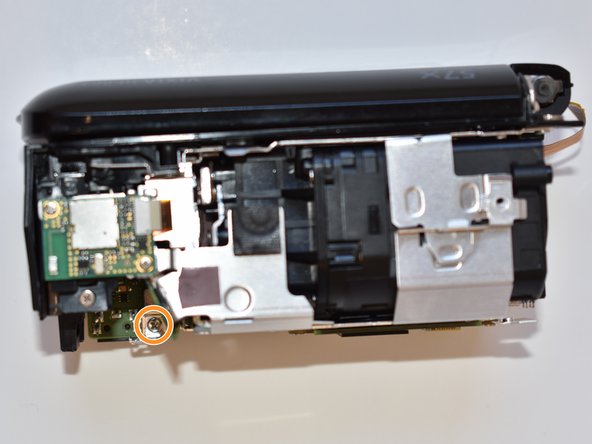
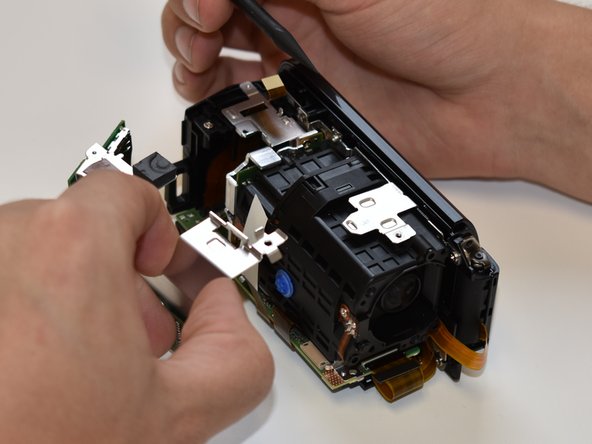
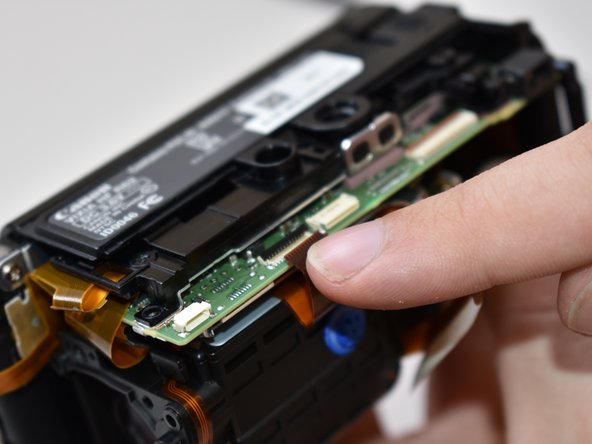
    • On the bottom of the metal plate, remove the two remaining Phillips #000 screws that are circled in the picture. Each screw is 3 mm long.

  25. Canon Vixia HF R62 Motherboard Replacement: 手順 25、 1の画像 1
    この手順で使用する道具:
    Tweezers
    $4.99
    購入する
    • Remove the metal plate carefully without tearing ribbons. Tweezers or a spudger may be helpful when performing this action.

  26. Canon Vixia HF R62 Motherboard Replacement: 手順 26、 2の画像 1 Canon Vixia HF R62 Motherboard Replacement: 手順 26、 2の画像 2
    • Using tweezers remove/unplug the remaining ribbon cables from the motherboard.

    • Remove the motherboard.

終わりに

To reassemble your device, follow these instructions in reverse order.

作成者

2人の作成者と共同で作成されました。

Alexander J.M. Wannamaker III

メンバー登録日: 10/03/19

97 ポイント

1ガイドが承認済み

0 件のコメント

コメントを追加

統計データ:

過去 24時間: 1

過去 7 日: 1

過去 30 日: 1

今までの合計 132