メインコンテンツにスキップ

Canon Powershot SD790 IS LCD Screen Replacement

必要な工具と部品

  1. Canon Powershot SD790 IS LCD Screen Replacement, LCD Screen: 手順 1、 3の画像 1 Canon Powershot SD790 IS LCD Screen Replacement, LCD Screen: 手順 1、 3の画像 2 Canon Powershot SD790 IS LCD Screen Replacement, LCD Screen: 手順 1、 3の画像 3
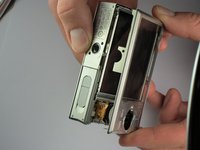
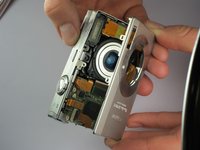
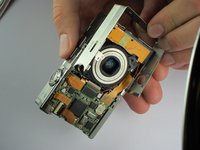
    • Remove the two screws from the left side of the camera using a Phillips #00 screwdriver.

    • Remove the two screws from the right side of the camera using a Phillips #00 screwdriver.

    • Remove the two screws from the bottom of the camera using a Phillips #00 screwdriver.

  2. Canon Powershot SD790 IS LCD Screen Replacement: 手順 2、 2の画像 1 Canon Powershot SD790 IS LCD Screen Replacement: 手順 2、 2の画像 2
    • Using your fingers, manually open the USB cover, labeled as “A/V OUT DIGITAL.”

    • Gently pull the tab of the side cover, completely detaching the cover from the camera.

  3. Canon Powershot SD790 IS LCD Screen Replacement: 手順 3、 3の画像 1 Canon Powershot SD790 IS LCD Screen Replacement: 手順 3、 3の画像 2 Canon Powershot SD790 IS LCD Screen Replacement: 手順 3、 3の画像 3
    • Gently grab the sides of the camera and pry off the screen cover using your fingers.

    • If necessary, use a spudger.

    • Once the screen cover is removed, the front cover and side plate will slide off.

  4. Canon Powershot SD790 IS LCD Screen Replacement: 手順 4、 2の画像 1 Canon Powershot SD790 IS LCD Screen Replacement: 手順 4、 2の画像 2
    • Remove the two screws from the bottom of the camera using a Phillips #00 screwdriver.

    • Remove the screw located below the button release panel.

  5. Canon Powershot SD790 IS LCD Screen Replacement: 手順 5、 1の画像 1
    • Using tweezers, gently slide the LCD cable, horizontally from its white plug towards the camera screen.

  6. Canon Powershot SD790 IS LCD Screen Replacement: 手順 6、 1の画像 1
    • Caution: Do not completely remove the button release panel from the camera. The black and red cables will keep the panel attached to the camera. Allow the panel to hang out of the way as you complete the remaining steps.

    • Using your fingers, open the USB port cover (labeled as “A/V OUT DIGITAL” on the camera).

    • Using your fingers, remove the button release panel located on the top of the camera and allow room for it to hang out of the way.

  7. Canon Powershot SD790 IS LCD Screen Replacement: 手順 7、 2の画像 1 Canon Powershot SD790 IS LCD Screen Replacement: 手順 7、 2の画像 2
    • Using the spudger, flip the clip in an upward motion. The clip should remain attached to camera, not removed completely.

  8. Canon Powershot SD790 IS LCD Screen Replacement: 手順 8、 1の画像 1
    • Using tweezers, gently slide the orange, translucent LCD ribbon from its dark gray plug horizontally towards the screen.

    • Remove the screen from the camera, and attach the new screen.

終わりに

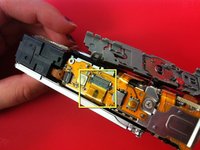
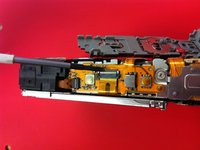
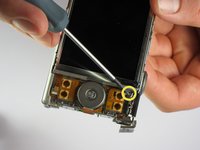
To reassemble your device, follow these instructions in reverse order.

2 の人々がこのガイドを完成させました。

作成者

14人の作成者と共同で作成されました。

Gabriela

メンバー登録日: 01/11/11

141 ポイント

1ガイドが承認済み

チーム

Cal Poly, Team 4-33, Regan Winter 2011 Cal Poly, Team 4-33, Regan Winter 2011人のメンバー

CPSU-REGAN-W11S4G33

4 メンバー

5のガイドは作成済み

コメント 1 件

do I just put everyhting back together in the backwards order of how I took it off?

zion saez - 返信

コメントを追加

統計データ:

過去 24時間: 0

過去 7 日: 1

過去 30 日: 4

今までの合計 3,761