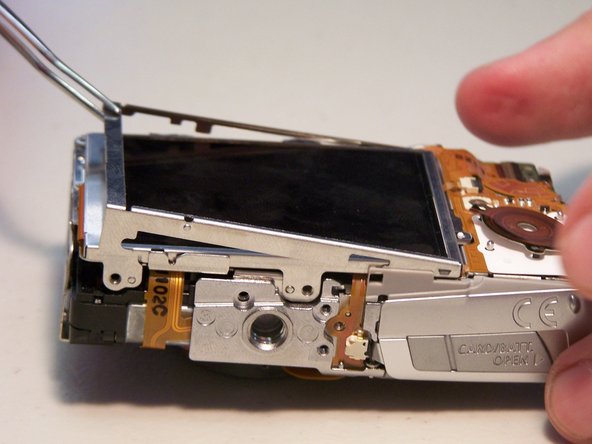
メインコンテンツにスキップ

Canon PowerShot SD850 IS LCD Screen Replacement

アーカイブされたガイド
このガイドは将来的な使用のためにのみ保存されてます。ご自身の修理作業には更新バージョンをご利用ください。

必要な工具と部品

  1. Canon PowerShot SD850 IS LCD Screen Replacement, Battery: 手順 1、 3の画像 1 Canon PowerShot SD850 IS LCD Screen Replacement, Battery: 手順 1、 3の画像 2 Canon PowerShot SD850 IS LCD Screen Replacement, Battery: 手順 1、 3の画像 3
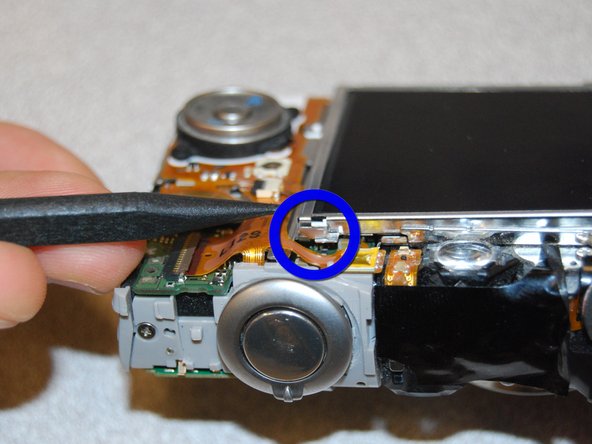
    • Slide the light grey tab toward the edge of the camera using your fingernail.

    • Pull the light grey tab up to open the door.
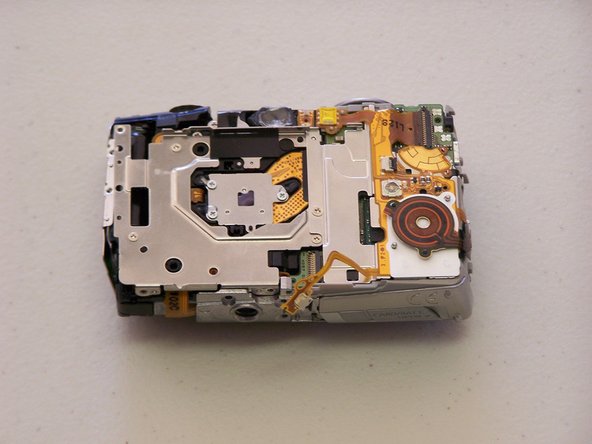
    • These photos do not show the camera’s memory card or battery, which should be visible inside.

  2. Canon PowerShot SD850 IS LCD Screen Replacement: 手順 2、 2の画像 1 Canon PowerShot SD850 IS LCD Screen Replacement: 手順 2、 2の画像 2
    • Slide the small brown tab toward the edge of the camera using your fingernail.

    • Let go of the brown tab when the battery pops up.

    • Grab battery and pull straight up to remove from holder.

    • When inserting the battery, orient it so that the terminals connect.

  3. Canon PowerShot SD850 IS LCD Screen Replacement, Case: 手順 3、 2の画像 1 Canon PowerShot SD850 IS LCD Screen Replacement, Case: 手順 3、 2の画像 2
    • Remove the following 4 screws:

    • Two 2.8 mm Phillips #00 at the bottom of the camera.

    • Two 2.75 mm Phillips #00 on the opposite side of the wrist strap.

  4. Canon PowerShot SD850 IS LCD Screen Replacement: 手順 4、 3の画像 1 Canon PowerShot SD850 IS LCD Screen Replacement: 手順 4、 3の画像 2 Canon PowerShot SD850 IS LCD Screen Replacement: 手順 4、 3の画像 3
    • Open the A/V OUT DIGITAL flap on the side of the wrist strap.

    • Remove the 2.75 mm Phillips #00 under the A/V OUT DIGITAL flap on the side of the wrist strap.

  5. Canon PowerShot SD850 IS LCD Screen Replacement: 手順 5、 2の画像 1 Canon PowerShot SD850 IS LCD Screen Replacement: 手順 5、 2の画像 2
    • On the bottom of the camera, use your fingernail to slide the light gray tab towards the edge of the camera.

    • Slide light gray door and pull up to open the door.

    • Remove the 8.35 mm Phillips #00 next to the brown tab that holds the battery.

  6. Canon PowerShot SD850 IS LCD Screen Replacement: 手順 6、 2の画像 1 Canon PowerShot SD850 IS LCD Screen Replacement: 手順 6、 2の画像 2
    • Gently pull the front cover straight out from the camera. This will expose the wiring on the front of the camera.

  7. Canon PowerShot SD850 IS LCD Screen Replacement: 手順 7、 1の画像 1
    • Remove the 2.75 mm Phillips #00 next to A/V OUT DIGITAL.

  8. Canon PowerShot SD850 IS LCD Screen Replacement: 手順 8、 1の画像 1
    • Slide the back casing (with the screen protector) off to reveal the LCD and back wiring.

  9. Canon PowerShot SD850 IS LCD Screen Replacement, LCD Screen: 手順 9、 2の画像 1 Canon PowerShot SD850 IS LCD Screen Replacement, LCD Screen: 手順 9、 2の画像 2
    • Remove the three screws attached to the bottom of the LCD brackets

  10. Canon PowerShot SD850 IS LCD Screen Replacement: 手順 10、 2の画像 1 Canon PowerShot SD850 IS LCD Screen Replacement: 手順 10、 2の画像 2
    • Remove the one quarter bracket around the LCD screen

    • Remove the three quarter bracket around the LCD screen.

  11. Canon PowerShot SD850 IS LCD Screen Replacement: 手順 11、 3の画像 1 Canon PowerShot SD850 IS LCD Screen Replacement: 手順 11、 3の画像 2 Canon PowerShot SD850 IS LCD Screen Replacement: 手順 11、 3の画像 3
    • Please Note: There are two areas of interest before removing the final bracket.

    • First, use a spudger to pry the the two tabs from the small guide pins.

    • Second, slide the bracket to the right as indicated in the second picture while lifting up. A small tab is holding the final bracket in place.

    • Remove the square metal bracket.

  12. Canon PowerShot SD850 IS LCD Screen Replacement: 手順 12、 1の画像 1
    • At this point the screen should be easy to lift from the camera body.

  13. Canon PowerShot SD850 IS LCD Screen Replacement: 手順 13、 3の画像 1 Canon PowerShot SD850 IS LCD Screen Replacement: 手順 13、 3の画像 2 Canon PowerShot SD850 IS LCD Screen Replacement: 手順 13、 3の画像 3
    • Lift the LCD screen and remove the two ribbon cables.

終わりに

To reassemble your device, follow these instructions in reverse order.

作成者

8人の作成者と共同で作成されました。

iDeleted

メンバー登録日: 07/07/10

2,101 ポイント

39のガイドは作成済み

0 件のコメント

コメントを追加

統計データ:

過去 24時間: 0

過去 7 日: 0

過去 30 日: 0

今までの合計 2,528