メインコンテンツにスキップ
リペアコミュニティに参加 - アカウントの作成
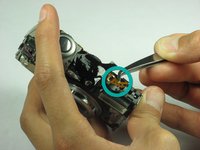
Canon PowerShot SD850 IS Flash Unit Replacement

必要な工具と部品

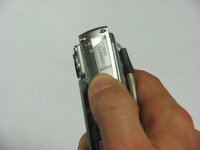
    1. Canon PowerShot SD850 IS Flash Unit Replacement, Case: 手順 1、 2の画像 1 Canon PowerShot SD850 IS Flash Unit Replacement, Case: 手順 1、 2の画像 2
      • Remove the following 4 screws:

      • Two 2.8 mm Phillips #00 at the bottom of the camera.

      • Two 2.75 mm Phillips #00 on the opposite side of the wrist strap.

      FixBotに聞いてみる

      コメントを追加

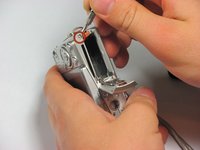
    2. Canon PowerShot SD850 IS Flash Unit Replacement: 手順 2、 3の画像 1 Canon PowerShot SD850 IS Flash Unit Replacement: 手順 2、 3の画像 2 Canon PowerShot SD850 IS Flash Unit Replacement: 手順 2、 3の画像 3
      • Open the A/V OUT DIGITAL flap on the side of the wrist strap.

      • Remove the 2.75 mm Phillips #00 under the A/V OUT DIGITAL flap on the side of the wrist strap.

      FixBotに聞いてみる

      コメントを追加

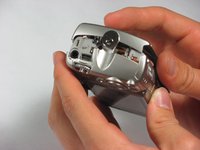
    3. Canon PowerShot SD850 IS Flash Unit Replacement: 手順 3、 2の画像 1 Canon PowerShot SD850 IS Flash Unit Replacement: 手順 3、 2の画像 2
      • On the bottom of the camera, use your fingernail to slide the light gray tab towards the edge of the camera.

      • Slide light gray door and pull up to open the door.

      • Remove the 8.35 mm Phillips #00 next to the brown tab that holds the battery.

      FixBotに聞いてみる

      コメントを追加

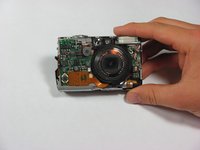
    4. Canon PowerShot SD850 IS Flash Unit Replacement: 手順 4、 2の画像 1 Canon PowerShot SD850 IS Flash Unit Replacement: 手順 4、 2の画像 2
      • Gently pull the front cover straight out from the camera. This will expose the wiring on the front of the camera.

      FixBotに聞いてみる

      コメントを追加

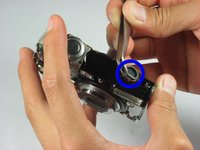
    5. Canon PowerShot SD850 IS Flash Unit Replacement: 手順 5、 1の画像 1
      • Remove the 2.75 mm Phillips #00 next to A/V OUT DIGITAL.

      FixBotに聞いてみる

      コメントを追加

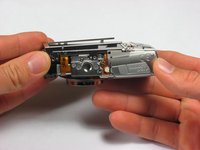
    6. Canon PowerShot SD850 IS Flash Unit Replacement: 手順 6、 1の画像 1
      • Slide the back casing (with the screen protector) off to reveal the LCD and back wiring.

      FixBotに聞いてみる

      コメントを追加

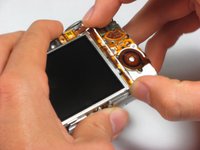
    1. Canon PowerShot SD850 IS Flash Unit Replacement, LCD Screen: 手順 7、 1の画像 1
      • Remove the 1.75 mm Phillips #00 located at the top left of the LCD screen.

      FixBotに聞いてみる

      コメントを追加

    2. Canon PowerShot SD850 IS Flash Unit Replacement: 手順 8、 1の画像 1
      • Remove the two 3.4 mm Phillips #00 located at the bottom of the camera.

      FixBotに聞いてみる

      コメントを追加

    3. Canon PowerShot SD850 IS Flash Unit Replacement: 手順 9、 2の画像 1 Canon PowerShot SD850 IS Flash Unit Replacement: 手順 9、 2の画像 2
      • Remove the two metal frames that hold the LCD panel in place.

      FixBotに聞いてみる

      コメントを追加

    4. Canon PowerShot SD850 IS Flash Unit Replacement: 手順 10、 1の画像 1
      • The LCD screen should now only be attached by two LCD data cables.

      • Lift the screen from the left side and use a spudger or a small flat head screwdriver to flip the black portion of the connector upward to unlock it.

      • Carefully slide the data cable out of the connector.

      FixBotに聞いてみる

      コメントを追加

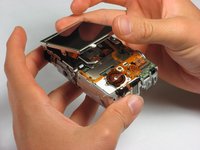
    5. Canon PowerShot SD850 IS Flash Unit Replacement: 手順 11、 1の画像 1
      • The LCD should still be connected by the backlight cable.

      • To remove the backlight cable, use a spudger or a small flat head screwdriver to unlock the backlight cable.

      • Carefully slide out the backlight cable.

      • The LCD screen can now be fully detached from the camera body.

      FixBotに聞いてみる

      コメントを追加

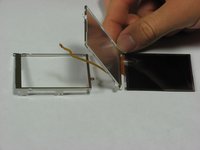
    6. Canon PowerShot SD850 IS Flash Unit Replacement: 手順 12、 2の画像 1 Canon PowerShot SD850 IS Flash Unit Replacement: 手順 12、 2の画像 2
      • The LCD screen and housing are now in three pieces:

      • LCD screen

      • LCD screen frame

      • LCD back housing

      • The LCD screen itself can now be removed and fixed/replaced.

      FixBotに聞いてみる

      コメントを追加

    1. Canon PowerShot SD850 IS Flash Unit Replacement, Flash Unit: 手順 13、 1の画像 1
      • Remove the 1.85 mm #00 Phillips located on the left side of the camera.

      FixBotに聞いてみる

      コメントを追加

    2. Canon PowerShot SD850 IS Flash Unit Replacement: 手順 14、 2の画像 1 Canon PowerShot SD850 IS Flash Unit Replacement: 手順 14、 2の画像 2
      この手順で使用する道具:
      Tweezers
      $4.99
      • Use a set of tweezers to remove the speaker located at the top of the camera on the flash unit.

      • Next use the tweezers to carefully remove the speaker cable off its respective holders.

      FixBotに聞いてみる

      コメントを追加

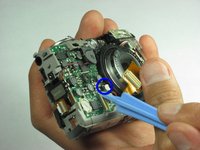
    3. Canon PowerShot SD850 IS Flash Unit Replacement: 手順 15、 1の画像 1
      • Use a spudger or a flathead screwdriver to remove the camera lens cable located in the front of the camera.

      FixBotに聞いてみる

      コメントを追加

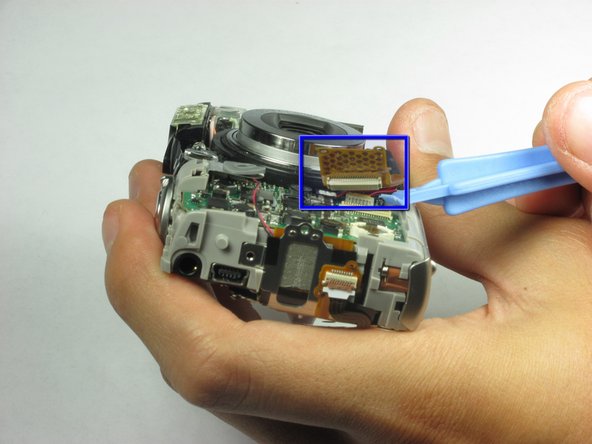
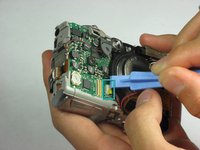
    4. Canon PowerShot SD850 IS Flash Unit Replacement: 手順 16、 2の画像 1 Canon PowerShot SD850 IS Flash Unit Replacement: 手順 16、 2の画像 2
      • Use a spudger or a flathead screwdriver and carefully pry out the first flash cable from the bottom of the cable. The white 2 prong power cable pops UP (use spudger below red/black insertion and put upward pressure). For the yellow one, apply pressure horizontally.

      • Next use a spudger or a flathead screwdriver and carefully pry out the second flash cable.

      FixBotに聞いてみる

      コメントを追加

    5. Canon PowerShot SD850 IS Flash Unit Replacement: 手順 17、 1の画像 1
      • Gently remove the flash component from the rest of the camera.

      • Use a spudger or a flathead screwdriver and carefully pry off the plastic piece on top of the flash unit.

      • The flash unit can now be removed and replaced.

      • Be careful not to touch the capacitor attached to the flash unit as it may still be holding a charge!

      FixBotに聞いてみる

      コメントを追加

終わりに

To reassemble your device, follow these instructions in reverse order.

キャンセル: このガイドを終了できませんでした。

作成者

3人の作成者と共同で作成されました。

Peter Tran

メンバー登録日: 10/06/10

252 ポイント

6のガイドは作成済み

チーム

Cal Poly, Team 20-7, Maness Fall 2010 Cal Poly, Team 20-7, Maness Fall 2010人のメンバー

CPSU-MANESS-F10S20G7

6 メンバー

84のガイドは作成済み

0件のガイドコメント

コメントを追加

統計データ:

過去 24時間: 0

過去 7 日: 7

過去 30 日: 36

今までの合計 3,329