-
-
Unscrew five Phillips screws using a #0 Phillips screwdriver.
-
One screw is on upper right corner of the back panel.
-
The other four screws are on the bottom of the camera.
-
-
-
-
-
-
-
-
Gently separate the top of LCD from the rest of the camera using your thumb.
-
Be careful not pull the LCD too far because of the ribbon cable connection.
-
Place the Spudger in the hole of the electrical ribbon.
-
Gently pull the ribbon down using the Spudger until it is free from the camera but still connected to the LCD.
-
The LCD will still be connected to the rest of the camera
-
-
Unscrew single Phillips screw with a #0 Phillips screwdriver.
-
Free the bottom panel and attached ribbon from the rest of the camera.
-
Be careful not to damage the ribbon.
-
-
Turn over the camera.
-
Lift the clear plastic from the face of the camera, peeling the adhesive just below the zoom lens.
-
The plastic will still be connected on the left side.
-
-
-
-
-
-
-
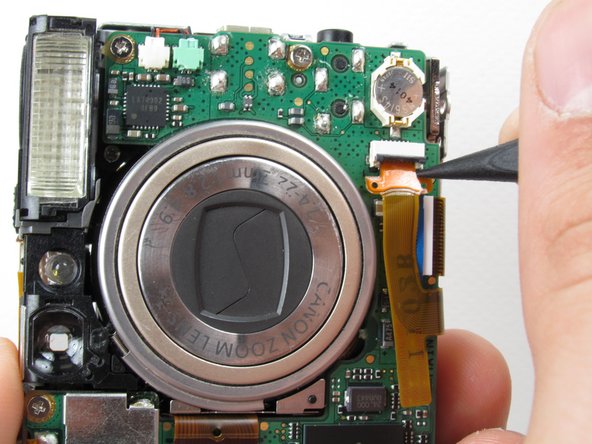
Insert the Spudger into the hole of the ribbon.
-
Move the Spudger away from the gate to fully remove ribbon.
-
Be careful not to damage the ribbon.
-
このガイドを埋め込む
サイズを選択し、以下のコードをコピーして、このガイドを小さなウィジェットとしてサイト/フォーラムに埋め込みます。
プレビュー