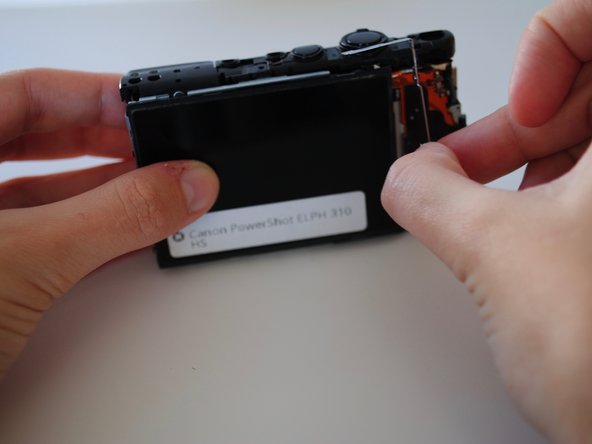
メインコンテンツにスキップ

Canon PowerShot ELPH 310 HS LCD Screen Replacement

必要な工具と部品

  1. Canon PowerShot ELPH 310 HS LCD Screen Replacement, External Panels: 手順 1、 1の画像 1
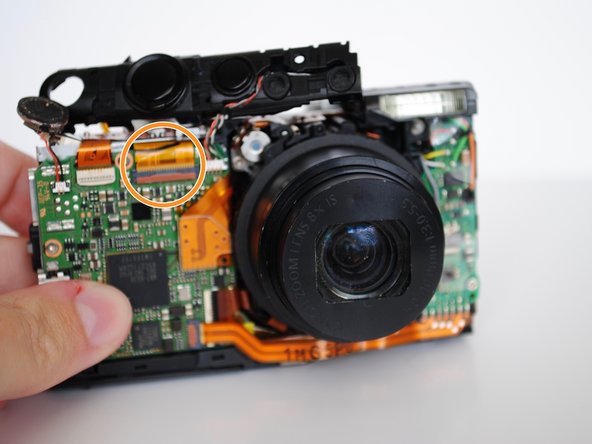
    • Use the Phillips #000 screwdriver from the iFixit tool kit to unscrew the two image stabilizer panel’s 2 mm Phillips head screws.

    • Using your hands, remove the image stabilizer panel.

  2. Canon PowerShot ELPH 310 HS LCD Screen Replacement: 手順 2、 2の画像 1 Canon PowerShot ELPH 310 HS LCD Screen Replacement: 手順 2、 2の画像 2
    • Unscrew the two 4 mm Phillips head screws from the bottom side of the camera.

  3. Canon PowerShot ELPH 310 HS LCD Screen Replacement: 手順 3、 2の画像 1 Canon PowerShot ELPH 310 HS LCD Screen Replacement: 手順 3、 2の画像 2
    • Using your hand, open the battery portal located on the bottom left of the camera. The screw is in the bottom left of the battery portal.

    • Unscrew the hidden 4mm Phillips head screw inside the battery portal.

  4. Canon PowerShot ELPH 310 HS LCD Screen Replacement: 手順 4、 2の画像 1 Canon PowerShot ELPH 310 HS LCD Screen Replacement: 手順 4、 2の画像 2
    • Remove the HDMI side panel with your hands.

    • Unscrew the four 4 mm Phillips head screws from the inside of the camera.

  5. Canon PowerShot ELPH 310 HS LCD Screen Replacement: 手順 5、 1の画像 1
    • The back side of the camera should pop off or be removed by hand.

  6. Canon PowerShot ELPH 310 HS LCD Screen Replacement: 手順 6、 2の画像 1 Canon PowerShot ELPH 310 HS LCD Screen Replacement: 手順 6、 2の画像 2
    • Unscrew the one 3 mm Phillips head screw on the top of the camera.

  7. Canon PowerShot ELPH 310 HS LCD Screen Replacement: 手順 7、 1の画像 1
    • Manually remove the front panel from the camera.

  8. Canon PowerShot ELPH 310 HS LCD Screen Replacement, LCD Screen: 手順 8、 2の画像 1 Canon PowerShot ELPH 310 HS LCD Screen Replacement, LCD Screen: 手順 8、 2の画像 2
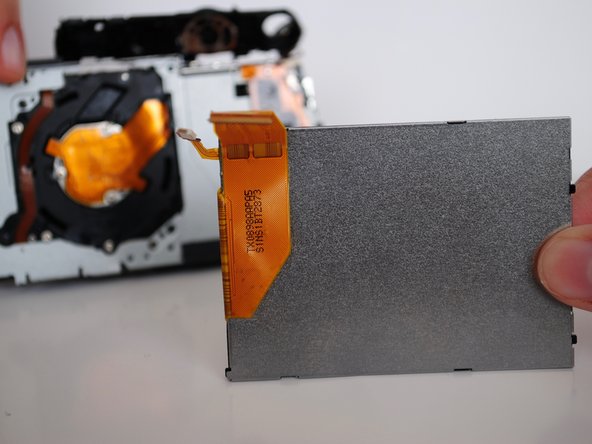
    • Using your hands, remove the metal piece (surrounding the right side of the screen) from the right side of the camera.

  9. Canon PowerShot ELPH 310 HS LCD Screen Replacement: 手順 9、 1の画像 1
    • Using your hands, lift up the screen.

    • The screen is fragile!

  10. Canon PowerShot ELPH 310 HS LCD Screen Replacement: 手順 10、 3の画像 1 Canon PowerShot ELPH 310 HS LCD Screen Replacement: 手順 10、 3の画像 2 Canon PowerShot ELPH 310 HS LCD Screen Replacement: 手順 10、 3の画像 3
    • The strip tears easily!

    • Manually lift the shutter button plate and remove the white ZIF connector, which is the white clasp underneath.

    • On the front of the camera, using your fingers, undo the orange ribbon from the gray clasp and pull the ribbon through the shutter deck.

終わりに

To reassemble your device, follow these instructions in reverse order.

作成者

2人の作成者と共同で作成されました。

Kadie Aldridge

メンバー登録日: 09/23/15

213 ポイント

2のガイドは作成済み

チーム

University of Alabama, Team 1-4, Sydow campbell Fall 2015 University of Alabama, Team 1-4, Sydow campbell Fall 2015人のメンバー

UA-SYDOW CAMPBELL-F15S1G4

4 メンバー

4のガイドは作成済み

0 件のコメント

コメントを追加

統計データ:

過去 24時間: 0

過去 7 日: 2

過去 30 日: 11

今までの合計 967