メインコンテンツにスキップ

Canon PowerShot A540 Function Key Motherboard Replacement

必要な工具と部品

  1. Canon PowerShot A540 Function Key Motherboard Replacement, Back Cover: 手順 1、 2の画像 1 Canon PowerShot A540 Function Key Motherboard Replacement, Back Cover: 手順 1、 2の画像 2
    • Turn off the camera.

    • Turn the camera upside-down and press the tab to release the battery cover. Remove the batteries.

  2. Canon PowerShot A540 Function Key Motherboard Replacement: 手順 2、 1の画像 1
    • Turn the camera upside down to view the "Card/Batt. Open" Cover.

    • Use a Phillips head #000 screwdriver to remove the three (3) 4.0 mm screws.

  3. Canon PowerShot A540 Function Key Motherboard Replacement: 手順 3、 1の画像 1
    • Open "Card/Batt. Open" Cover.

    • Remove the one (1) 5.0 mm screw with the Phillips head #000 screwdriver.

  4. Canon PowerShot A540 Function Key Motherboard Replacement: 手順 4、 1の画像 1
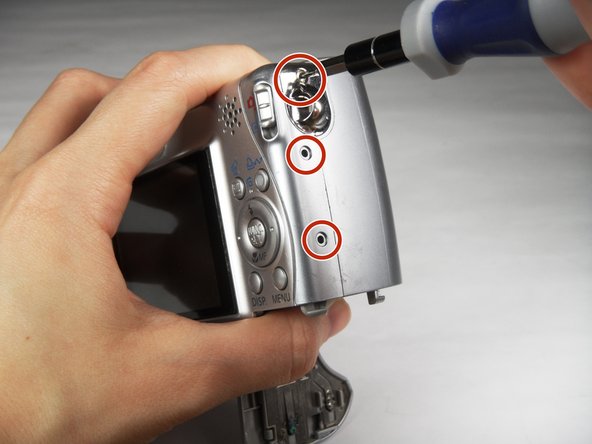
    • Turn the camera to the right side of the LCD screen.

    • Remove the three (3) 4.0 mm screws with the Phillips head #000 screwdriver.

  5. Canon PowerShot A540 Function Key Motherboard Replacement: 手順 5、 3の画像 1 Canon PowerShot A540 Function Key Motherboard Replacement: 手順 5、 3の画像 2 Canon PowerShot A540 Function Key Motherboard Replacement: 手順 5、 3の画像 3
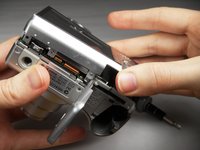
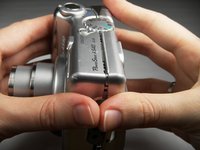
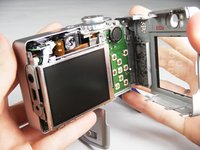
    • Gently remove the back cover.

    • Start at the bottom at the corner of the "Card/Batt. Open" Cover.

    • Then move onto the other edges and the top.

    • It may be tight at the top!

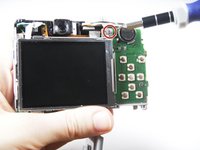
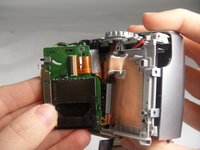
  6. Canon PowerShot A540 Function Key Motherboard Replacement, Function Key Motherboard: 手順 6、 2の画像 1 Canon PowerShot A540 Function Key Motherboard Replacement, Function Key Motherboard: 手順 6、 2の画像 2
    • Turn the camera to view the back.

    • Remove the one (1) 3.0 mm screw on the top right corner of the screen.

    • There is a small metal bar that rests on this frame. Keep it with the screws that have been removed from the camera.

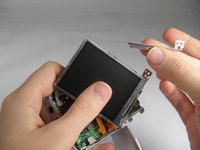
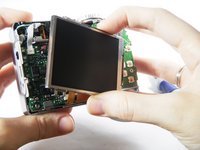
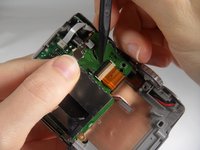
  7. Canon PowerShot A540 Function Key Motherboard Replacement: 手順 7、 2の画像 1 Canon PowerShot A540 Function Key Motherboard Replacement: 手順 7、 2の画像 2
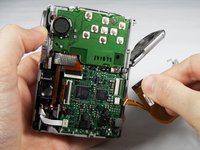
    • Lift the LCD Screen off of the back to view the attached ribbon cables.

    • Use tweezers to flip the black bar up.

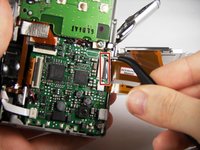
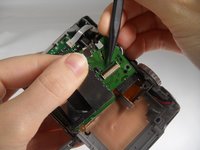
  8. Canon PowerShot A540 Function Key Motherboard Replacement: 手順 8、 3の画像 1 Canon PowerShot A540 Function Key Motherboard Replacement: 手順 8、 3の画像 2 Canon PowerShot A540 Function Key Motherboard Replacement: 手順 8、 3の画像 3
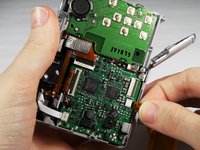
    • Gently pull the big ribbon out.

    • Gently pull the small ribbon out.

    • The small ribbon does not have a bar like the big ribbon.

  9. Canon PowerShot A540 Function Key Motherboard Replacement: 手順 9、 2の画像 1 Canon PowerShot A540 Function Key Motherboard Replacement: 手順 9、 2の画像 2
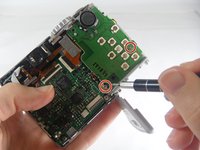
    • Remove the two (2) 3.0 mm screws with the Phillips head #000 screwdriver.

  10. Canon PowerShot A540 Function Key Motherboard Replacement: 手順 10、 2の画像 1 Canon PowerShot A540 Function Key Motherboard Replacement: 手順 10、 2の画像 2
    • Remove the orange ribbon from the clamp by using a Spudger to push the bar up.

  11. Canon PowerShot A540 Function Key Motherboard Replacement: 手順 11、 1の画像 1
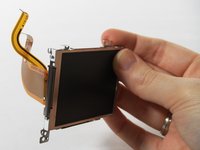
    • Remove the Function Key Motherboard and replace.

    • There is another metal bar that comes off of the SD Card reader when screws are removed.

終わりに

To reassemble your device, follow these instructions in reverse order.

作成者

2人の作成者と共同で作成されました。

Cooper Hale

メンバー登録日: 03/22/15

556 ポイント

3のガイドは作成済み

チーム

Baylor, Team 7-12, Williams Spring 2015 Baylor, Team 7-12, Williams Spring 2015人のメンバー

BU-WILLIAMS-S15S7G12

3 メンバー

20のガイドは作成済み

0 件のコメント

コメントを追加

統計データ:

過去 24時間: 0

過去 7 日: 1

過去 30 日: 2

今までの合計 714