このバージョンは誤った内容を含んでいる可能性があります。最新の承認済みスナップショットに切り替えてください。
必要な工具と部品
-
-
この手順は未翻訳です。 翻訳を手伝う。
-
Remove the camera case. Refer to the prerequisite guide Disassembling the Canon PowerShot A200 Case as needed.
-
Locate the LCD Display. It is the thin, rectangular panel adjacent to the view finder.
-
Use the Phillips head screwdriver, rotating counter clockwise, to remove the four screws in each corner of the LCD Display. Set the screws aside.
-
-
この手順は未翻訳です。 翻訳を手伝う。
-
Begin reassembling the camera with the orange strip with the yellow edge.
-
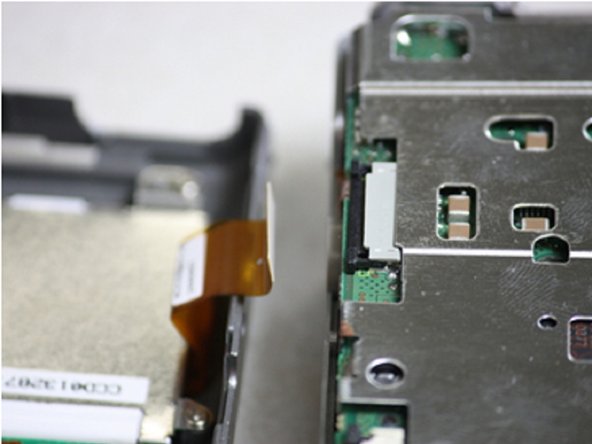
Align the orange strip on the back half of the camera with its slot on the front part of the camera.
-
Use the metal tweezers to insert the orange ribbon into the slot. Push the ribbon in as far as it can go into the slot.
-
Use the metal tweezers to push the black tabs at each side of the slot toward the center. The tabs will hold the orange ribbon in place.
-
-
この手順は未翻訳です。 翻訳を手伝う。
-
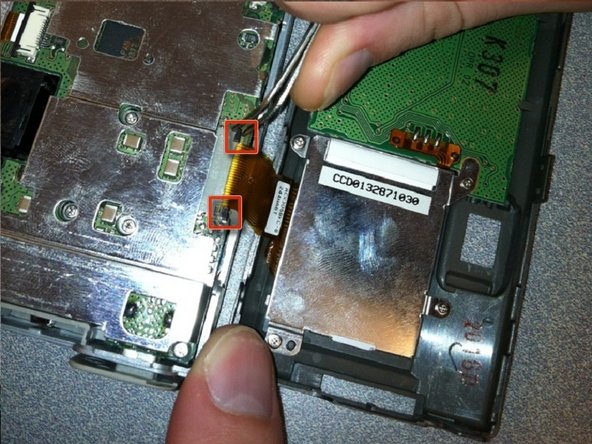
Align the white strip on the back half of the camera with its slot on the front part of the camera.
-
Use the metal tweezers to insert the white strip into the slot. Push the strip in as far as it can go into the slot.
-
Use the metal tweezers to push the black tabs at each side of the slot toward the center. The tabs will hold the white strip in place.
-
-
この手順は未翻訳です。 翻訳を手伝う。
-
Open the outer battery cover.
-
Use the Phillips head screwdriver, turning clockwise, to fasten two screws on each side of the battery case.
-
Flip the black battery cover down and press until it is secured by the gray tab.
-
Use the Phillips head screwdriver, turning clockwise, to fasten two screws on each side of the memory card slot.
-
Shut the outer battery cover.
-


チーム

Cal Poly, Team 7-37, Regan Winter 2011 Cal Poly, Team 7-37, Regan Winter 2011人のメンバー
CPSU-REGAN-W11S7G37
4 メンバー
10のガイドは作成済み