はじめに
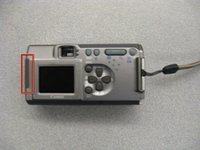
Use this guide to replace the LCD Display if it is cracked or not functioning properly on your Canon PowerShot A200.
A functioning LCD Display uses its liquid substances to properly create images on the screen of your camera.
A broken LCD screen could be hazardous to the skin. If broken, take appropriate precautions.
Once the case has been disassembled, a new LCD Display can be installed.
Make sure there is some experience with working with difficulty as soldering will be needed to reassemble the camera together.
必要な工具と部品
-
-
-
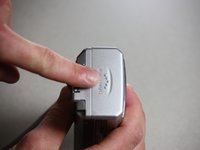
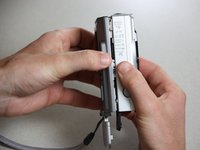
Use a Phillips #00 screwdriver to remove the two screws located at the bottom of the camera.
 FixBotに聞いてみる
-
-
-
Locate the screw and the rubber covering on the left side of the camera. Slide the rubber covering to expose a second screw.
-
Remove the two screws with the Phillips #00 screwdriver.
-
-
-
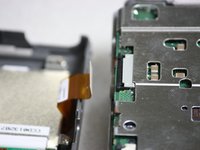
Open the battery compartment on the right side of the camera by pushing slightly in the direction of the arrow.
-
Remove the two screws by the memory card slot using the Phillips #00 screwdriver.
-
-
-
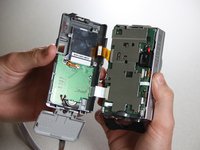
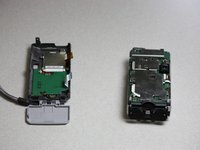
Pull the grey tab towards the back of the camera. Lift the black cover to expose the battery slots.
-
Remove the two visible screws with the Phillips #00 screwdriver.
-
-
-
-
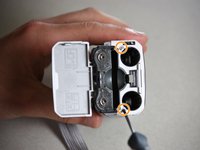
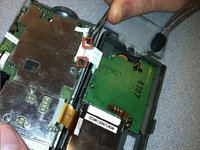
Remove the screen battery located to the left of the screen.
-
Set the screen battery aside for reassembly
-
-
この手順で使用する道具:Tweezers$4.99
-
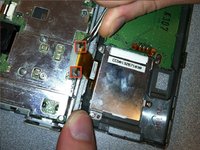
Locate the black tabs on either side of the white ribbon.
-
Use the metal tweezers to gently move these tabs to the outside edges of the ribbon.
-
Gently pull the white ribbon out from its connection.
-
-
-
Locate the black tabs on either side of the orange ribbon.
-
Use the metal tweezers to gently move these tabs to the outside edges of the ribbon.
-
Gently pull the orange ribbon out of its connection.
-
-
-
-
-
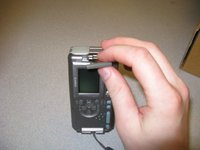
Use a Phillips head screwdriver to remove the four screws from the corners of the LCD.
-
-
-
Use a soldering iron to remove the LCD from the orange cable connected to the back of the camera.
-
Use the soldering iron to attach your new LCD in place.
-
-


Follow the instructions in the prerequisite guide Disassembling the Canon PowerShot A200 Case.
Once completed, proceed with installing a new LCD Display.
チーム

Cal Poly, Team 7-37, Regan Winter 2011 Cal Poly, Team 7-37, Regan Winter 2011人のメンバー
CPSU-REGAN-W11S7G37
4 メンバー
10のガイドは作成済み