メインコンテンツにスキップ

Canon PowerShot A1000 IS Case Disassembly

必要な工具と部品

  1. Canon PowerShot A1000 IS Case Disassembly, Canon PowerShot A1000 IS Case Disassembly: 手順 1、 3の画像 1 Canon PowerShot A1000 IS Case Disassembly, Canon PowerShot A1000 IS Case Disassembly: 手順 1、 3の画像 2 Canon PowerShot A1000 IS Case Disassembly, Canon PowerShot A1000 IS Case Disassembly: 手順 1、 3の画像 3
    • Transfer screws to a safe place upon removal.

    • The case is held together with two types of screws: fine thread screws that attach the case to the metal parts below, and coarse thread screws that attach the case to the plastic battery compartment.

  2. Canon PowerShot A1000 IS Case Disassembly: 手順 2、 2の画像 1 Canon PowerShot A1000 IS Case Disassembly: 手順 2、 2の画像 2
    • Remove the two coarse thread screws on the side of the device, to the left of the camera lens.

  3. Canon PowerShot A1000 IS Case Disassembly: 手順 3、 2の画像 1 Canon PowerShot A1000 IS Case Disassembly: 手順 3、 2の画像 2
    • Remove the two fine thread screws on the side of the device, to the right of the camera lens.

  4. Canon PowerShot A1000 IS Case Disassembly: 手順 4、 3の画像 1 Canon PowerShot A1000 IS Case Disassembly: 手順 4、 3の画像 2 Canon PowerShot A1000 IS Case Disassembly: 手順 4、 3の画像 3
    • Remove the two coarse thread screws and the single fine thread screw from bottom the camera.

  5. Canon PowerShot A1000 IS Case Disassembly: 手順 5、 2の画像 1 Canon PowerShot A1000 IS Case Disassembly: 手順 5、 2の画像 2
    • Remove the one coarse thread screw underneath the battery cover.

  6. Canon PowerShot A1000 IS Case Disassembly: 手順 6、 3の画像 1 Canon PowerShot A1000 IS Case Disassembly: 手順 6、 3の画像 2 Canon PowerShot A1000 IS Case Disassembly: 手順 6、 3の画像 3
    • Gently pry apart the two covers starting from the bottom. When there is a 1/4" gap, run your finger gently along the the top of the camera, on the back cover, to release the three catches that secure the shell.

  7. Canon PowerShot A1000 IS Case Disassembly: 手順 7、 2の画像 1 Canon PowerShot A1000 IS Case Disassembly: 手順 7、 2の画像 2
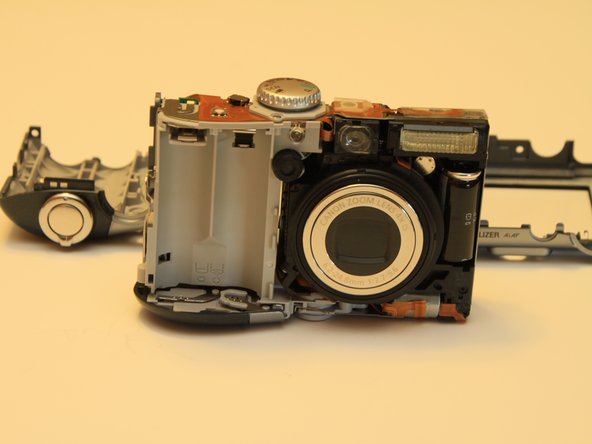
    • Gently remove both sides of the casing.

  8. Canon PowerShot A1000 IS Case Disassembly: 手順 8、 2の画像 1 Canon PowerShot A1000 IS Case Disassembly: 手順 8、 2の画像 2
    • When replacing the cover, remove the AV/USB rubber cover for easier reconstruction.

    • Replace the front cover first leaving a small gap on the left hand side of the device for easy reattachment of the back cover.

    • Reattach the back cover by aligning it with the front cover and snapping the latches into place. Secure with screws in any order.

終わりに

To reassemble your device, follow these instructions in reverse order.

2 の人々がこのガイドを完成させました。

作成者

8人の作成者と共同で作成されました。

Biff Wheeler

メンバー登録日: 06/06/12

762 ポイント

2のガイドは作成済み

0 件のコメント

コメントを追加

統計データ:

過去 24時間: 1

過去 7 日: 9

過去 30 日: 14

今までの合計 2,274