メインコンテンツにスキップ

この修理ガイドは変更されています。最新の未承認バージョンに切り替えます。

Canon ImageCLASS MF4350d Transformer Replacement

必要な工具と部品

  1. Canon ImageCLASS MF4350d Transformer Replacement, Canon ImageCLASS MF4350d Remove Front Paneling: 手順 1、 1の画像 1
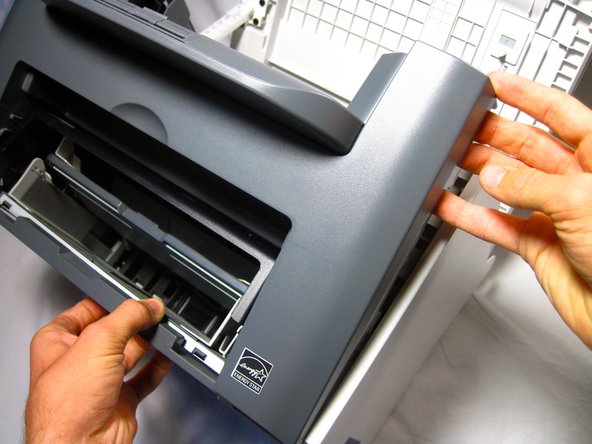
    • Lift the printer lid up as shown in the photo.

  2. Canon ImageCLASS MF4350d Transformer Replacement: 手順 2、 2の画像 1 Canon ImageCLASS MF4350d Transformer Replacement: 手順 2、 2の画像 2
    • Locate and remove the two 10mm side screws. There is one on each side.

  3. Canon ImageCLASS MF4350d Transformer Replacement: 手順 3、 2の画像 1 Canon ImageCLASS MF4350d Transformer Replacement: 手順 3、 2の画像 2
    • Unhook the plastic panel from the printer starting from the top.

    • You may need to wiggle the panel a bit to loosen it.

    • To remove the bottom part of the paneling gently lay the printer on its back.

    • The scanner lid needs to be supported when moving the printer

  4. Canon ImageCLASS MF4350d Transformer Replacement, Canon ImageCLASS MF4350d Remove Right Side Paneling: 手順 4、 3の画像 1 Canon ImageCLASS MF4350d Transformer Replacement, Canon ImageCLASS MF4350d Remove Right Side Paneling: 手順 4、 3の画像 2 Canon ImageCLASS MF4350d Transformer Replacement, Canon ImageCLASS MF4350d Remove Right Side Paneling: 手順 4、 3の画像 3
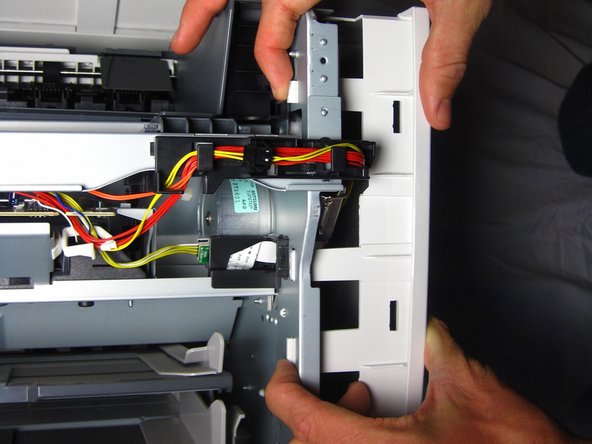
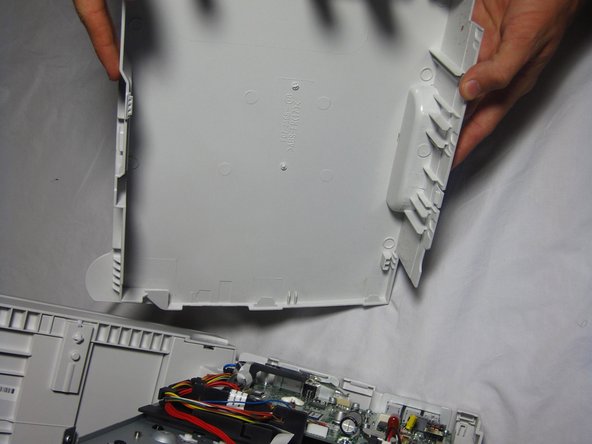
    • Gently unhook the right side paneling (as looking at the printer's front face) from the printer.

    • Use a gentle back and forth motion to wiggle the hooks out.

  5. Canon ImageCLASS MF4350d Transformer Replacement, Transformer: 手順 5、 2の画像 1 Canon ImageCLASS MF4350d Transformer Replacement, Transformer: 手順 5、 2の画像 2
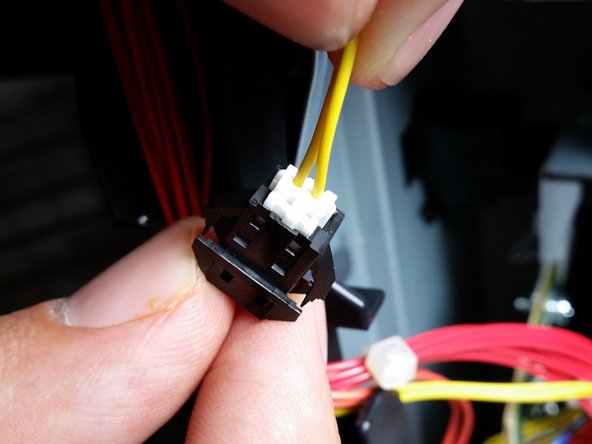
    • Locate the yellow wire connected to the metal box.

    • Carefully pull the yellow wire from the black connector.

    • Wires may detach completely from plug so tug very gently.

  6. Canon ImageCLASS MF4350d Transformer Replacement: 手順 6、 2の画像 1 Canon ImageCLASS MF4350d Transformer Replacement: 手順 6、 2の画像 2
    • Locate the spring.

    • Unhook the spring on the side of the metal box.

  7. Canon ImageCLASS MF4350d Transformer Replacement: 手順 7、 1の画像 1
    • Unscrew the 10mm screw attaching the metal plate to the printer.

  8. Canon ImageCLASS MF4350d Transformer Replacement: 手順 8、 1の画像 1
    • Lift the transformer out of the printer.

終わりに

To reassemble your device, follow these instructions in reverse order.

ある他の人がこのガイドを完成しました。

作成者

5人の作成者と共同で作成されました。

Helena Yanez

メンバー登録日: 09/29/13

455 ポイント

4のガイドは作成済み

チーム

Cal Poly, Team 13-1, Forte Fall 2013 Cal Poly, Team 13-1, Forte Fall 2013人のメンバー

CPSU-FORTE-F13S13G1

5 メンバー

16のガイドは作成済み

0 件のコメント

コメントを追加

統計データ:

過去 24時間: 1

過去 7 日: 4

過去 30 日: 15

今までの合計 2,794