メインコンテンツにスキップ

Cannon Henley cooker Oven fan Replacement

必要な工具と部品

  1. Cannon Henley cooker Oven fan Replacement, Oven Fan: 手順 1、 2の画像 1 Cannon Henley cooker Oven fan Replacement, Oven Fan: 手順 1、 2の画像 2
    • Your new fan will come separated from the motor. The nut has a reverse thread, mine was a 10mm nut.

  2. Cannon Henley cooker Oven fan Replacement: 手順 2、 1の画像 1
    • Disconnect the power. The cooker switch will be located near the cooker, or in a cupboard.

    • Move the cooker out of its space, carefully avoiding stressing the gas or electricity supply. These should be long enough to enable access, but do not attempt to disconnect them.

    • You should see a perforated circular panel in the rear cover. This is held in by 5 small lugs which can be snapped. Retain the piece to refit later.

  3. Cannon Henley cooker Oven fan Replacement: 手順 3、 1の画像 1
    • Remove the four screws holding the rear panel inside the oven and remove, exposing the heater element, thermostat and fan.

    • The fan nut can be removed by turning it clockwise with a 10mm socket or spanner, it is a reverse thread.

    • There are three screws holding the fan unit in place. Remove the bottom center one, and loosen the two top ones.

  4. Cannon Henley cooker Oven fan Replacement: 手順 4、 2の画像 1 Cannon Henley cooker Oven fan Replacement: 手順 4、 2の画像 2
    • Carefully move the wiring out of the way, removing cable ties if necessary.

    • You can then lift the motor and draw it out of the top two keyhole shaped screw holes.

    • The spade connectors can be slid off their tabs.

    • The position of each of the three connections to the motor, including the earth to the case.

    • Fit two of the screws to the corresponding holes in the new motor ready to insert into the keyholes.

    • Fit the motor into the space, hooking the two screws into their holes. Its helpful to have a second person hold the motor in place as you fit the third screw from inside the oven, and tighten up,

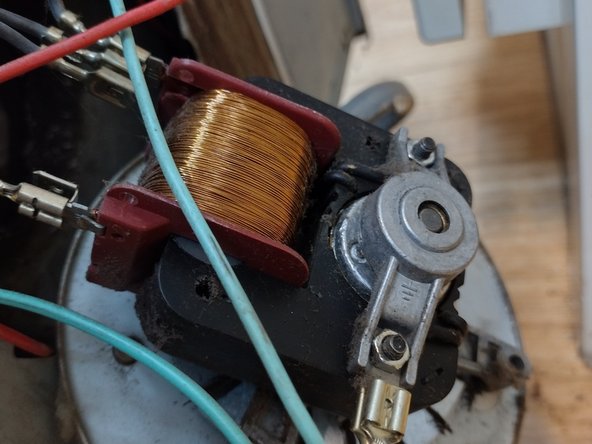
    • Reconnect the spade connectors to match the original connections.

    • Check all wires are positioned correctly. Now might be a good time to power the cooker back on and test the motor turns. Remember the over timer will need to be reset to manual. Then power the oven off again.

  5. Cannon Henley cooker Oven fan Replacement: 手順 6、 1の画像 1
    • Refit the cover using self tapping screws. If they won't bite, tie it back on using wire passed through the holes.

    • Fit the new fan onto the shaft inside the oven, remembering that it is a reverse thread. Then refit the rear panel inside the oven with the four screws and replace the lamp cover.

終わりに

Test the oven after finishing.

作成者

1人の作成者と共同作成されました。

Flannel

メンバー登録日: 08/17/19

145 ポイント

1ガイドが承認済み

0 件のコメント

コメントを追加

統計データ:

過去 24時間: 1

過去 7 日: 6

過去 30 日: 26

今までの合計 162