メインコンテンツにスキップ

Campbell Hausfeld FP204800 On/Off Switch Replacement

必要な工具と部品

  1. Campbell Hausfeld FP204800 On/Off Switch Replacement, Remove Shroud Screws: 手順 1、 3の画像 1 Campbell Hausfeld FP204800 On/Off Switch Replacement, Remove Shroud Screws: 手順 1、 3の画像 2 Campbell Hausfeld FP204800 On/Off Switch Replacement, Remove Shroud Screws: 手順 1、 3の画像 3
    • Unscrew the four 1cm long shroud screws using a 6mm Allen Wrench.

  2. Campbell Hausfeld FP204800 On/Off Switch Replacement, Remove Shroud: 手順 2、 2の画像 1 Campbell Hausfeld FP204800 On/Off Switch Replacement, Remove Shroud: 手順 2、 2の画像 2
    • Remove the plastic shroud from the compressor.

    • Do not pull the shroud too far from the compressor. You could damage the on/off switch wiring.

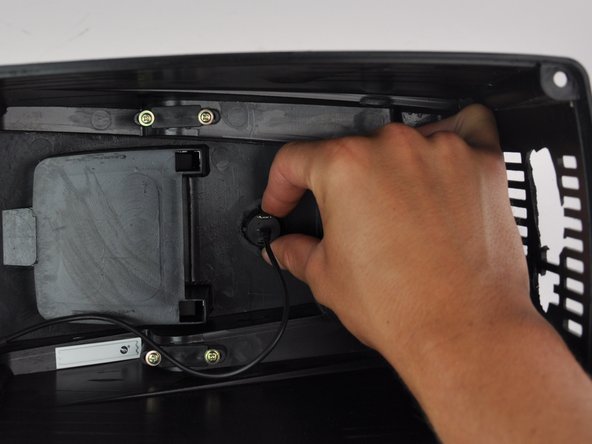
  3. Campbell Hausfeld FP204800 On/Off Switch Replacement, Remove The Wiring From the Pressure Switch to the On/Off Switch: 手順 3、 1の画像 1
    • Gently pull the wire attached from the pressure switch to the on/off switch.

    • It should come off the pressure switch with ease.

    • Make sure you are pulling the correct wire. The pressure switch could be in a different configuration on your compressor than in the picture.

  4. Campbell Hausfeld FP204800 On/Off Switch Replacement, Remove the On/Off Switch Wiring: 手順 4、 1の画像 1
    • Gently pull the wire connected from the on/off switch to the motor of the compressor.

    • It should be the only wire keeping the shroud from being lifted from the compressor.

  5. Campbell Hausfeld FP204800 On/Off Switch Replacement, Configure the on/off switch for removal: 手順 5、 2の画像 1 Campbell Hausfeld FP204800 On/Off Switch Replacement, Configure the on/off switch for removal: 手順 5、 2の画像 2
    • Twist the On/Off switch from the underside of the shroud.

    • Twist 90 degrees in any direction or until the on/off switch prongs are in a vertical position.

    • When the switch has reached the correct position, you will feel it "click" into place.

  6. Campbell Hausfeld FP204800 On/Off Switch Replacement, Remove the on/off switch: 手順 6、 1の画像 1
    • Push the on/off switch from the underside of the shroud until it comes loose.

    • If the switch is not in the correct position highlighted in the previous step, it will not be easily removed and could damage the shroud.

終わりに

To reassemble your device, follow these instructions in reverse order.

ある他の人がこのガイドを完成しました。

作成者

1人の作成者と共同作成されました。

Caleb Davies

メンバー登録日: 10/07/14

528 ポイント

4のガイドは作成済み

チーム

Cal Poly, Team 14-29, Maness Fall 2014 Cal Poly, Team 14-29, Maness Fall 2014人のメンバー

CPSU-MANESS-F14S14G29

4 メンバー

7のガイドは作成済み

0 件のコメント

コメントを追加

統計データ:

過去 24時間: 0

過去 7 日: 3

過去 30 日: 16

今までの合計 1,476