メインコンテンツにスキップ

Brother PT-D200 Faceplate Replacement

必要な工具と部品

  1. Brother PT-D200 Faceplate Replacement, Battery: 手順 1、 1の画像 1
    • Flip the device over and press down on the indication arrows located at the top center of the back cover and pull it open.

  2. Brother PT-D200 Faceplate Replacement: 手順 2、 1の画像 1
    • Remove the six AAA batteries.

  3. Brother PT-D200 Faceplate Replacement, Back of Device: 手順 3、 1の画像 1
    • Use the Helping Hand 1/4" screwdriver to unscrew the six 3/16" corner screws.

  4. Brother PT-D200 Faceplate Replacement: 手順 4、 1の画像 1
    • Close the back cover and then flip the device over and separate the top half from the bottom half as shown.

    • Be gentle when lifting the top of the device, there is a ribbon cable attaching the two halves together.

  5. Brother PT-D200 Faceplate Replacement, Circuit Board Cables: 手順 5、 1の画像 1
    • Gently pull out the ribbon cable from the circuit board.

    • The ribbon cable is very fragile.

  6. Brother PT-D200 Faceplate Replacement: 手順 6、 1の画像 1
    • Remove two-pin plastic connector from the circuit board.

    • Gently pull the two-pin connector from the circuit board to avoid damaging the board.

  7. Brother PT-D200 Faceplate Replacement, Face Plate: 手順 7、 1の画像 1
    • On the top portion of the device there are four grey clips locking the faceplate in place. The two top clips are circled in the image. The two others are located in the other corners of the device.

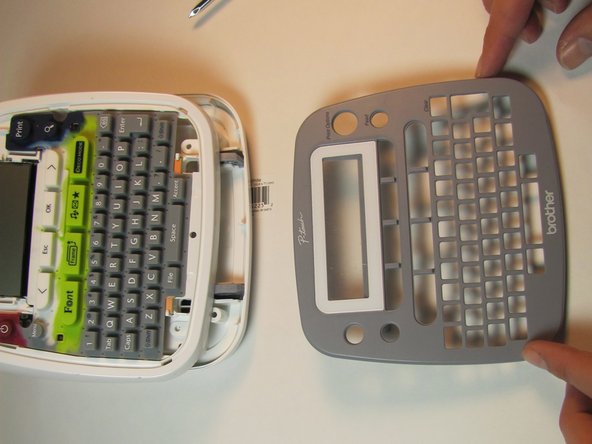
  8. Brother PT-D200 Faceplate Replacement: 手順 8、 2の画像 1 Brother PT-D200 Faceplate Replacement: 手順 8、 2の画像 2
    • Pull the clips inward two at a time, first the top then the bottom, to snap the face plate off.

終わりに

To reassemble your device, follow these instructions in reverse order.

ある他の人がこのガイドを完成しました。

作成者

5人の作成者と共同で作成されました。

[deleted]

メンバー登録日: 01/24/14

301 ポイント

3のガイドは作成済み

0 件のコメント

コメントを追加

統計データ:

過去 24時間: 0

過去 7 日: 0

過去 30 日: 2

今までの合計 641