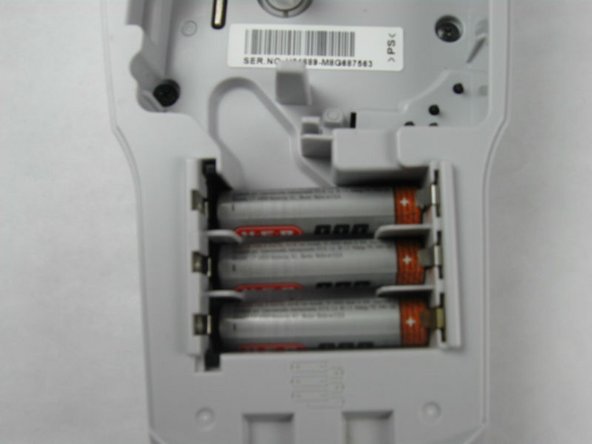
メインコンテンツにスキップ

Brother PT-1010 Battery Replacement

  1. Brother PT-1010 Battery Replacement, Removing Back Panel: 手順 1、 1の画像 1
    • Turn device so you are looking down at the top

  2. Brother PT-1010 Battery Replacement: 手順 2、 2の画像 1 Brother PT-1010 Battery Replacement: 手順 2、 2の画像 2
    • Press firmly on arrow indicator and pull panel toward you.

  3. Brother PT-1010 Battery Replacement, Remove Dead Batteries: 手順 3、 1の画像 1
    • Remove dead batteries one at a time by pulling up on the side indicated with a + symbol.

    • Make sure the battery compartment is empty and clear of debris.

  4. Brother PT-1010 Battery Replacement: 手順 4、 2の画像 1 Brother PT-1010 Battery Replacement: 手順 4、 2の画像 2
    • Insert the first battery with the flat side (indicated by a - symbol on the battery) facing to the left of the battery compartment.

    • Do the same thing to insert the next 2 batteries.

  5. Brother PT-1010 Battery Replacement: 手順 5、 1の画像 1
    • The next 3 batteries will be inserted on top of the others.

    • Insert the 4th battery with the flat side (indicated by the - symbol on the battery) facing to the right of the battery compartment.

  6. Brother PT-1010 Battery Replacement: 手順 6、 1の画像 1
    • Repeat step 5 to insert the last 2 batteries.

  7. Brother PT-1010 Battery Replacement, Replace Back Panel: 手順 7、 1の画像 1
    • Reinsert back panel.

終わりに

To reassemble your device, follow these instructions in reverse order.

ある他の人がこのガイドを完成しました。

作成者

3人の作成者と共同で作成されました。

Haley Sweet

メンバー登録日: 10/30/14

460 ポイント

4のガイドは作成済み

チーム

Baylor, Team 4-4, Williams Fall 2014 Baylor, Team 4-4, Williams Fall 2014人のメンバー

BU-WILLIAMS-F14S4G4

4 メンバー

4のガイドは作成済み

0 件のコメント

コメントを追加

統計データ:

過去 24時間: 0

過去 7 日: 3

過去 30 日: 16

今までの合計 4,813