メインコンテンツにスキップ

Brother CS6000i LCD Screen Replacement

必要な工具と部品

  1. Brother CS6000i LCD Screen Replacement, Body: 手順 1、 2の画像 1 Brother CS6000i LCD Screen Replacement, Body: 手順 1、 2の画像 2
    • Remove the five 20 mm Phillips #2 screws on the back of the device.

    • Remove the single 28 mm Phillips #2 screw on the back of the device.

    • Remove the single 23 mm Phillips #2 screw on the back of the device.

  2. Brother CS6000i LCD Screen Replacement: 手順 2、 2の画像 1 Brother CS6000i LCD Screen Replacement: 手順 2、 2の画像 2
    • Pull the white cover off.

  3. Brother CS6000i LCD Screen Replacement: 手順 3、 2の画像 1 Brother CS6000i LCD Screen Replacement: 手順 3、 2の画像 2
    • Remove the final screw, a 11 mm Phillips #2.

    • After removing all eight screws, you will have five 2 mm screws, one 28 mm screw, one 23 mm screw, and one 11 mm screw, all of which are Phillips #2.

  4. Brother CS6000i LCD Screen Replacement: 手順 4、 3の画像 1 Brother CS6000i LCD Screen Replacement: 手順 4、 3の画像 2 Brother CS6000i LCD Screen Replacement: 手順 4、 3の画像 3
    • Slightly pull apart the two halves of the machine, taking care not to strain the attached cables.

    • Unhook the white wires that are connected to the motherboard.

    • Fully separate the two halves.

  5. Brother CS6000i LCD Screen Replacement, LCD Screen: 手順 5、 1の画像 1
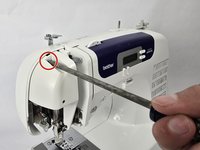
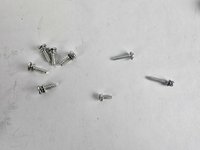
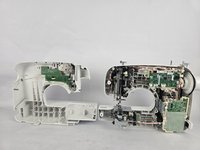
    • Remove the two 10 mm Philips #2 screws that secure the screen.

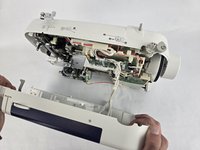
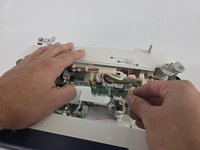
    • Unplug the ribbon cable located at the top of the circuit board, then gently remove the LCD screen.

終わりに

To reassemble your device, follow these instructions in reverse order.

ある他の人がこのガイドを完成しました。

作成者

3人の作成者と共同で作成されました。

Wasim Benbrahim

メンバー登録日: 11/04/24

152 ポイント

1ガイドが承認済み

チーム

Cuesta, Team 20-1, Krynen Fall 2024 Cuesta, Team 20-1, Krynen Fall 2024人のメンバー

CUESTA-KRYNEN-F24S20G1

5 メンバー

8のガイドは作成済み

0件のガイドコメント

コメントを追加

統計データ:

過去 24時間: 0

過去 7 日: 9

過去 30 日: 26

今までの合計 84