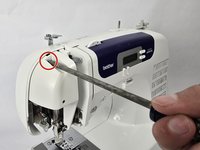
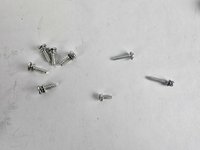
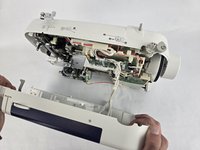
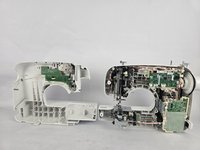
メインコンテンツにスキップ

Brother CS6000i Body Replacement

必要な工具と部品

  1. Brother CS6000i Body Replacement, Body: 手順 1、 2の画像 1 Brother CS6000i Body Replacement, Body: 手順 1、 2の画像 2
    • Remove the five 20 mm Phillips #2 screws on the back of the device.

    • Remove the single 28 mm Phillips #2 screw on the back of the device.

    • Remove the single 23 mm Phillips #2 screw on the back of the device.

  2. Brother CS6000i Body Replacement: 手順 2、 2の画像 1 Brother CS6000i Body Replacement: 手順 2、 2の画像 2
    • Pull the white cover off.

  3. Brother CS6000i Body Replacement: 手順 3、 2の画像 1 Brother CS6000i Body Replacement: 手順 3、 2の画像 2
    • Remove the final screw, a 11 mm Phillips #2.

    • After removing all eight screws, you will have five 2 mm screws, one 28 mm screw, one 23 mm screw, and one 11 mm screw, all of which are Phillips #2.

  4. Brother CS6000i Body Replacement: 手順 4、 3の画像 1 Brother CS6000i Body Replacement: 手順 4、 3の画像 2 Brother CS6000i Body Replacement: 手順 4、 3の画像 3
    • Slightly pull apart the two halves of the machine, taking care not to strain the attached cables.

    • Unhook the white wires that are connected to the motherboard.

    • Fully separate the two halves.

終わりに

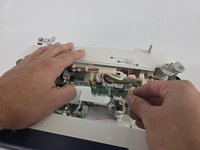
To reassemble your device, follow these instructions in reverse order.

ある他の人がこのガイドを完成しました。

作成者

4人の作成者と共同で作成されました。

Ava Martinez

メンバー登録日: 10/31/24

448 ポイント

4のガイドは作成済み

チーム

Cuesta, Team 20-1, Krynen Fall 2024 Cuesta, Team 20-1, Krynen Fall 2024人のメンバー

CUESTA-KRYNEN-F24S20G1

5 メンバー

8のガイドは作成済み

0件のガイドコメント

コメントを追加

統計データ:

過去 24時間: 7

過去 7 日: 19

過去 30 日: 90

今までの合計 791