はじめに
Use this guide to remove and replace the batteries in the Braun Cruzer 6 - Beard and Hair Trimmer, Model: 5417
必要な工具と部品
-
-
Remove the trimmer head.
-
Remove the two Torx T5 screws attaching the cover to the hand-piece.
-
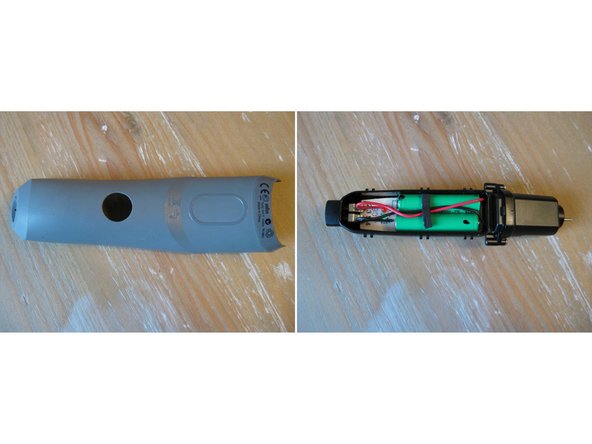
Remove the cover.
-
Take this opportunity to remove built up hair and residue. Hair can prevent the batteries from making contact leading to power failure.
-
-
-
-
Remove the back cover.
-
Using a flat head screw driver, remove the single screw holding the power board in place.
-
Use compressed air to clean the motor. Take this opportunity to lubricate the trimmer with an anti-rust spray or WD-40.
-
Remove the two AAA batteries by soldering them with soldering iron and des soldering pump.
-
Bend the terminals of the new batteries and solder them back in the right direction
-
If the batteries are already slightly charged, you can briefly press the power button to check if the motor is working
-
Insert the board again, with the side towards the motor first
-


To reassemble your device, follow the above steps in reverse order.
To reassemble your device, follow the above steps in reverse order.
23 の人々がこのガイドを完成させました。
以下の翻訳者の皆さんにお礼を申し上げます:
100%


これらの翻訳者の方々は世界を修理する私たちのサポートをしてくれています。 あなたも貢献してみませんか?
翻訳を始める ›
7 件のコメント
Your guide saved me from purchasing a new device.
After replacing the batteries it works again like a charm!
Thanks this was helpful. The Braun Series 3 Hair Clipper HC3050 has a VERY similar design. Some additional notes: After removing the screws, it takes a bit of force to get the back separated from the front. I had to gently pry it apart with a screw driver. The very inside is slightly different, but same concept.
Die Anleitung war sehr hilfreich.
Der Austausch der Batterien ging ziemlich gut.
I think one pcc— 1.2 V 1800 mah AA battary
Thank you! Another appliance reborn :)
It really helps to work around consumerism with such shared knowledge!
Keep it up 👍
Guten Tag.
wo genau löte ich den Akku ab und wieder an?
Auf der Platine oder am Akku selber?
Gruß Tino
tino laube - 返信
Thanks a lot, as someone before, you saved me from buying a new one. Circular eonomy rocks ;)
I think I already posted a comment but I can’t see it.
Your excellent guide saved me from purchasing a new beard trimmer. After replacing the batteries it works again like a charm!
Thank you
King Arthur - 返信
Thank you so much. Another appliance reborn :)
Not so much on the price but regarding the consumerism avoidance.
Keep it up 👍
Pedro Faria - 返信