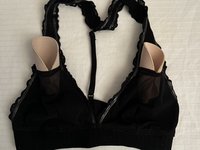
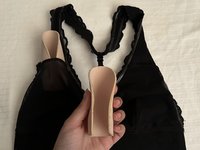
メインコンテンツにスキップ

Bralette Foam Insert Replacement

必要な工具と部品

  1. Bralette Foam Insert Replacement, Foam Inserts: 手順 1、 1の画像 1
    • Lay out the bralette in a clean and flat place.

  2. Bralette Foam Insert Replacement: 手順 2、 1の画像 1
    • Find the foam insert pockets.

    • These are usually found in the cups or sides of the bralette.

  3. Bralette Foam Insert Replacement: 手順 3、 1の画像 1
    • Take out the existing foam inserts by carefully pulling them from their pockets.

  4. Bralette Foam Insert Replacement: 手順 4、 1の画像 1
    • Use a lint roller to remove lint or dirt in the pockets.

  5. Bralette Foam Insert Replacement: 手順 5、 1の画像 1
    • Select the right roam inserts that have the perfect size and thickness for the bralette.

  6. Bralette Foam Insert Replacement: 手順 6、 2の画像 1 Bralette Foam Insert Replacement: 手順 6、 2の画像 2
    • Slide the replacement foam insert into the pocket of the bralette.

    • Make sure no bumps are present.

  7. Bralette Foam Insert Replacement: 手順 7、 1の画像 1
    • Once inserted, make sure the foam inserts are in the correct place and give the ideal shape and support.

  8. Bralette Foam Insert Replacement: 手順 8、 1の画像 1
    • Put the bralette on to check the shape and support of the replacement foam inserts.

    • Make any improvements if required.

終わりに

You did it! You have replaced your old foam inserts to revamp your favourite bralette.

作成者

1人の作成者と共同作成されました。

Tasnuva Bushra

メンバー登録日: 07/04/24

157 ポイント

1ガイドが承認済み

チーム

York University, Team 1-8, O'Regan Summer 2024 York University, Team 1-8, O'Regan Summer 2024人のメンバー

YORK-O'REGAN-SU24S1G8

1 メンバー

2のガイドは作成済み

0件のガイドコメント

コメントを追加

統計データ:

過去 24時間: 0

過去 7 日: 1

過去 30 日: 12

今までの合計 184