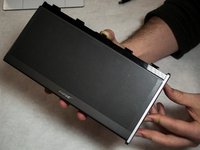
メインコンテンツにスキップ

Bose Soundlink II Button Cover Replacement

必要な工具と部品

  1. Bose Soundlink II Button Cover Replacement, Bose Soundlink II Cover Removal: 手順 1、 1の画像 1
    • Using a 2.5 mm hex wrench, remove the two 13 mm screws from the bottom of the speaker.

  2. Bose Soundlink II Button Cover Replacement: 手順 2、 1の画像 1
    • Push up on the back of the cover until it slides up slightly.

    • Pull the cover up and away from the speaker backing.

  3. Bose Soundlink II Button Cover Replacement, Side Cover: 手順 3、 1の画像 1
    • Remove the black electrical tape in order to reveal the screws attaching the side cover to the main body of the speaker. These screws are on the base of the device.

  4. Bose Soundlink II Button Cover Replacement: 手順 4、 1の画像 1
    • Using the T-10 star tip screwdriver, remove the two 13 mm screws located on the bottom of the speaker on each side of the battery pack.

  5. Bose Soundlink II Button Cover Replacement: 手順 5、 3の画像 1 Bose Soundlink II Button Cover Replacement: 手順 5、 3の画像 2 Bose Soundlink II Button Cover Replacement: 手順 5、 3の画像 3
    • Slide the silver side cover down toward the base of the speaker. The silver cover will come off easily.

  6. Bose Soundlink II Button Cover Replacement, Button Cover: 手順 6、 1の画像 1
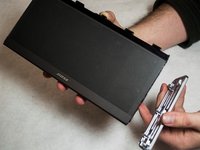
    • Once the Bose Soundlink II Side Covers Removal has been completed, remove the two screws (13 mm) an inch below the buttons on the back of the speaker using the T-10 star tip screwdriver.

  7. Bose Soundlink II Button Cover Replacement: 手順 7、 1の画像 1
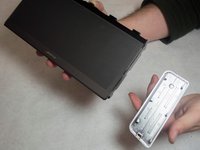
    • Using a tool such as a spudger or plastic opening tool, insert the end into one of the small indentations located on the back of the speaker. Start either on the indentation farthest to the right or to the left.

    • Pry up with the spudger or plastic opening tool so that the cover is pushed up slightly.

  8. Bose Soundlink II Button Cover Replacement: 手順 8、 1の画像 1
    • Repeat this process with each of the indentations, working your way left or right (depending on where you start).

  9. Bose Soundlink II Button Cover Replacement: 手順 9、 1の画像 1
    • Pull the cover around the buttons off. If you’d like, you can remove the button cover as well.

終わりに

To reassemble your device, follow these instructions in reverse order.

2 の人々がこのガイドを完成させました。

作成者

2人の作成者と共同で作成されました。

John P Loughran

メンバー登録日: 03/02/17

448 ポイント

3のガイドは作成済み

チーム

IUPUI, Team S3-G3, Harley Spring 2017 IUPUI, Team S3-G3, Harley Spring 2017人のメンバー

IUPUI-HARLEY-S17S3G3

4 メンバー

3のガイドは作成済み

0 件のコメント

コメントを追加

統計データ:

過去 24時間: 1

過去 7 日: 5

過去 30 日: 15

今までの合計 2,129