メインコンテンツにスキップ

Bose SoundLink Color Speaker Replacement

必要な工具と部品

  1. Bose SoundLink Color Speaker Replacement, Outer Casing: 手順 1、 2の画像 1 Bose SoundLink Color Speaker Replacement, Outer Casing: 手順 1、 2の画像 2
    • Four round, plastic plugs are located on the back of the device.

    • Using a metal spudger, carefully pry up the plastic covers.

    • The covers are all glued on, so be careful not to scar the casing when prying them off. If possible, use a spudger or plastic opening tool to remove them.

  2. Bose SoundLink Color Speaker Replacement: 手順 2、 2の画像 1 Bose SoundLink Color Speaker Replacement: 手順 2、 2の画像 2
    • Remove the four 1.8 cm-long T15 Torx Security screws from the outer case.

    • Some of these use T15 "Star" 5-point Torx security screws instead of the more common 6-point ones.

  3. Bose SoundLink Color Speaker Replacement: 手順 3、 2の画像 1 Bose SoundLink Color Speaker Replacement: 手順 3、 2の画像 2
    • Carefully open up the casing.

    • The top button pad may need to be re-glued upon installing the new casing.

  4. Bose SoundLink Color Speaker Replacement, Speaker: 手順 4、 2の画像 1 Bose SoundLink Color Speaker Replacement, Speaker: 手順 4、 2の画像 2
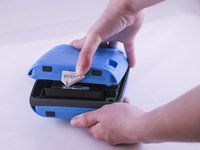
    • Lift up the retaining flap on the button cable ZIF connector.

    • Pull the button cable straight out of the connector.

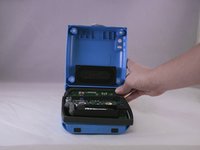
    • Remove the inner assembly.

  5. Bose SoundLink Color Speaker Replacement: 手順 5、 1の画像 1
    • The speakers are on the front of the inner assembly.

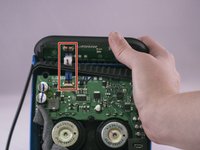
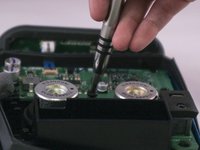
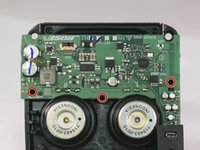
    • Using the Phillips head screwdriver, unscrew the four 1.3 cm screws holding the speaker that will be replaced.

  6. Bose SoundLink Color Speaker Replacement: 手順 6、 2の画像 1 Bose SoundLink Color Speaker Replacement: 手順 6、 2の画像 2
    • Three screws hold the printed circuit board.

    • Using the Phillips head screwdriver, unscrew the three 1.2 cm screws.

  7. Bose SoundLink Color Speaker Replacement: 手順 7、 2の画像 1 Bose SoundLink Color Speaker Replacement: 手順 7、 2の画像 2
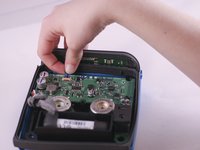
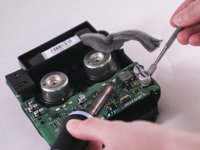
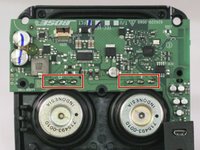
    • Desolder each the three pins connecting the speaker to the motherboard.

    • Carefully lift the motherboard with a spudger to ensure that each pin desolders.

    • Work carefully. Prying too hard may cause damage to the board.

  8. Bose SoundLink Color Speaker Replacement: 手順 8、 1の画像 1
    • Push the speaker through the front of the inner assembly.

終わりに

To reassemble your device, follow these instructions in reverse order.

17 の人々がこのガイドを完成させました。

作成者

1人の作成者と共同作成されました。

Brett Horstketter

メンバー登録日: 03/31/16

2,648 ポイント

1ガイドが承認済み

チーム

Eastern Washington University, Team 1-4, Giguere Spring 2016 Eastern Washington University, Team 1-4, Giguere Spring 2016人のメンバー

EWU-GIGUERE-S16S1G4

5 メンバー

15のガイドは作成済み

11 件のコメント

Thanks for this tear down. Never thought that it looks like this on the inside. My battery is kind off aging, bought the unit 7 months ago. Local Bose dealer said battery cost half of this speaker. I hope there is a cheaper alternative.

vintiglao22 - 返信

You can unsolder the battery and replace with a standard unprotected 18650 cell it literally costs 7$ for a high quality sony or panasonic or samsung cell. The protection and charging circuit is included in the speaker motherboard just make sure you resolder with the proper polarity.

swiftink -

Como ago para traducir cada

luis beltran - 返信

Speaker looks like a 18650 lithium ion- from the pictures here.

DR Paquette - 返信

Does anybody know where one could order a spare speaker for this device?

sebastiansebisilva - 返信

コメントを追加

統計データ:

過去 24時間: 8

過去 7 日: 57

過去 30 日: 262

今までの合計 29,397