メインコンテンツにスキップ

Bose Solo 5 Sound Bar Indicator Light Replacement

必要な工具と部品

  1. Bose Solo 5 Sound Bar Indicator Light Replacement, Indicator Light: 手順 1、 1の画像 1
    • Lay the Bose Solo 5 on its side, with the speakers facing away from you. This orientation will result in the bottom of the speaker facing upwards.

  2. Bose Solo 5 Sound Bar Indicator Light Replacement: 手順 2、 1の画像 1
    • Remove five 18.25mm screws with a Phillips #2 screw driver.

  3. Bose Solo 5 Sound Bar Indicator Light Replacement: 手順 3、 1の画像 1
    • Gently remove the gold plates and the snap connector from the circuit board by pulling it apart.

  4. Bose Solo 5 Sound Bar Indicator Light Replacement: 手順 4、 1の画像 1
    • Using the plastic opening tool, slightly lift the circuit board up and remove it from the housing.

  5. Bose Solo 5 Sound Bar Indicator Light Replacement: 手順 5、 1の画像 1
    • Disconnect the cords running to the white connector by pulling upon the tab until it is disconnected completely.

  6. Bose Solo 5 Sound Bar Indicator Light Replacement: 手順 6、 1の画像 1
    • Locate the two clear LED receptors and note that one has two prongs and the other has three prongs.

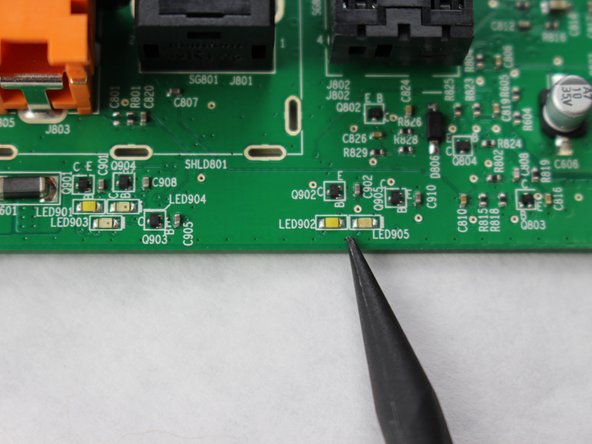
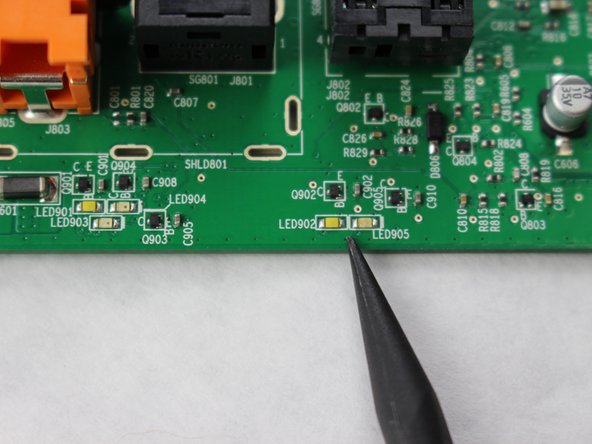
  7. Bose Solo 5 Sound Bar Indicator Light Replacement: 手順 7、 2の画像 1 Bose Solo 5 Sound Bar Indicator Light Replacement: 手順 7、 2の画像 2
    • Locate on the back of the control panel where it states LED 902, 903, 904, and 905.

  8. Bose Solo 5 Sound Bar Indicator Light Replacement: 手順 8、 2の画像 1 Bose Solo 5 Sound Bar Indicator Light Replacement: 手順 8、 2の画像 2
    • If there is any debris located in these locations, use the spudger tool to thoroughly clean the area.

終わりに

To reassemble the sound bar, follow the steps listed above in reverse order.

ある他の人がこのガイドを完成しました。

作成者

6人の作成者と共同で作成されました。

Emma

メンバー登録日: 10/05/18

500 ポイント

3のガイドは作成済み

チーム

Sam Houston State, Team S15-G7, Blackburne Fall 2018 Sam Houston State, Team S15-G7, Blackburne Fall 2018人のメンバー

SHSU-BLACKBURNE-F18S15G7

2 メンバー

4のガイドは作成済み

0 件のコメント

コメントを追加

統計データ:

過去 24時間: 2

過去 7 日: 8

過去 30 日: 49

今までの合計 5,468