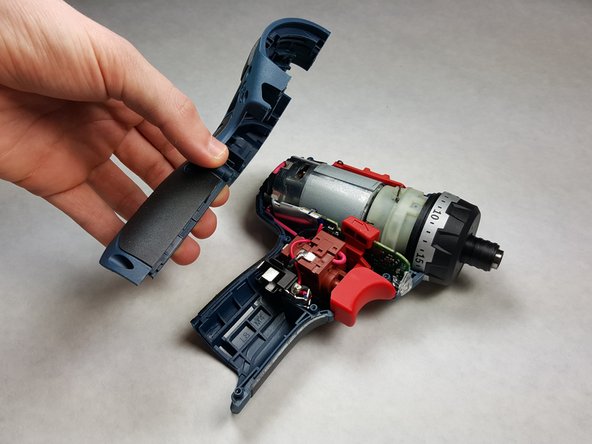
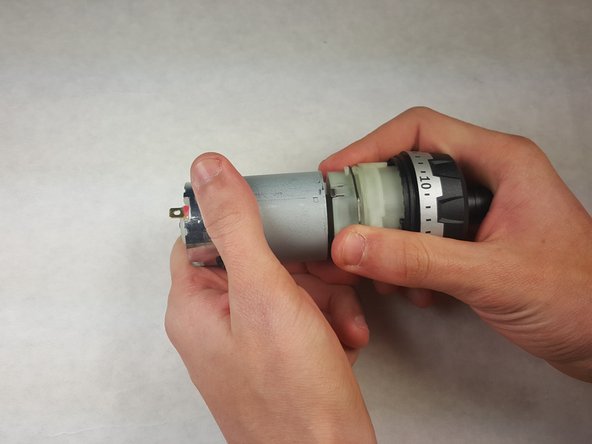
メインコンテンツにスキップ

Bosch PS21 Motor Replacement

必要な工具と部品

  1. Bosch PS21 Motor Replacement, Battery: 手順 1、 1の画像 1
    • Pinch the two release tabs on the sides of the battery, and slide the battery out.

  2. Bosch PS21 Motor Replacement, Motor: 手順 2、 2の画像 1 Bosch PS21 Motor Replacement, Motor: 手順 2、 2の画像 2
    • After removing the battery pack, locate the clip that connects the two halves of the outer casing shown in the picture. Remove the clip using angled tweezers or a similar tool. Save the clip for reassembly.

  3. Bosch PS21 Motor Replacement: 手順 3、 1の画像 1
    • Locate the eight 5.5 mm screws as shown in the picture.

    • Remove each screw using a small Phillips head screw driver. Save all the screws for reassembly.

  4. Bosch PS21 Motor Replacement: 手順 4、 2の画像 1 Bosch PS21 Motor Replacement: 手順 4、 2の画像 2
    • Starting at the rear of the drill, use a wedge to separate the two halves of the outer case at the parting line.

  5. Bosch PS21 Motor Replacement: 手順 5、 2の画像 1 Bosch PS21 Motor Replacement: 手順 5、 2の画像 2
    • The motor and trigger assembly are connected by two wires. Do not pull or put tension on these wires.

    • Lift up the metal tab as shown in the first picture to free the trigger assembly.

    • Gently dislodge the motor and trigger assembly from the drill case. Remove the components as one piece, shown in the second picture.

  6. Bosch PS21 Motor Replacement: 手順 6、 3の画像 1 Bosch PS21 Motor Replacement: 手順 6、 3の画像 2 Bosch PS21 Motor Replacement: 手順 6、 3の画像 3
    • Be sure to not grip the pliers too firmly, as it could cause damage to the wire connectors.

    • Firmly secure the motor assembly in place. Using a set of pliers, carefully pull the black wire connector away from the motor. Repeat this action with the red wire connector.

    • The wire connections on the motor are color coded, matching the color wire that connects there.

  7. Bosch PS21 Motor Replacement: 手順 7、 3の画像 1 Bosch PS21 Motor Replacement: 手順 7、 3の画像 2 Bosch PS21 Motor Replacement: 手順 7、 3の画像 3
    • Once the wires have been disconnected, separate the trigger mechanism from the motor assembly.

    • Place your hands on each end of mechanism and carefully pull apart the assembly in order to separate the gearbox from the motor.

終わりに

To reassemble your device, follow these instructions in reverse order.

ある他の人がこのガイドを完成しました。

作成者

11人の作成者と共同で作成されました。

Daniel Sebastian

メンバー登録日: 02/15/16

133 ポイント

1ガイドが承認済み

チーム

IUPUI, Team 1-2, Harley Spring 2016 IUPUI, Team 1-2, Harley Spring 2016人のメンバー

IUPUI-HARLEY-S16S1G2

4 メンバー

4のガイドは作成済み

0 件のコメント

コメントを追加

統計データ:

過去 24時間: 1

過去 7 日: 2

過去 30 日: 15

今までの合計 2,869