メインコンテンツにスキップ

Blu Studio 5.5 S Rear Facing Camera Replacement

必要な工具と部品

  1. Blu Studio 5.5 S Rear Facing Camera Replacement, Back Casing: 手順 1、 1の画像 1
    • In order to remove the back case, start by flipping the phone to the back side and look at it from the top.

  2. Blu Studio 5.5 S Rear Facing Camera Replacement, Applying Pressure: 手順 2、 3の画像 1 Blu Studio 5.5 S Rear Facing Camera Replacement, Applying Pressure: 手順 2、 3の画像 2 Blu Studio 5.5 S Rear Facing Camera Replacement, Applying Pressure: 手順 2、 3の画像 3
    • Place your finger in the small notch on the left side of the charging port (facing from the back).

    • Once your finger is in the notch, pull the back case towards yourself to remove it.

  3. Blu Studio 5.5 S Rear Facing Camera Replacement, Battery: 手順 3、 3の画像 1 Blu Studio 5.5 S Rear Facing Camera Replacement, Battery: 手順 3、 3の画像 2 Blu Studio 5.5 S Rear Facing Camera Replacement, Battery: 手順 3、 3の画像 3
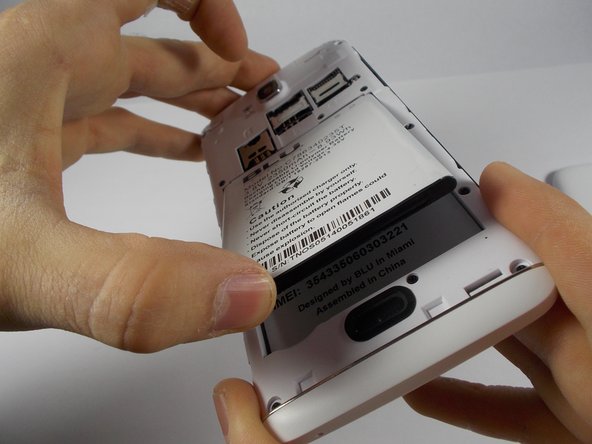
    • Once the back case is removed, locate the battery. It is the large brick embedded in the phone. It has BLU Products, a caution statement, and a barcode on it.

    • Insert your finger into the notch near the lower left of the battery, apply pressure and lift up.

  4. Blu Studio 5.5 S Rear Facing Camera Replacement, Midframe: 手順 4、 3の画像 1 Blu Studio 5.5 S Rear Facing Camera Replacement, Midframe: 手順 4、 3の画像 2 Blu Studio 5.5 S Rear Facing Camera Replacement, Midframe: 手順 4、 3の画像 3
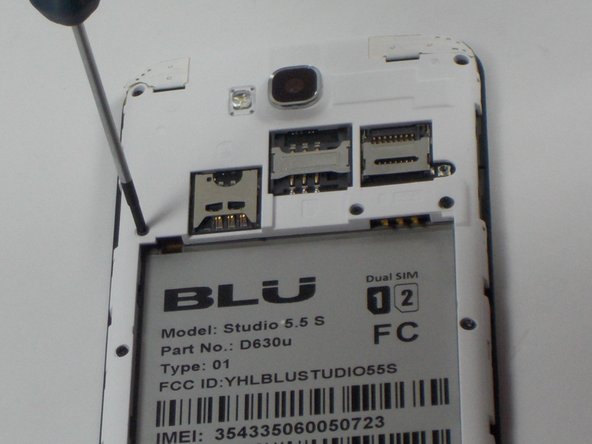
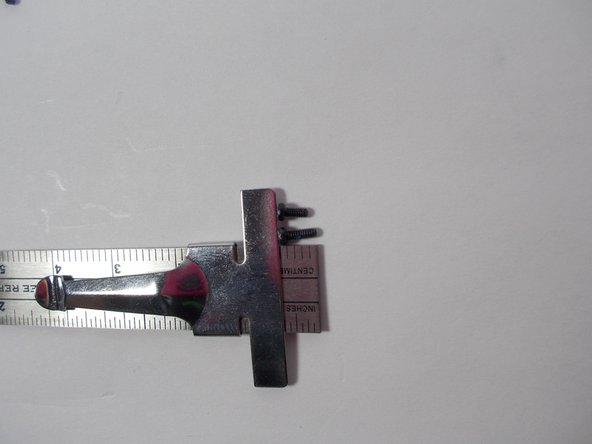
    • The speaker is located behind the inner back case. Using a Phillips #0 screwdriver, unscrew the 10, 7mm screws.

    • Using the Phillips #00 screwdriver, unscrew the two, 10mm screws at the bottom.

  5. Blu Studio 5.5 S Rear Facing Camera Replacement, Aesthetic Bottom Case: 手順 5、 1の画像 1
    • Apply pressure and pop off the bottom aesthetic case, being careful not to break it.

  6. Blu Studio 5.5 S Rear Facing Camera Replacement: 手順 6、 3の画像 1 Blu Studio 5.5 S Rear Facing Camera Replacement: 手順 6、 3の画像 2 Blu Studio 5.5 S Rear Facing Camera Replacement: 手順 6、 3の画像 3
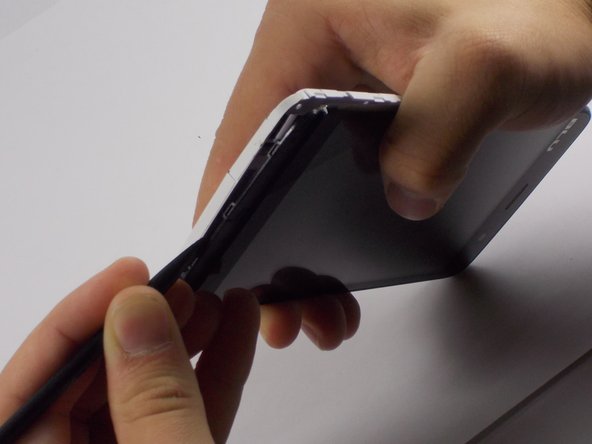
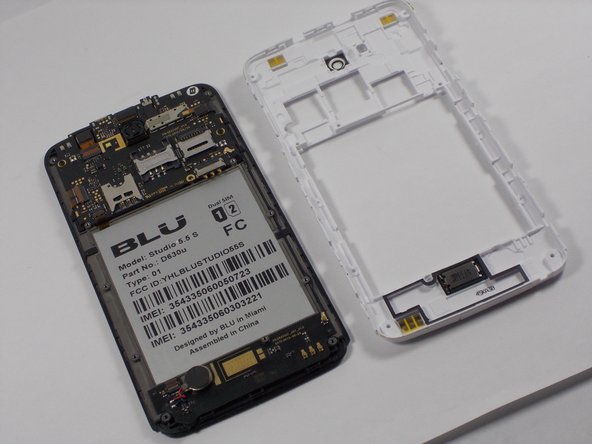
    • Use the Spudger to pop the inner back casing off. Do this by lightly raising the side of the battery housing, then sliding the Spudger around the case.

    • Pick up the inner back case and flip it over.

  7. Blu Studio 5.5 S Rear Facing Camera Replacement, Back Camera.: 手順 7、 3の画像 1 Blu Studio 5.5 S Rear Facing Camera Replacement, Back Camera.: 手順 7、 3の画像 2 Blu Studio 5.5 S Rear Facing Camera Replacement, Back Camera.: 手順 7、 3の画像 3
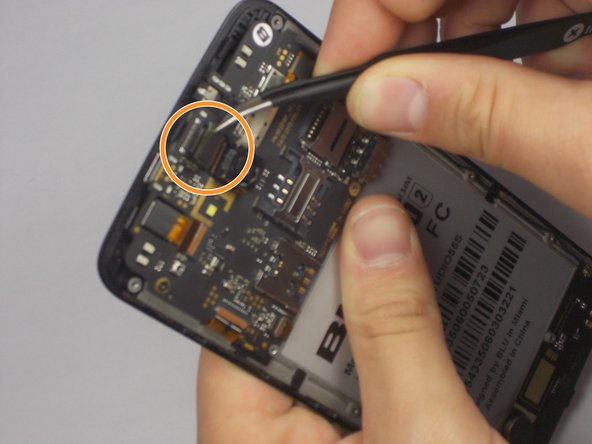
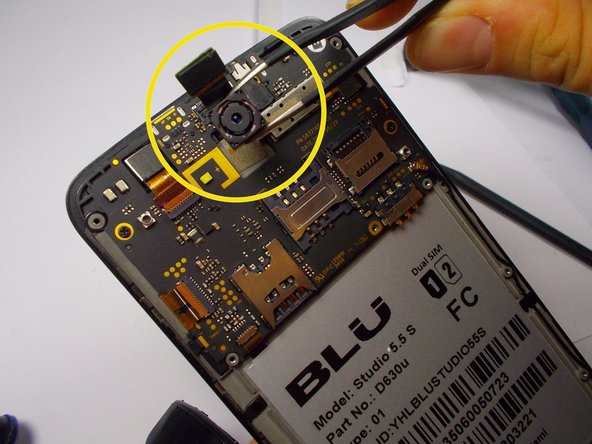
    • The rear camera is located in the center of the motherboard . It is connected by a ribbon wire / prong system.

    • Use tweezers to gently pop off the prong system, by pulling upwards on the black cap piece connected to the motherboard from the ribbon wire.

    • Use the Tweezers to pull the camera out of the housing.

    • When removing the back camera be careful not to scratch the lens, unless you are throwing it out.

終わりに

To reassemble your device, follow these instructions in reverse order.

ある他の人がこのガイドを完成しました。

作成者

3人の作成者と共同で作成されました。

Cody Dyl

メンバー登録日: 10/27/14

804 ポイント

5のガイドは作成済み

チーム

UMass Dartmouth, Team 4-8, Miles Fall 2014 UMass Dartmouth, Team 4-8, Miles Fall 2014人のメンバー

UMASSD-MILES-F14S4G8

2 メンバー

6のガイドは作成済み

0 件のコメント

コメントを追加

統計データ:

過去 24時間: 0

過去 7 日: 0

過去 30 日: 0

今までの合計 1,474