メインコンテンツにスキップ

Blu Studio 5.5 Back Camera Replacement

必要な工具と部品

  1. Blu Studio 5.5 Back Camera Replacement, Battery: 手順 1、 3の画像 1 Blu Studio 5.5 Back Camera Replacement, Battery: 手順 1、 3の画像 2 Blu Studio 5.5 Back Camera Replacement, Battery: 手順 1、 3の画像 3
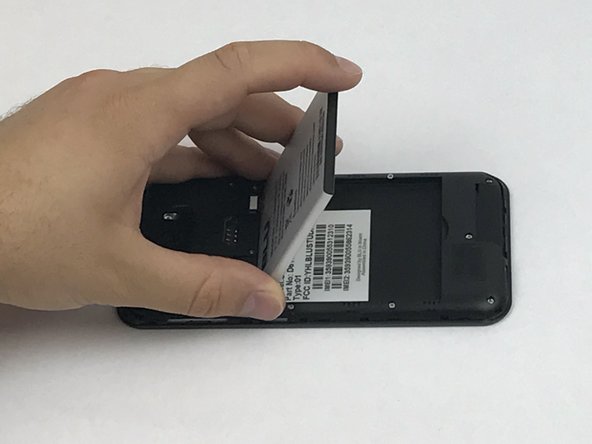
    • Locate the notch to remove the back panel at the lower left corner of the panel.

    • Insert the plastic opening tool or a fingernail into the notch.

    • Apply force upwards until back panel becomes loosened.

  2. Blu Studio 5.5 Back Camera Replacement: 手順 2、 2の画像 1 Blu Studio 5.5 Back Camera Replacement: 手順 2、 2の画像 2
    • Remove the loosened back panel and set aside.

    • Locate the notch to remove the battery.

  3. Blu Studio 5.5 Back Camera Replacement: 手順 3、 3の画像 1 Blu Studio 5.5 Back Camera Replacement: 手順 3、 3の画像 2 Blu Studio 5.5 Back Camera Replacement: 手順 3、 3の画像 3
    • Insert a plastic opening tool or your fingernail into the notch and apply force upwards until the battery is loosened.

    • Remove the battery and set aside.

  4. Blu Studio 5.5 Back Camera Replacement, Back Panel Assembly: 手順 4、 2の画像 1 Blu Studio 5.5 Back Camera Replacement, Back Panel Assembly: 手順 4、 2の画像 2
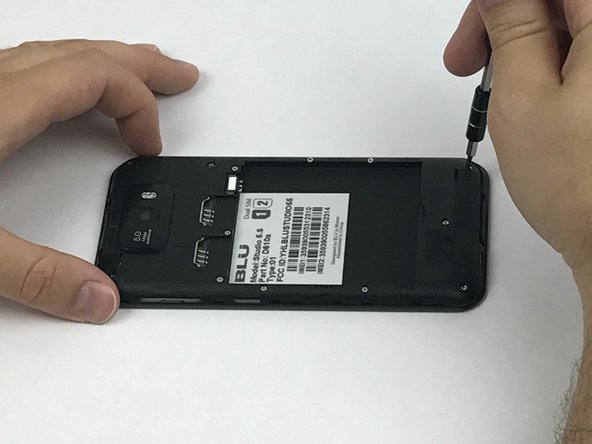
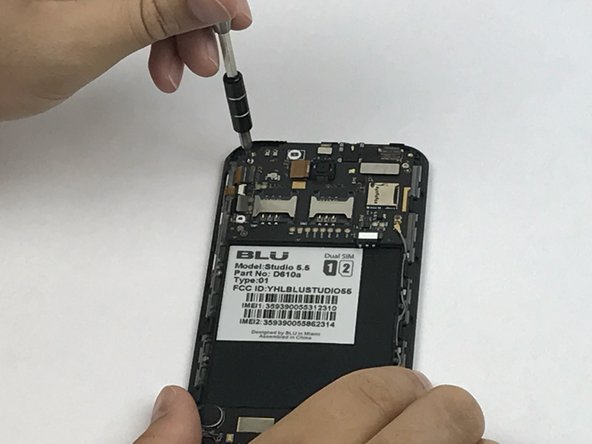
    • Locate all twelve screws along the back panel:

    • Seven 5mm screws.

    • Five 3.5mm screws.

    • Using a Phillips #000 screwdriver, remove all twelve screws.

  5. Blu Studio 5.5 Back Camera Replacement: 手順 5、 3の画像 1 Blu Studio 5.5 Back Camera Replacement: 手順 5、 3の画像 2 Blu Studio 5.5 Back Camera Replacement: 手順 5、 3の画像 3
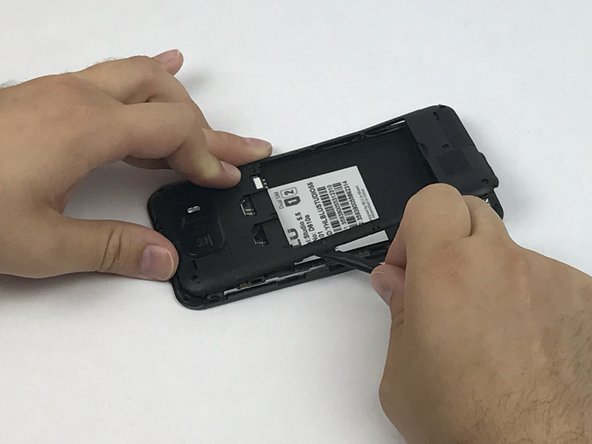
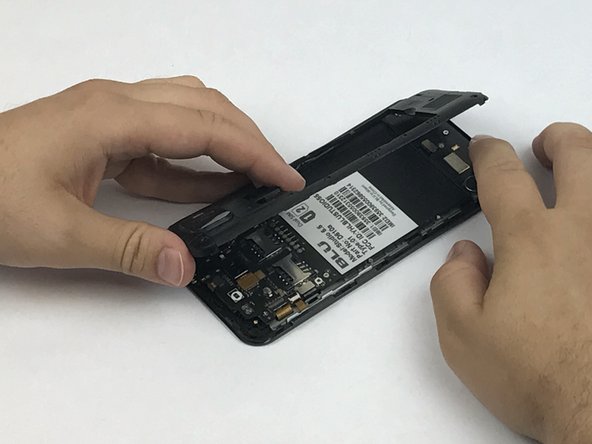
    • Now that all the screws have been removed, use a plastic opening tool to carefully pry at each of the corners until loosened.

    • Be extra careful when prying open as it may damage or snap the thin sides of the panel.

    • Place the plastic opening tool inside the loosened panel and gently push upwards and move along the phone to remove the back panel.

    • Remove the panel as if you were turning the page of a book.

  6. Blu Studio 5.5 Back Camera Replacement, Motherboard: 手順 6、 3の画像 1 Blu Studio 5.5 Back Camera Replacement, Motherboard: 手順 6、 3の画像 2 Blu Studio 5.5 Back Camera Replacement, Motherboard: 手順 6、 3の画像 3
    • Locate the motherboard that is above where the battery was removed.

    • Remove the three screws holding down the motherboard to the phone.

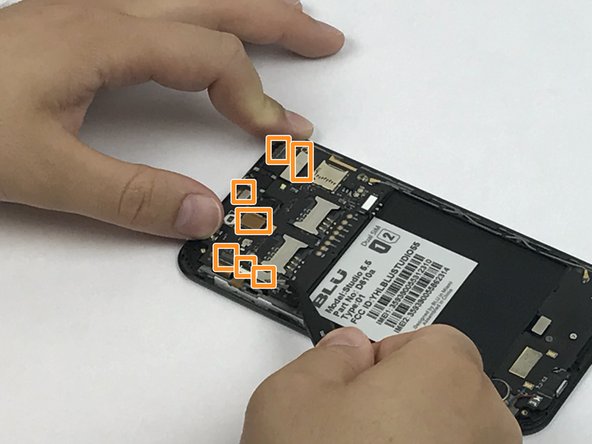
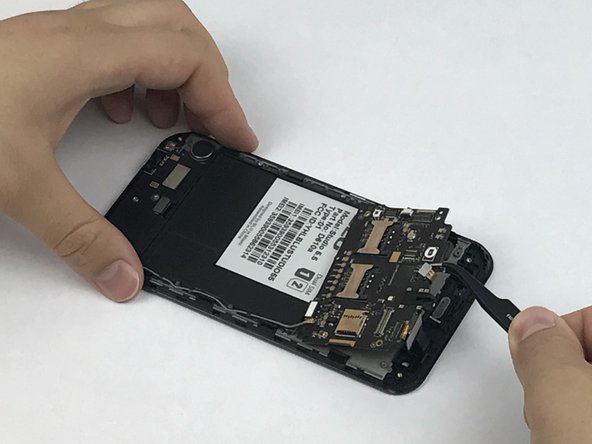
    • Locate all 7 flex cable connectors that are attached to the motherboard.

  7. Blu Studio 5.5 Back Camera Replacement: 手順 7、 3の画像 1 Blu Studio 5.5 Back Camera Replacement: 手順 7、 3の画像 2 Blu Studio 5.5 Back Camera Replacement: 手順 7、 3の画像 3
    この手順で使用する道具:
    Anti-Static Wrist Strap
    $7.95
    購入する
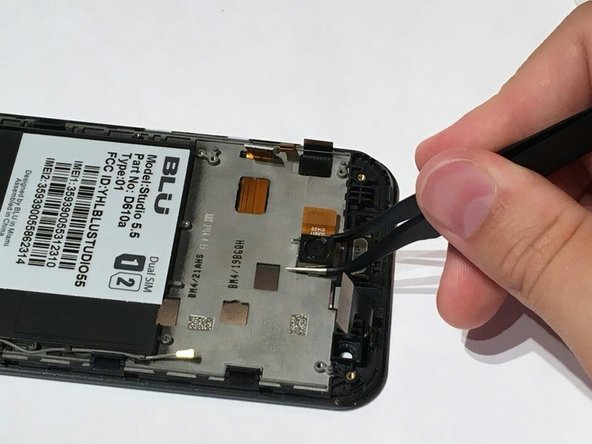
    • Use tweezers to carefully grasp and unhook all 7 flex cable connectors.

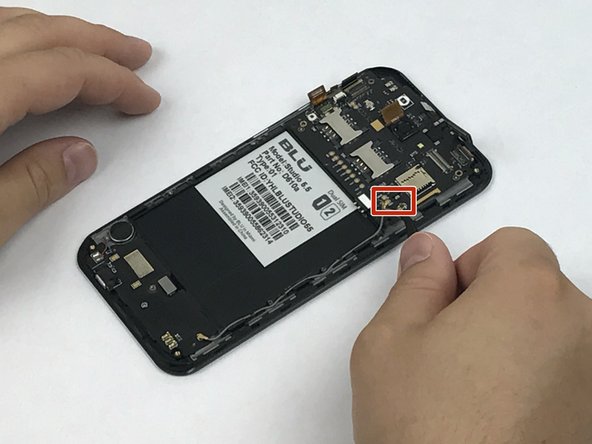
    • With the same tweezers, pry off the cable clasp that connects the motherboard to the sub PCBA.

    • Once the motherboard is disconnected from all components, use the tweezers or your fingers to remove it from the phone assembly.

    • Use the Anti-Static Wrist Strap to eliminate the possibility of introducing a static force that may damage the motherboard components.

  8. Blu Studio 5.5 Back Camera Replacement, Back Camera: 手順 8、 3の画像 1 Blu Studio 5.5 Back Camera Replacement, Back Camera: 手順 8、 3の画像 2 Blu Studio 5.5 Back Camera Replacement, Back Camera: 手順 8、 3の画像 3
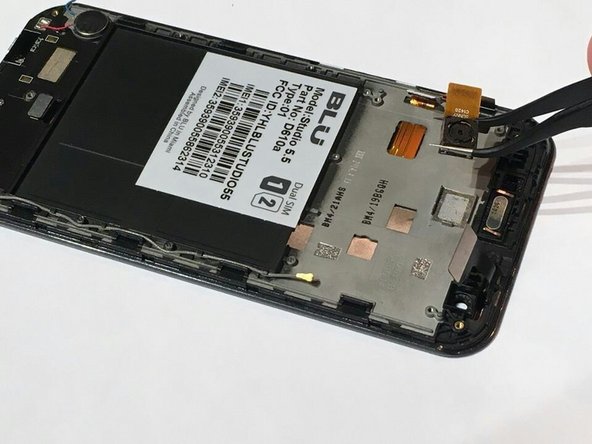
    • After the motherboard has been removed you will see the back camera, which is glued to the phone assembly.

    • Using a pair of tweezers grip onto the sides of the camera and gently pry it off the panel.

    • Make sure that when you put in the replacement it is adhered to the phone panel and the flex cable connector goes in through the motherboard opening.

終わりに

To reassemble your device, follow these instructions in reverse order.

作成者

1人の作成者と共同作成されました。

Luis Gomez-Atehortua

メンバー登録日: 02/28/17

452 ポイント

4のガイドは作成済み

チーム

USF Tampa, Team S1-G6, Nance Spring 2017 USF Tampa, Team S1-G6, Nance Spring 2017人のメンバー

USFT-NANCE-S17S1G6

3 メンバー

8のガイドは作成済み

0 件のコメント

コメントを追加

統計データ:

過去 24時間: 0

過去 7 日: 0

過去 30 日: 1

今までの合計 181