メインコンテンツにスキップ

Blink Video Doorbell Back Panel Replacement

必要な工具と部品

  1. Blink Video Doorbell Back Panel Replacement, Battery: 手順 1、 3の画像 1 Blink Video Doorbell Back Panel Replacement, Battery: 手順 1、 3の画像 2 Blink Video Doorbell Back Panel Replacement, Battery: 手順 1、 3の画像 3
    • Push the opening key into the small opening with the two gray buttons on the bottom of the device.

    • The device will click off the mount.

    • Push the device up from the mount and slide it off.

  2. Blink Video Doorbell Back Panel Replacement: 手順 2、 3の画像 1 Blink Video Doorbell Back Panel Replacement: 手順 2、 3の画像 2 Blink Video Doorbell Back Panel Replacement: 手順 2、 3の画像 3
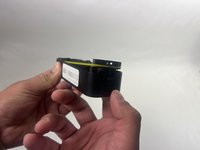
    • Use your finger to slide the gray tab, located near the bottom of the device, upwards.

    • Remove the battery cover.

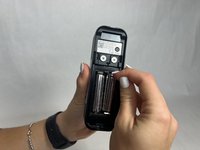
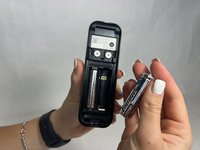
  3. Blink Video Doorbell Back Panel Replacement: 手順 3、 3の画像 1 Blink Video Doorbell Back Panel Replacement: 手順 3、 3の画像 2 Blink Video Doorbell Back Panel Replacement: 手順 3、 3の画像 3
    • Remove the right battery by pushing the positive end down and pulling the battery out toward yourself.

    • Repeat the procedure for the left battery.

    • Do not mix used and new batteries or batteries of different types (for example, lithium and alkaline batteries).

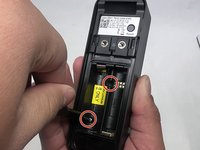
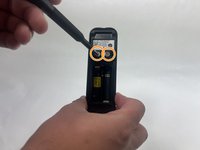
  4. Blink Video Doorbell Back Panel Replacement, Back Panel: 手順 4、 3の画像 1 Blink Video Doorbell Back Panel Replacement, Back Panel: 手順 4、 3の画像 2 Blink Video Doorbell Back Panel Replacement, Back Panel: 手順 4、 3の画像 3
    • Remove the two 6 mm screws in the battery compartment using a JIS #1 screwdriver.

    • Remove the two 7 mm screws above the battery compartment using a JIS #1 screwdriver.

    • Starting from the bottom of the device, pry the back plate away from the rest of the doorbell.

終わりに

To reassemble your device, follow these instructions in reverse order.

Kristen Gismondi

メンバー登録日: 11/12/14

92,499 ポイント

241のガイドは作成済み

チーム

iFixit iFixit人のメンバー

Staff

118 メンバー

19,619のガイドは作成済み

0 件のコメント

コメントを追加

統計データ:

過去 24時間: 1

過去 7 日: 4

過去 30 日: 18

今までの合計 45