メインコンテンツにスキップ

Blackberry Curve 9300 Speaker Replacement

必要な工具と部品

  1. Blackberry Curve 9300 Speaker Replacement, Battery: 手順 1、 1の画像 1
    • Place your Blackberry face down in front of you.

  2. Blackberry Curve 9300 Speaker Replacement: 手順 2、 1の画像 1
    • Locate the indent on the bottom of the back cover.

    • Use your fingernail to lift and remove the back cover.

  3. Blackberry Curve 9300 Speaker Replacement: 手順 3、 1の画像 1
    • From the top, use your fingernail to lift and remove the battery.

  4. Blackberry Curve 9300 Speaker Replacement, Keyboard: 手順 4、 1の画像 1
    • Use the T6 Torx screwdriver to unscrew the two 5mm screws highlighted.

  5. Blackberry Curve 9300 Speaker Replacement: 手順 5、 2の画像 1 Blackberry Curve 9300 Speaker Replacement: 手順 5、 2の画像 2
    • Place the phone face up and use tweezers to securely grip and lift the screen upwards.

  6. Blackberry Curve 9300 Speaker Replacement: 手順 6、 1の画像 1
    • Use a plastic opening tool to lift the bottom edge of the front cover.

  7. Blackberry Curve 9300 Speaker Replacement: 手順 7、 1の画像 1
    • Use your nails to unclip the sides of the frame from the phone.

  8. Blackberry Curve 9300 Speaker Replacement: 手順 8、 1の画像 1
    • Lift and remove the frame.

  9. Blackberry Curve 9300 Speaker Replacement: 手順 9、 1の画像 1
    • Lift and remove the keyboard.

  10. Blackberry Curve 9300 Speaker Replacement, Speaker: 手順 10、 1の画像 1
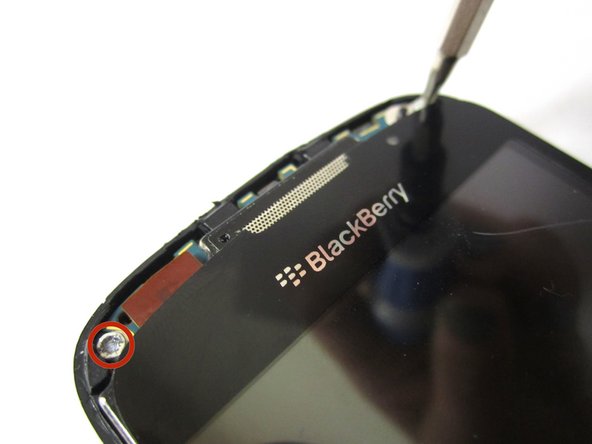
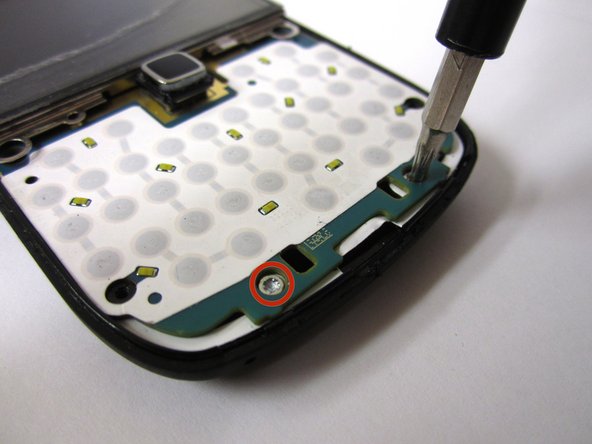
    • Locate and remove the two 5mm screws on top of the keyboard base with a T6 Torx screwdriver.

  11. Blackberry Curve 9300 Speaker Replacement: 手順 11、 1の画像 1
    • Carefully pull keyboard base up and away from phone.

    • Disconnect keyboard base from phone completely.

  12. Blackberry Curve 9300 Speaker Replacement: 手順 12、 3の画像 1 Blackberry Curve 9300 Speaker Replacement: 手順 12、 3の画像 2 Blackberry Curve 9300 Speaker Replacement: 手順 12、 3の画像 3
    • Remove the four 5mm screws on the top and bottom of phone with a T6 Torx screwdriver

  13. Blackberry Curve 9300 Speaker Replacement: 手順 13、 2の画像 1 Blackberry Curve 9300 Speaker Replacement: 手順 13、 2の画像 2
    • Using a prying tool, find the crease below the screen.

    • Insert where shown and use the tool to unclip the two sides of screen from body.

    • Prying tool goes approximately midway between the top and bottom edge of the screen.

  14. Blackberry Curve 9300 Speaker Replacement: 手順 14、 2の画像 1 Blackberry Curve 9300 Speaker Replacement: 手順 14、 2の画像 2
    • From the back of the phone, use your finger to push the front piece of the phone away from the back piece.

  15. Blackberry Curve 9300 Speaker Replacement: 手順 15、 1の画像 1
    • Insert tweezers into the small holes on the top of the speaker.

  16. Blackberry Curve 9300 Speaker Replacement: 手順 16、 2の画像 1 Blackberry Curve 9300 Speaker Replacement: 手順 16、 2の画像 2
    • Lift the speaker up to remove the speaker from phone.

終わりに

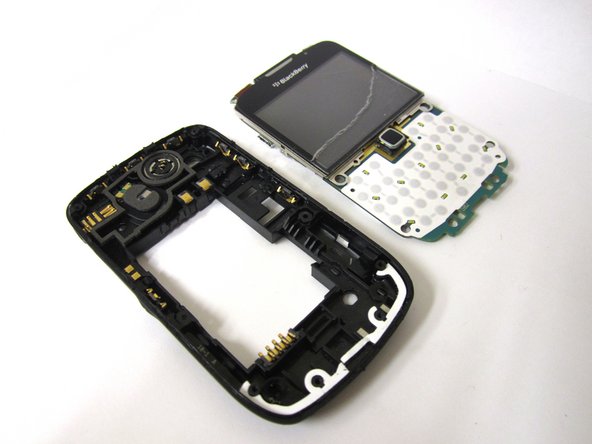
To reassemble your device, follow these instructions in reverse order.

6 の人々がこのガイドを完成させました。

作成者

6人の作成者と共同で作成されました。

Alek Squires

メンバー登録日: 09/30/13

431 ポイント

2のガイドは作成済み

チーム

Cal Poly, Team 14-7, Forte Fall 2013 Cal Poly, Team 14-7, Forte Fall 2013人のメンバー

CPSU-FORTE-F13S14G7

5 メンバー

5のガイドは作成済み

0 件のコメント

コメントを追加

統計データ:

過去 24時間: 0

過去 7 日: 2

過去 30 日: 5

今までの合計 4,134