メインコンテンツにスキップ

Blackberry Bold 9900 Screen Replacement

必要な工具と部品

  1. Blackberry Bold 9900 Screen Replacement, Battery: 手順 1、 1の画像 1
    • Place phone screen down.

    • Use your finger to life upward on the battery case.

    • Pull the cover away from the battery.

  2. Blackberry Bold 9900 Screen Replacement: 手順 2、 1の画像 1
    • Lift the edge of battery with the green stripe upward to remove battery.

  3. Blackberry Bold 9900 Screen Replacement, Mini-SIM removal: 手順 3、 1の画像 1
    • The Mini-SIM card is located inside the red rectangle.

    • To remove the Mini-SIM Card, push and slide the card inward towards the top of the phone. It will be ejected.

  4. Blackberry Bold 9900 Screen Replacement, MicroSD card: 手順 4、 2の画像 1 Blackberry Bold 9900 Screen Replacement, MicroSD card: 手順 4、 2の画像 2
    • The MicroSD card is located where the red rectangle is shown.

    • To remove MicroSD card, push the card inward towards the top of the phone then release. The MicroSD card will be ejected.

  5. Blackberry Bold 9900 Screen Replacement, Keyboard: 手順 5、 2の画像 1 Blackberry Bold 9900 Screen Replacement, Keyboard: 手順 5、 2の画像 2
    • Lift the bezel at the bottom of the phone up and peel it away from the phone.

  6. Blackberry Bold 9900 Screen Replacement: 手順 6、 2の画像 1 Blackberry Bold 9900 Screen Replacement: 手順 6、 2の画像 2
    • Remove the two exposed screws using the T5 Torx screwdriver.

  7. Blackberry Bold 9900 Screen Replacement: 手順 7、 1の画像 1
    • Now lever the keyboard up using the screwdriver in the indicated hole.

  8. Blackberry Bold 9900 Screen Replacement: 手順 8、 2の画像 1 Blackberry Bold 9900 Screen Replacement: 手順 8、 2の画像 2
    • The keyboard is attached via a ribbon cable. Pull the cable up to remove the keyboard.

  9. Blackberry Bold 9900 Screen Replacement, Back Case: 手順 9、 1の画像 1
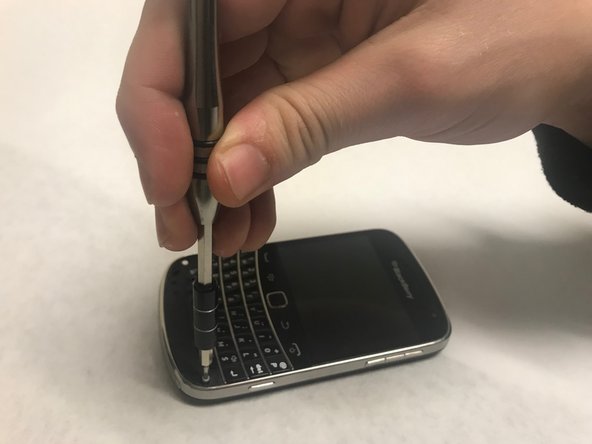
    • Using the T5 Torx Screwdriver, remove the four torx screws that are located on the bottom half of the device

  10. Blackberry Bold 9900 Screen Replacement: 手順 10、 1の画像 1
    • Now, carefully and gently using your fingers, lift and remove the assembly from the back case.

  11. Blackberry Bold 9900 Screen Replacement, Power/Volume Button: 手順 11、 3の画像 1 Blackberry Bold 9900 Screen Replacement, Power/Volume Button: 手順 11、 3の画像 2 Blackberry Bold 9900 Screen Replacement, Power/Volume Button: 手順 11、 3の画像 3
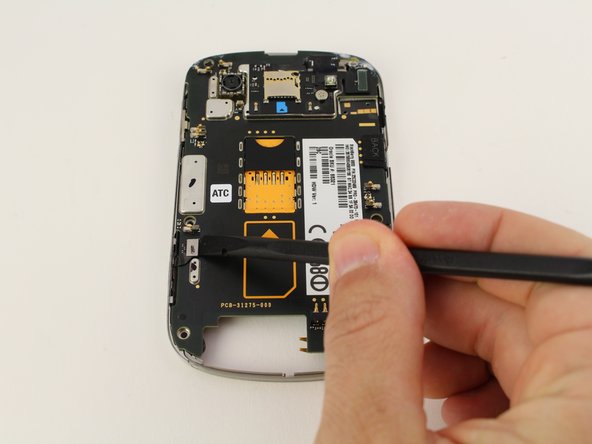
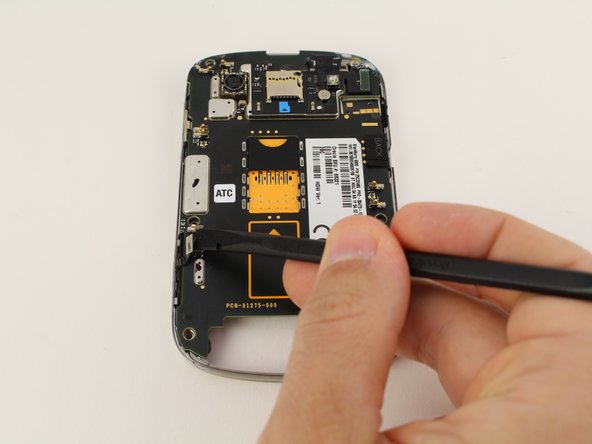
    • Use the black nylon spudger to pop the press fit connector up from the lower left corner of the motherboard.

  12. Blackberry Bold 9900 Screen Replacement: 手順 12、 1の画像 1
    • Lift the midframe, which contains the power/volume buttons, off of the motherboard and screen.

  13. Blackberry Bold 9900 Screen Replacement, Screen: 手順 13、 3の画像 1 Blackberry Bold 9900 Screen Replacement, Screen: 手順 13、 3の画像 2 Blackberry Bold 9900 Screen Replacement, Screen: 手順 13、 3の画像 3
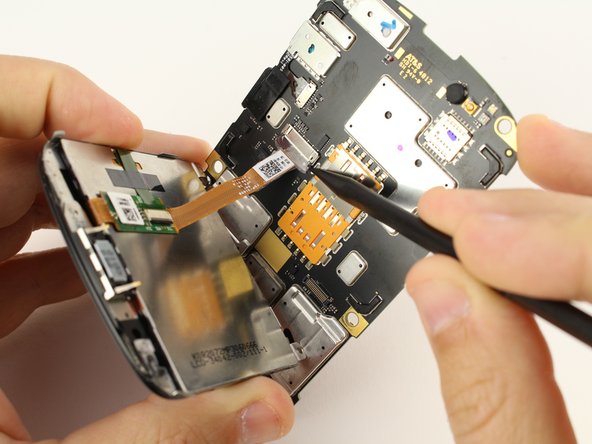
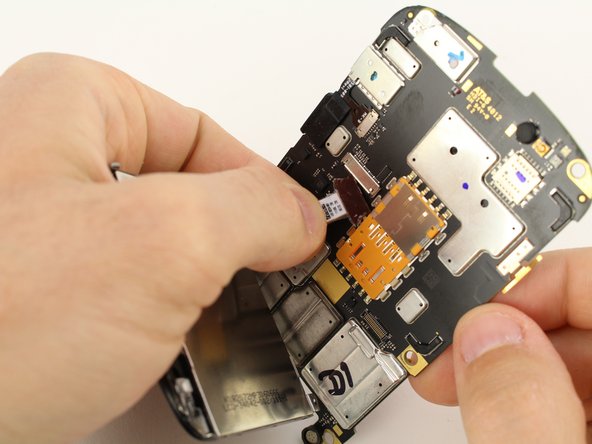
    • Using a spudger, gently remove the display cable out from the motherboard.

    • When it seems it has become loose enough, remove it by pinching the ribbon firmly with your fingers and gently sliding it the rest of the way out.

  14. Blackberry Bold 9900 Screen Replacement: 手順 14、 1の画像 1
    • Remove the screen from the motherboard.

終わりに

To reassemble your device, follow these instructions in reverse order.

ある他の人がこのガイドを完成しました。

作成者

1人の作成者と共同作成されました。

Austin Blakely

メンバー登録日: 03/11/19

19,506 ポイント

53のガイドは作成済み

チーム

iFixit iFixit人のメンバー

Staff

135 メンバー

16,817のガイドは作成済み

0 件のコメント

コメントを追加

統計データ:

過去 24時間: 0

過去 7 日: 9

過去 30 日: 22

今までの合計 1,181