メインコンテンツにスキップ

BlackBerry Storm LCD/Digitizer Replacement

必要な工具と部品

  1. BlackBerry Storm LCD/Digitizer Replacement, LCD/Digitizer: 手順 1、 1の画像 1
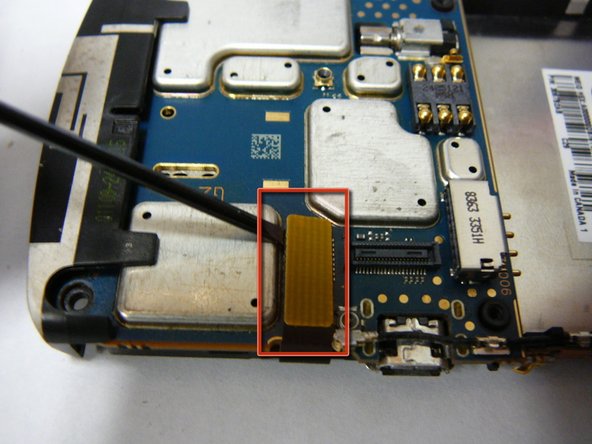
    • Turn your Blackberry Storm 9500 onto its back side, and remove the battery door & battery.

  2. BlackBerry Storm LCD/Digitizer Replacement: 手順 2、 1の画像 1
    • Remove the 2 screws (T6) under the battery compartment they are located as shown in red.

  3. BlackBerry Storm LCD/Digitizer Replacement: 手順 3、 1の画像 1
    • Turn the Blackberry Storm 9500 around and pry off the microphone cover at the top using a safe pry tool.

  4. BlackBerry Storm LCD/Digitizer Replacement: 手順 4、 1の画像 1
    • Remove the two screws(T6) as shown.

  5. BlackBerry Storm LCD/Digitizer Replacement: 手順 5、 1の画像 1
    • Flip it back over to the back of the phone, and remove the plastic lens on top of the camera & flash. This is held in place by some adhesive, so use a safe pry tool to remove as shown.

  6. BlackBerry Storm LCD/Digitizer Replacement: 手順 6、 1の画像 1
    • Once the plastic piece is removed, unscrew the two torx screws underneath it.

  7. BlackBerry Storm LCD/Digitizer Replacement: 手順 7、 3の画像 1 BlackBerry Storm LCD/Digitizer Replacement: 手順 7、 3の画像 2 BlackBerry Storm LCD/Digitizer Replacement: 手順 7、 3の画像 3
    • Now use a safe pry tool, and go along the edges of the phone to release the clips to open the housing. There are a total of 6 clips, 3 on each side.

    • There is a small cap connection that connects the antenna to the logic board as pictured.

  8. BlackBerry Storm LCD/Digitizer Replacement: 手順 8、 1の画像 1
    • Once you have worked you way all the way around the device with the safe pry tool you can now separate the two pieces of the housing.

    • *Be sure to remove the antenna cable in the top portion of the housing. You will need to reattach this when you repair the phone*

  9. BlackBerry Storm LCD/Digitizer Replacement: 手順 9、 1の画像 1
    • Now remove the logic board & LCD assembly from the rear housing. Be gentle, and do not use excessive force.

  10. BlackBerry Storm LCD/Digitizer Replacement: 手順 10、 2の画像 1 BlackBerry Storm LCD/Digitizer Replacement: 手順 10、 2の画像 2
    • Flip the logicboard around so that it is sitting on top of the screen, now remove the two ribbon cables for the LCD & Digitizer.

  11. BlackBerry Storm LCD/Digitizer Replacement: 手順 11、 1の画像 1
    • Put your broken assembly to the side, and now install your new one following the past steps in reverse.

    • Before ordering your new part, check the number on your existing LCD, it will either be V.014 or V.024. (Shown in blue)

終わりに

To reassemble your device, follow these instructions in reverse order.

13 の人々がこのガイドを完成させました。

作成者

2人の作成者と共同で作成されました。

Josh Forester

メンバー登録日: 11/28/10

2,497 ポイント

10のガイドは作成済み

0 件のコメント

コメントを追加

統計データ:

過去 24時間: 2

過去 7 日: 3

過去 30 日: 4

今までの合計 21,095