メインコンテンツにスキップ

この修理ガイドは変更されています。最新の未承認バージョンに切り替えます。

BlackBerry Pearl 8100 Disassembly

必要な工具と部品

  1. BlackBerry Pearl 8100 Disassembly, Rear Cover: 手順 1、 1の画像 1
    • Push the button indicated by the yellow marker to remove the rear cover.

    • Remove the battery (not pictured).

  2. BlackBerry Pearl 8100 Disassembly, Screws underneath the rear cover: 手順 2、 1の画像 1
    • Use a T6 Torx screwdriver to remove the two screws indicated by the yellow markers.

  3. BlackBerry Pearl 8100 Disassembly, Bottom Cover: 手順 3、 2の画像 1 BlackBerry Pearl 8100 Disassembly, Bottom Cover: 手順 3、 2の画像 2
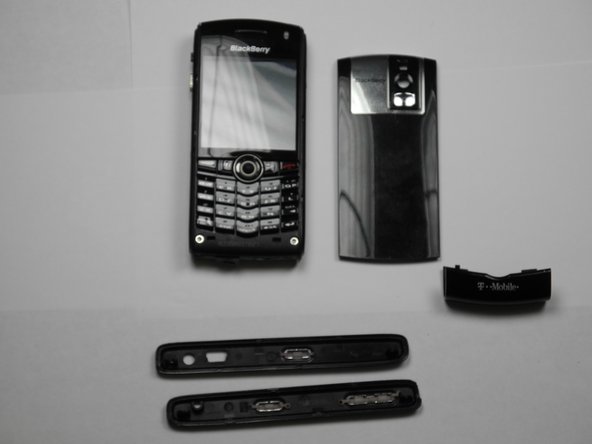
    • Use the plastic opening tool to loosen the bottom cover, and then remove the bottom cover from the cellphone.

  4. BlackBerry Pearl 8100 Disassembly, Side Cover: 手順 4、 2の画像 1 BlackBerry Pearl 8100 Disassembly, Side Cover: 手順 4、 2の画像 2
    • Use the plastic opening tool to remove the side covers.

    • The side covers are attached to the cell phone with small plastic snaps. These snaps can be bent or broken easily.

  5. BlackBerry Pearl 8100 Disassembly, More screws: 手順 5、 1の画像 1
    • With the bottom and side covers removed, the two screws indicated by yellow markers will be visible.

    • Use the T6 Torx screwdriver to remove the screws.

  6. BlackBerry Pearl 8100 Disassembly, Frame: 手順 6、 2の画像 1 BlackBerry Pearl 8100 Disassembly, Frame: 手順 6、 2の画像 2
    • With the screws removed, the frame can be detached.

  7. BlackBerry Pearl 8100 Disassembly, Logic Board: 手順 7、 2の画像 1 BlackBerry Pearl 8100 Disassembly, Logic Board: 手順 7、 2の画像 2
    • Use the plastic opening tool to separate the motherboard from the front cover.

    • While removing the motherboard, the button that opens the rear cover may come loose along with a small spring. Do not lose these.

  8. BlackBerry Pearl 8100 Disassembly, Keypad and Trackball: 手順 8、 2の画像 1 BlackBerry Pearl 8100 Disassembly, Keypad and Trackball: 手順 8、 2の画像 2
    • Separate the keypad (first picture) and trackball (second picture) from the front cover.

    • Lift the piece of plastic that overlays the trackball (second picture). The trackball should then come loose.

    • Keep the trackball intact. The trackball has extremely small magnetic bolts underneath that are difficult to reassemble.

  9. BlackBerry Pearl 8100 Disassembly, Complete: 手順 9、 1の画像 1
    • These are all the parts of the BlackBerry Pearl 8100 completely disassembled. From left to right, the parts are as follows: rear cover, front cover, motherboard, side covers, trackball, keypad, bottom cover, and frame.

終わりに

To reassemble your device, follow these instructions in reverse order.

ある他の人がこのガイドを完成しました。

作成者

6人の作成者と共同で作成されました。

Justin

メンバー登録日: 10/06/14

150 ポイント

2のガイドは作成済み

チーム

Aristotle Aristotle人のメンバー

Community

5 メンバー

3のガイドは作成済み

0 件のコメント

コメントを追加

統計データ:

過去 24時間: 2

過去 7 日: 3

過去 30 日: 6

今までの合計 651