メインコンテンツにスキップ

BlackBerry Curve 8310 LCD Screen Replacement

必要な工具と部品

  1. BlackBerry Curve 8310 LCD Screen Replacement, Battery: 手順 1、 1の画像 1
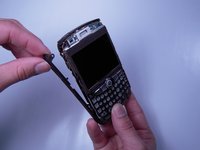
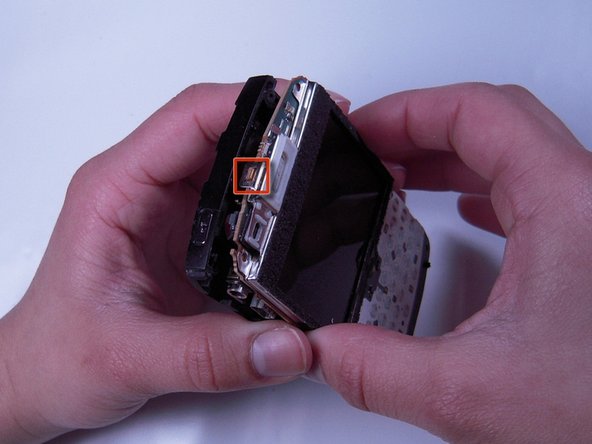
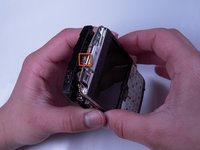
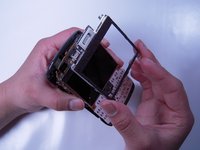
    • Press down on the battery release button and slide the back cover up with your thumb.

  2. BlackBerry Curve 8310 LCD Screen Replacement: 手順 2、 1の画像 1
    • Pry from the top of the battery to pull it out.

  3. BlackBerry Curve 8310 LCD Screen Replacement, Lens: 手順 3、 1の画像 1
    • Slide the metal sim card cover to the unlock position.

    • Remove the sim card.

    • The arrows on the sim card enclosure indicate the lock and unlock positions.

  4. BlackBerry Curve 8310 LCD Screen Replacement: 手順 4、 1の画像 1
    • Remove the two T5 Torx screws circled at the top of the phone.

    • The T5 Torx screws may be covered by a white sticker.

  5. BlackBerry Curve 8310 LCD Screen Replacement: 手順 5、 1の画像 1
    • Remove the red cover at the bottom of the phone.

    • You may have to work a spudger underneath to release the plastic clips.

  6. BlackBerry Curve 8310 LCD Screen Replacement: 手順 6、 3の画像 1 BlackBerry Curve 8310 LCD Screen Replacement: 手順 6、 3の画像 2 BlackBerry Curve 8310 LCD Screen Replacement: 手順 6、 3の画像 3
    • Be careful not to damage the front cover's plastic clips while trying to separate it from the phone.

    • Use a spudger to pry the front cover away from the side panels.

    • Work the spudger around the entire phone until the front cover is free.

  7. BlackBerry Curve 8310 LCD Screen Replacement, Keyboard: 手順 7、 1の画像 1
    • Remove the keyboard.

  8. BlackBerry Curve 8310 LCD Screen Replacement, Screen Housing: 手順 8、 1の画像 1
    • Remove the four T6 Torx screws located on the corners of the keyboard frame.

  9. BlackBerry Curve 8310 LCD Screen Replacement: 手順 9、 2の画像 1 BlackBerry Curve 8310 LCD Screen Replacement: 手順 9、 2の画像 2
    • Now remove the left and right side panels.

  10. BlackBerry Curve 8310 LCD Screen Replacement: 手順 10、 3の画像 1 BlackBerry Curve 8310 LCD Screen Replacement: 手順 10、 3の画像 2 BlackBerry Curve 8310 LCD Screen Replacement: 手順 10、 3の画像 3
    • Remove the keyboard frame.

    • Be sure to unhook the screen housing from the motherboard before continuing. Refer to the square indicated in the second picture.

    • Now remove the screen housing.

  11. BlackBerry Curve 8310 LCD Screen Replacement, LCD Screen: 手順 11、 1の画像 1
    • Unplug the ribbon cable from the board.

    • The ribbon cable is located at the top left of the phone above the screen.

  12. BlackBerry Curve 8310 LCD Screen Replacement: 手順 12、 1の画像 1
    • Insert tool between LCD screen and board.

    • Pry LCD screen from board.

終わりに

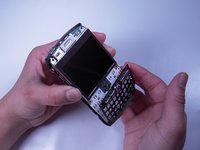
To reassemble your device, follow these instructions in reverse order.

4 の人々がこのガイドを完成させました。

作成者

5人の作成者と共同で作成されました。

Mandy Chan

メンバー登録日: 01/20/12

91 ポイント

2のガイドは作成済み

チーム

Cal Poly, Team 10-32, Amido Winter 2012 Cal Poly, Team 10-32, Amido Winter 2012人のメンバー

CPSU-AMIDO-W12S10G32

4 メンバー

8のガイドは作成済み

0 件のコメント

コメントを追加

統計データ:

過去 24時間: 0

過去 7 日: 4

過去 30 日: 17

今までの合計 1,769