メインコンテンツにスキップ
リペアコミュニティに参加 - アカウントの作成

BlackBerry 7290 Side Button Replacement

必要な工具と部品

    1. BlackBerry 7290 Side Button Replacement, Battery: 手順 1、 3の画像 1 BlackBerry 7290 Side Button Replacement, Battery: 手順 1、 3の画像 2 BlackBerry 7290 Side Button Replacement, Battery: 手順 1、 3の画像 3
      • Apply pressure to the lock button on the back of the device.

      • Slide the battery cover down towards the bottom of the device, revealing the battery compartment.

      FixBotに聞いてみる

      コメントを追加

    2. BlackBerry 7290 Side Button Replacement: 手順 2、 3の画像 1 BlackBerry 7290 Side Button Replacement: 手順 2、 3の画像 2 BlackBerry 7290 Side Button Replacement: 手順 2、 3の画像 3
      • Locate groove along the right side of the battery compartment.

      • Remove battery by prying between the battery and the groove.

      FixBotに聞いてみる

      コメントを追加

    1. BlackBerry 7290 Side Button Replacement, SIM Card: 手順 3、 1の画像 1
      • Slide the SIM card holder to the left to unlock the SIM card.

      FixBotに聞いてみる

      コメントを追加

    2. BlackBerry 7290 Side Button Replacement: 手順 4、 2の画像 1 BlackBerry 7290 Side Button Replacement: 手順 4、 2の画像 2
      • Lift the SIM card holder up.

      • Gently remove the SIM card from the SIM card holder by sliding the card along the railing.

      FixBotに聞いてみる

      コメントを追加

    1. BlackBerry 7290 Side Button Replacement, Side Button: 手順 5、 1の画像 1
      • Locate the four screws along the perimeter of the back casing.

      • Remove the four top screws using a T-6 torx screwdriver.

      • The top four screws are .413 inches.

      FixBotに聞いてみる

      コメントを追加

    2. BlackBerry 7290 Side Button Replacement: 手順 6、 2の画像 1 BlackBerry 7290 Side Button Replacement: 手順 6、 2の画像 2
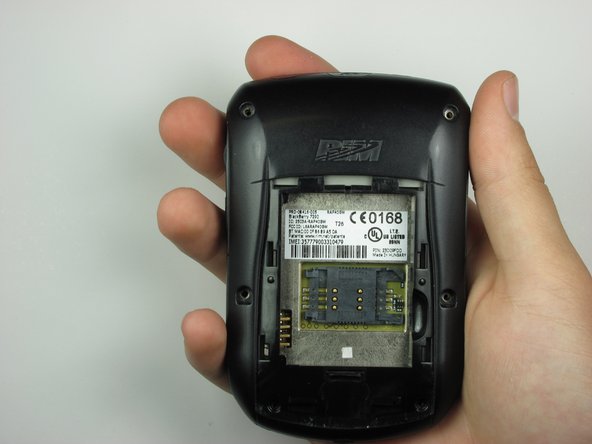
      • Locate two screws within the lower edge of the inner compartment.

      • Remove the two bottom screws using a T-6 torx screwdriver.

      • The bottom two screws are .2 inches in length.

      • The second picture displays the device after the six screws have been removed.

      FixBotに聞いてみる

      コメントを追加

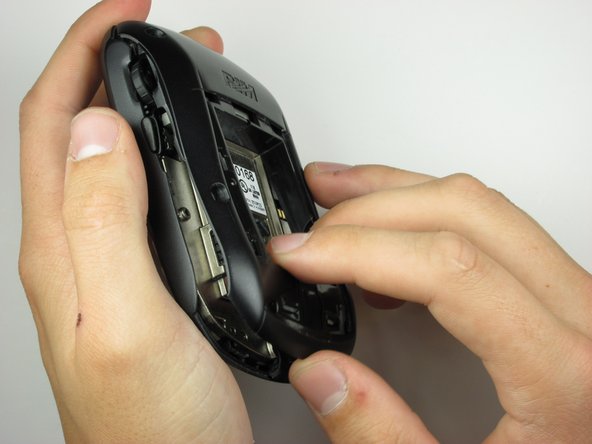
    3. BlackBerry 7290 Side Button Replacement: 手順 7、 1の画像 1
      • Use the plastic opening tool to apply pressure on the two clips that are located at the bottom of the phone.

      FixBotに聞いてみる

      コメントを追加

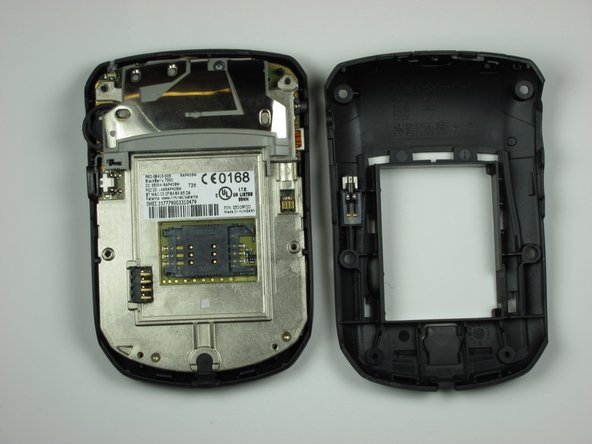
    4. BlackBerry 7290 Side Button Replacement: 手順 8、 3の画像 1 BlackBerry 7290 Side Button Replacement: 手順 8、 3の画像 2 BlackBerry 7290 Side Button Replacement: 手順 8、 3の画像 3
      • Remove the back casing from the phone by lifting the unhooked portion, then slide the casing towards the top of the device.

      • Make sure all clips holding the case together are unhooked, so no damage is caused to the case.

      FixBotに聞いてみる

      コメントを追加

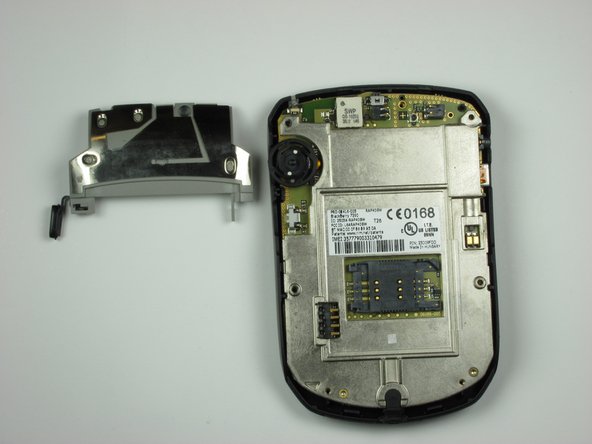
    5. BlackBerry 7290 Side Button Replacement: 手順 9、 2の画像 1 BlackBerry 7290 Side Button Replacement: 手順 9、 2の画像 2
      • Locate on the backside of the phone, a screw towards the top of the device.

      • Using a T-6 screwdriver, remove the screw.

      • After the screw has been removed, carefully lift the side button brace to reveal the side button.

      FixBotに聞いてみる

      コメントを追加

終わりに

To reassemble your device, follow these instructions in reverse order.

キャンセル: このガイドを終了できませんでした。

作成者

13人の作成者と共同で作成されました。

Jschutt

メンバー登録日: 11/05/09

79 ポイント

1ガイドが承認済み

チーム

Cal Poly, Team 19-6, Maness Fall 2009 Cal Poly, Team 19-6, Maness Fall 2009人のメンバー

CPSU-MANESS-F09S19G6

5 メンバー

84のガイドは作成済み

0件のガイドコメント

コメントを追加

統計データ:

過去 24時間: 0

過去 7 日: 6

過去 30 日: 32

今までの合計 4,265