メインコンテンツにスキップ

Black and Decker Dustbuster CHV1510 Battery Pack Replacement

必要な工具と部品

  1. Black and Decker Dustbuster CHV1510 Battery Pack Replacement, Battery Pack: 手順 1、 2の画像 1 Black and Decker Dustbuster CHV1510 Battery Pack Replacement, Battery Pack: 手順 1、 2の画像 2
    • Remove the six exterior 2 mm Phillips #0 screws securing the 2 halves of the white shell together.

  2. Black and Decker Dustbuster CHV1510 Battery Pack Replacement: 手順 2、 2の画像 1 Black and Decker Dustbuster CHV1510 Battery Pack Replacement: 手順 2、 2の画像 2
    • Remove nozzle by pressing two blue buttons on the side of the nozzle

  3. Black and Decker Dustbuster CHV1510 Battery Pack Replacement: 手順 3、 2の画像 1 Black and Decker Dustbuster CHV1510 Battery Pack Replacement: 手順 3、 2の画像 2
    • Remove the dustbin by pressing the blue button on the vacuum's handle and lift the bin from the vacuum.

  4. Black and Decker Dustbuster CHV1510 Battery Pack Replacement: 手順 4、 3の画像 1 Black and Decker Dustbuster CHV1510 Battery Pack Replacement: 手順 4、 3の画像 2 Black and Decker Dustbuster CHV1510 Battery Pack Replacement: 手順 4、 3の画像 3
    • Gently separate the two halves by pulling them apart, revealing the 14 cell battery pack behind the motor.

  5. Black and Decker Dustbuster CHV1510 Battery Pack Replacement: 手順 5、 2の画像 1 Black and Decker Dustbuster CHV1510 Battery Pack Replacement: 手順 5、 2の画像 2
    • Removal of the battery pack is a tool-less process, lift the battery pack out of the vacuum gently, notice there are two wires connected to the battery.

  6. Black and Decker Dustbuster CHV1510 Battery Pack Replacement: 手順 6、 2の画像 1 Black and Decker Dustbuster CHV1510 Battery Pack Replacement: 手順 6、 2の画像 2
    • Disconnect the red wire from the battery pack (pull do not twist!) and do the same with the black wire

  7. Black and Decker Dustbuster CHV1510 Battery Pack Replacement, Battery Pack: 手順 7、 3の画像 1 Black and Decker Dustbuster CHV1510 Battery Pack Replacement, Battery Pack: 手順 7、 3の画像 2 Black and Decker Dustbuster CHV1510 Battery Pack Replacement, Battery Pack: 手順 7、 3の画像 3
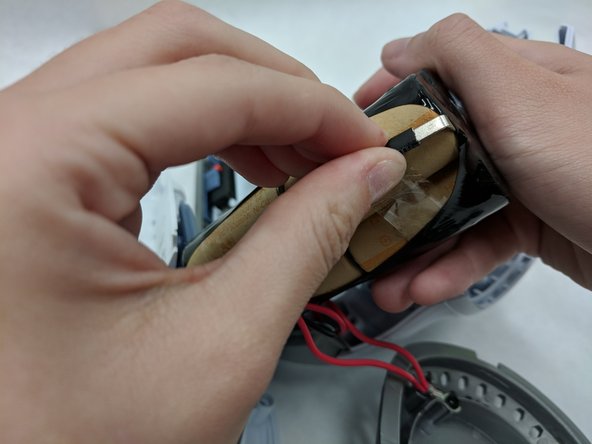
    • Holding the battery pack firmly, disconnect the red and black wires from the battery pack by pulling them gently.

終わりに

To reassemble your device, follow these instructions in reverse order.

2 の人々がこのガイドを完成させました。

作成者

2人の作成者と共同で作成されました。

Miguel Vilao

メンバー登録日: 11/09/17

376 ポイント

3のガイドは作成済み

チーム

IUPUI, Team S7-G6, Baechle Fall 2017 IUPUI, Team S7-G6, Baechle Fall 2017人のメンバー

IUPUI-BAECHLE-F17S7G6

3 メンバー

3のガイドは作成済み

コメント 1 件

The battery pack in no longer available and the 14 cells would cost more than a brand new dustbuster (Feb 25, 2021). I managed to get almost 10-years out of my CHV1510.

glenn.watkins - 返信

コメントを追加

統計データ:

過去 24時間: 0

過去 7 日: 7

過去 30 日: 31

今までの合計 4,101