メインコンテンツにスキップ

Bissell SpotClean ProHeat 5207U Spraying Mechanism Replacement

必要な工具と部品

  1. Bissell SpotClean ProHeat 5207U Spraying Mechanism Replacement, Spraying Mechanism: 手順 1、 3の画像 1 Bissell SpotClean ProHeat 5207U Spraying Mechanism Replacement, Spraying Mechanism: 手順 1、 3の画像 2 Bissell SpotClean ProHeat 5207U Spraying Mechanism Replacement, Spraying Mechanism: 手順 1、 3の画像 3
    • Place the brush in front of you and make sure that the brushes are rotated towards the ceiling.

    • Separate the brush from the hose by pressing the lever.

  2. Bissell SpotClean ProHeat 5207U Spraying Mechanism Replacement: 手順 2、 3の画像 1 Bissell SpotClean ProHeat 5207U Spraying Mechanism Replacement: 手順 2、 3の画像 2 Bissell SpotClean ProHeat 5207U Spraying Mechanism Replacement: 手順 2、 3の画像 3
    • Using a Phillips screwdriver, unscrew the two 12.8 mm screws on the lever cap.

    • Remove the cap on top of the spring mechanism.

  3. Bissell SpotClean ProHeat 5207U Spraying Mechanism Replacement: 手順 3、 3の画像 1 Bissell SpotClean ProHeat 5207U Spraying Mechanism Replacement: 手順 3、 3の画像 2 Bissell SpotClean ProHeat 5207U Spraying Mechanism Replacement: 手順 3、 3の画像 3
    • Grab the spraying mechanism and separate it from the lever by pulling it back.

    • Rotate the spraying mechanism clockwise to fully separate it.

  4. Bissell SpotClean ProHeat 5207U Spraying Mechanism Replacement: 手順 4、 3の画像 1 Bissell SpotClean ProHeat 5207U Spraying Mechanism Replacement: 手順 4、 3の画像 2 Bissell SpotClean ProHeat 5207U Spraying Mechanism Replacement: 手順 4、 3の画像 3
    • Grab the spring mechanism and pull back to fully loosen it.

  5. Bissell SpotClean ProHeat 5207U Spraying Mechanism Replacement: 手順 5、 3の画像 1 Bissell SpotClean ProHeat 5207U Spraying Mechanism Replacement: 手順 5、 3の画像 2 Bissell SpotClean ProHeat 5207U Spraying Mechanism Replacement: 手順 5、 3の画像 3
    この手順で使用する道具:
    Tweezers
    $4.99
    購入する
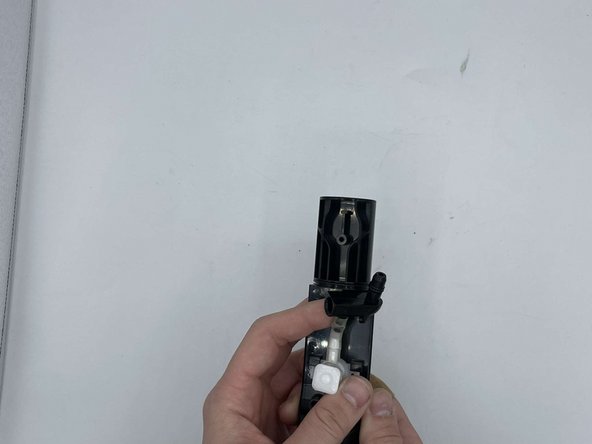
    • Using tweezers, squeeze the hose clamp prongs together to loosen it.

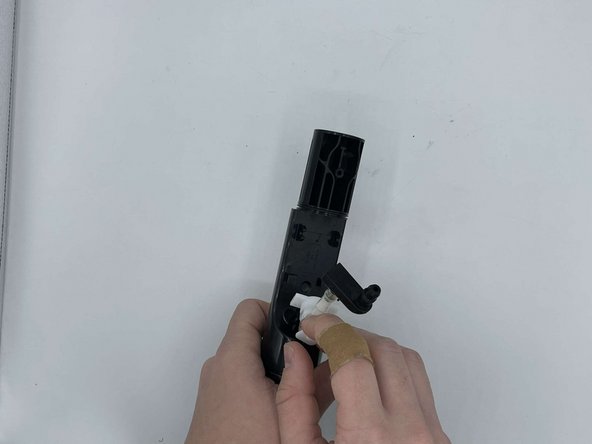
    • As you are squeezing the hose clamp prongs, pull the spraying mechanism out to remove it.

    • Once the spraying mechanism is removed, and squeeze the clamp prongs again and install the new mechanism.

終わりに

To reassemble your device, follow these instructions in reverse order.

2 の人々がこのガイドを完成させました。

作成者

5人の作成者と共同で作成されました。

Zachary Chandler

メンバー登録日: 09/13/23

369 ポイント

2のガイドは作成済み

チーム

University of North Texas, Team 6-4, Kilpatrick Fall 2023 University of North Texas, Team 6-4, Kilpatrick Fall 2023人のメンバー

UNT-KILPATRICK-F23S6G4

4 メンバー

5のガイドは作成済み

0 件のコメント

コメントを追加

統計データ:

過去 24時間: 0

過去 7 日: 0

過去 30 日: 3

今までの合計 59