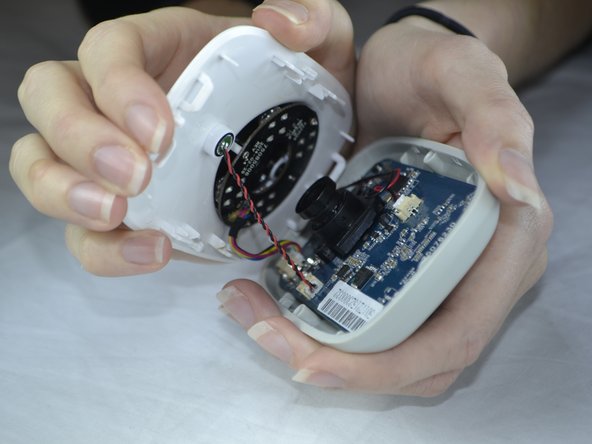
メインコンテンツにスキップ

Belkin NetCam HD Plus Front Casing Replacement

必要な工具と部品

  1. Belkin NetCam HD Plus Front Casing Replacement, Case: 手順 1、 1の画像 1
    • Use a wrench to loosen up the stand from the back in order to hold the NetCam more comfortably.

  2. Belkin NetCam HD Plus Front Casing Replacement: 手順 2、 1の画像 1
    • Work a plastic opening tool into the seam and pry the face plate away from the back panel.

  3. Belkin NetCam HD Plus Front Casing Replacement: 手順 3、 2の画像 1 Belkin NetCam HD Plus Front Casing Replacement: 手順 3、 2の画像 2
    • Use pressure to separate the covers.

    • When pulling the device apart, separate from the bottom up in order to avoid pulling the wiring at the top apart.

  4. Belkin NetCam HD Plus Front Casing Replacement, Microphone: 手順 4、 2の画像 1 Belkin NetCam HD Plus Front Casing Replacement, Microphone: 手順 4、 2の画像 2
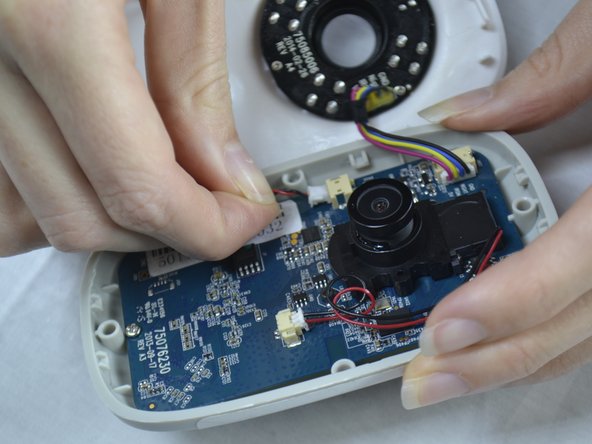
    • Use tweezers to gently pull out the white attachment from the port.

    • Use your fingers to pull out the white attachment from the tan port on the front of the board a little.

  5. Belkin NetCam HD Plus Front Casing Replacement: 手順 5、 2の画像 1 Belkin NetCam HD Plus Front Casing Replacement: 手順 5、 2の画像 2
    • Use a pair of tweezers to wedge between the mic and the rubber guard to remove the mic from the front cover.

    • If the rubber guard comes off with the mic just remove the guard from mic and place back on the front cover.

  6. Belkin NetCam HD Plus Front Casing Replacement, Front Casing: 手順 6、 1の画像 1
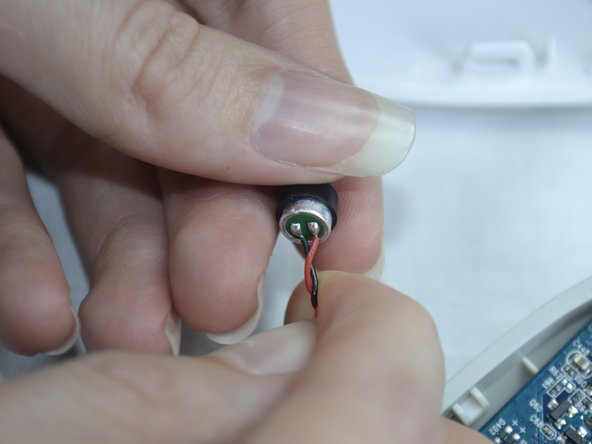
    • Carefully use your fingers to gently pull out the white attachment from the tan colored part.

終わりに

To reassemble your device, follow these instructions in reverse order.

作成者

2人の作成者と共同で作成されました。

Destinie DiazVerdejo

メンバー登録日: 10/04/16

805 ポイント

7のガイドは作成済み

チーム

USF Tampa, Team 3-5, Sullivan Fall 2016 USF Tampa, Team 3-5, Sullivan Fall 2016人のメンバー

USFT-SULLIVAN-F16S3G5

4 メンバー

14のガイドは作成済み

0 件のコメント

コメントを追加

統計データ:

過去 24時間: 0

過去 7 日: 1

過去 30 日: 3

今までの合計 281