メインコンテンツにスキップ

Beboncool Gamepad for Nintendo Switch Action Button Replacement

必要な工具と部品

  1. Beboncool Gamepad for Nintendo Switch Action Button Replacement, Beboncool Nintendo Switch Gamepad Disassembly: 手順 1、 3の画像 1 Beboncool Gamepad for Nintendo Switch Action Button Replacement, Beboncool Nintendo Switch Gamepad Disassembly: 手順 1、 3の画像 2 Beboncool Gamepad for Nintendo Switch Action Button Replacement, Beboncool Nintendo Switch Gamepad Disassembly: 手順 1、 3の画像 3
    • Use the plastic opening tool to remove the blue plastic grips from the sides of the controller.

  2. Beboncool Gamepad for Nintendo Switch Action Button Replacement: 手順 2、 2の画像 1 Beboncool Gamepad for Nintendo Switch Action Button Replacement: 手順 2、 2の画像 2
    • Use the Phillips #0 screwdriver to remove the seven 5mm screws from the back of the controller.

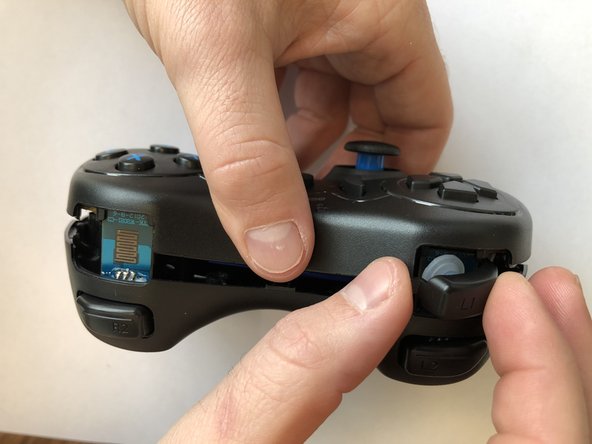
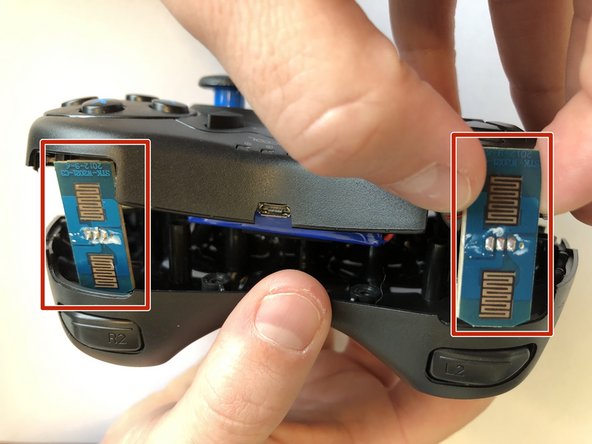
  3. Beboncool Gamepad for Nintendo Switch Action Button Replacement: 手順 3、 3の画像 1 Beboncool Gamepad for Nintendo Switch Action Button Replacement: 手順 3、 3の画像 2 Beboncool Gamepad for Nintendo Switch Action Button Replacement: 手順 3、 3の画像 3
    • Gently separate the two halves of the controller.

    • As the two covers come apart the L1 and R1 button, will fall free from the controller. Be sure not to lose them if they should pop out and fall.

    • Be sure to slide the small circuit boards out of the covers to be able to separate the two halves

  4. Beboncool Gamepad for Nintendo Switch Action Button Replacement: 手順 4、 2の画像 1 Beboncool Gamepad for Nintendo Switch Action Button Replacement: 手順 4、 2の画像 2
    • Use the Phillips #0 screwdriver to remove the two 3.5mm screws holding the circuit board in place.

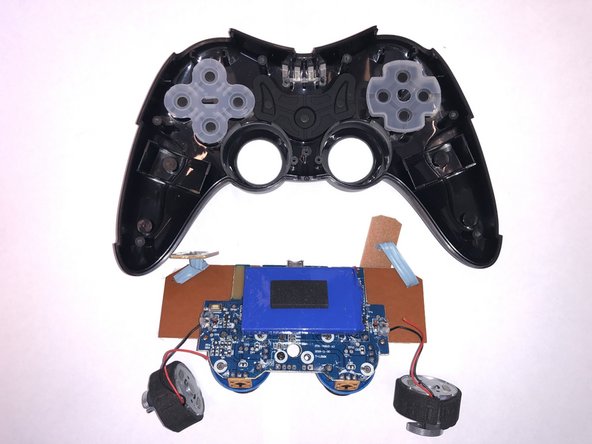
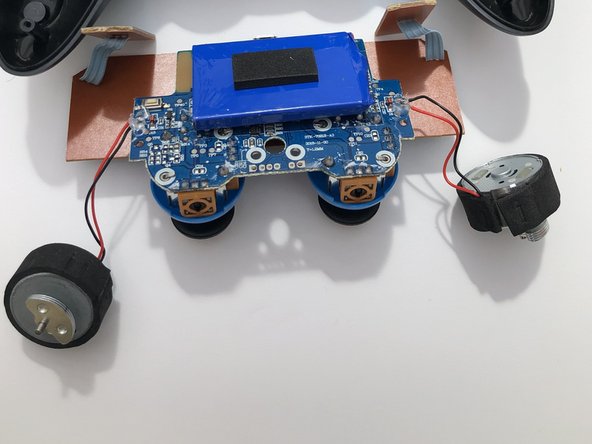
  5. Beboncool Gamepad for Nintendo Switch Action Button Replacement: 手順 5、 3の画像 1 Beboncool Gamepad for Nintendo Switch Action Button Replacement: 手順 5、 3の画像 2 Beboncool Gamepad for Nintendo Switch Action Button Replacement: 手順 5、 3の画像 3
    • Lift the motherboard from the back case with the vibration motors and button boards attached.

  6. Beboncool Gamepad for Nintendo Switch Action Button Replacement, Action Button: 手順 6、 3の画像 1 Beboncool Gamepad for Nintendo Switch Action Button Replacement, Action Button: 手順 6、 3の画像 2 Beboncool Gamepad for Nintendo Switch Action Button Replacement, Action Button: 手順 6、 3の画像 3
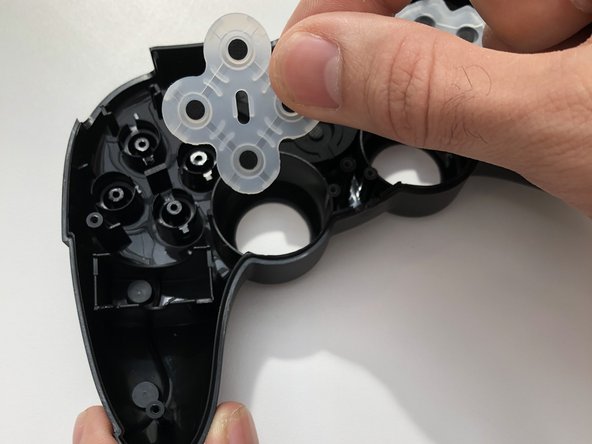
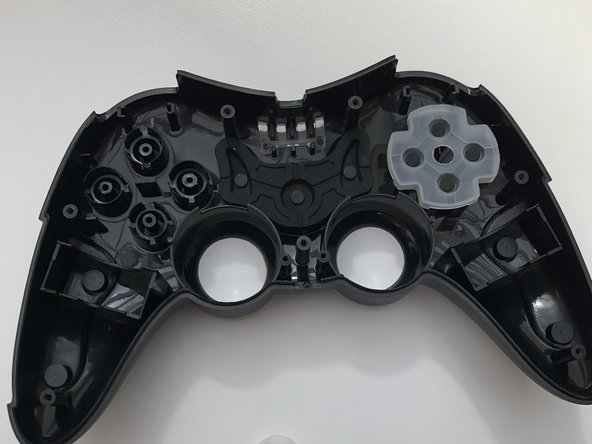
    • Remove the conductive rubber pad that covers the broken action button(s).

  7. Beboncool Gamepad for Nintendo Switch Action Button Replacement: 手順 7、 2の画像 1 Beboncool Gamepad for Nintendo Switch Action Button Replacement: 手順 7、 2の画像 2
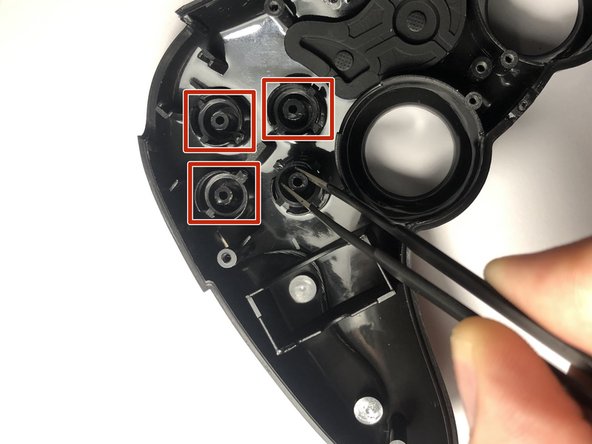
    • Remove the damaged button from the front cover with a pair of tweezers.

    • If removing more than one damaged button, it is important to replace them either one at a time or have the button layout saved as it will be essential to have the correctly labeled buttons put back into place for game play.

  8. Beboncool Gamepad for Nintendo Switch Action Button Replacement: 手順 8、 2の画像 1 Beboncool Gamepad for Nintendo Switch Action Button Replacement: 手順 8、 2の画像 2
    • After both the rubber conductor pad and the button is removed, it is crucial that an inspection be done of both components to confirm the issue.

    • The rubber conductive pad should be inspected for rips, tears, or loss of the black conductive material in the 4 locations the buttons would press them to the circuit board

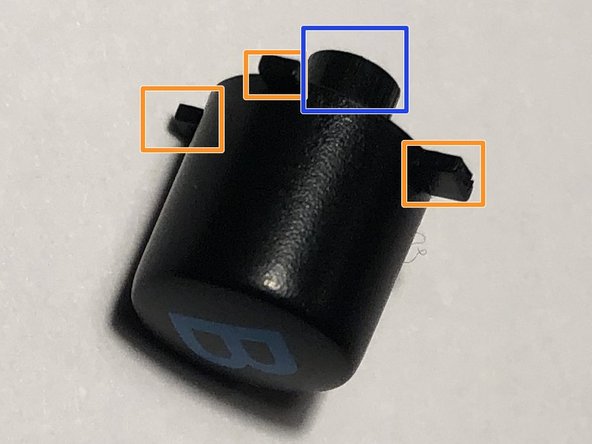
    • The troubled button should be removed and inspected for damage, It should be noted each button has 4 plastic splines that guide it into place in the controllers cover.

    • The button has a cylindrical piece in the center that presses against the rubber conductive pad.

    • After identifying and replacing the damaged component remember to confirm the button layout prior to reassembly.

  9. Beboncool Gamepad for Nintendo Switch Action Button Replacement: 手順 9、 2の画像 1 Beboncool Gamepad for Nintendo Switch Action Button Replacement: 手順 9、 2の画像 2
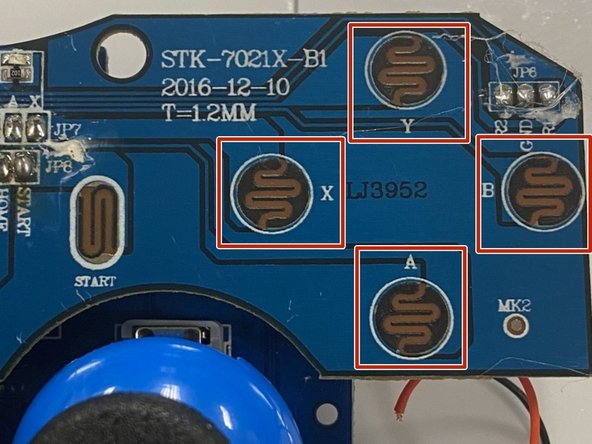
    • The final check is to inspect the components on the action button circuitry. The right side of the controller has the four circular components for the action buttons. Ensure the circuitry is not damaged.

終わりに

To reassemble your device, follow these instructions in reverse order.

作成者

3人の作成者と共同で作成されました。

Dylan Shirey

メンバー登録日: 01/30/20

168 ポイント

1ガイドが承認済み

0 件のコメント

コメントを追加

統計データ:

過去 24時間: 0

過去 7 日: 2

過去 30 日: 19

今までの合計 788