必要な工具と部品
-
-
wedge the plastic opening piece underneath the bottom left hand corner of the front frame. Pry the frame off of the Nook.
-
-
-
Remove every visible screw tying the chassis to the bottom frame using the T-4 attachment for the screwdriver in the iFixit screwdriver kit.
Some of the screws will also have this sticky substance on them. There are 24 screws in all. Five along the bottom, nine along the right side, five along the top and five along the left side.
Correction; there are 20 screws holding the back to the screen and motherboard. I took some additional screws out (actually 25 as one was hiding in the upper right corner under some glue sticky substance) which seemed to make getting the motherboard and screen apart a bit easier.
-
-
-
Remove every visible screw tying the chassis to the bottom frame using the T-4 attachment for the screwdriver in the iFixit screwdriver kit.
Chassis is the back part of the Nook. Carefully remove it as the battery ribbon connects it to the rest of the device!
-
-
-
detach the battery ribbon from the motherboard.
-
-
-
-
flip center chassis so that the back of the screen is facing you, and the hole is positioned in the bottom right corner.
-
-
-
Remove copper tape above the antenna, 3 quarters of the way up the left side of the nook.
-
-
-
Locate thin orange strip on the top side of the motherboard. Apply tweezers to the black casing that locks it into the motherboard (plastic piece will completely come out).
My plastic piece is still attached, it just flipped open. Used angled tweezers to carefully detach.
-
-
-
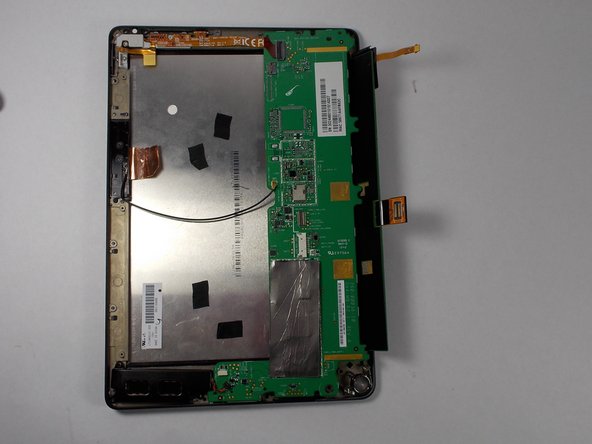
Locate the foam covered orange strip on the motherboard. Pull up (away from motherboard) so that it i no longer connected to the motherboard.
-
-
-
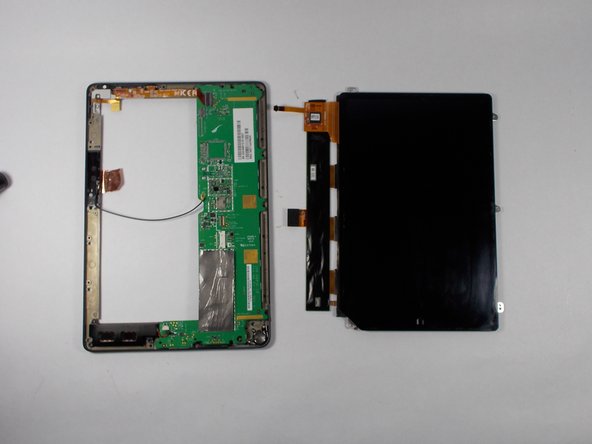
Lift motherboard away from the screen. Pull frame off of the screen.
I had additional black tape running around various parts of my nook keeping the motherboard nicely nestled with the screen. There are two holding the antenna, and two on the black strip on the right hand side. You’ll need to remove them all to remove the motherboard.
In addition you’ll need to wiggle it carefully apart as the screen is nicely set in there. You can bend the black strip slightly to get the motherboard out.
-
-
-
Put the new screen back into place in the frame (the reverse of step 9). Place motherboard back into place on the back of the screen. And follow steps in reverse order to reassemble.
-


To reassemble your device, follow these instructions in reverse order.
To reassemble your device, follow these instructions in reverse order.
9 の人々がこのガイドを完成させました。
チーム

UMass Dartmouth, Team 2-3, Duarte Fall 2014 UMass Dartmouth, Team 2-3, Duarte Fall 2014人のメンバー
UMASSD-DUARTE-F14S2G3
5 メンバー
10のガイドは作成済み
コメント 1 件
como faço para comprar a tela touch do tablet nook ce0984
sou de Fortaleza-Ceara - Brasil
meu e-mail é moreiragenesio@yahoo.com.br
Frame will more in likely be “glued” down with sticky substance.
Bonnie Jean Angel Farmer - 返信