メインコンテンツにスキップ

Baby Taylor Guitar String Replacement

必要な工具と部品

  1. Baby Taylor Guitar String Replacement, Guitar String Replacement: 手順 1、 3の画像 1 Baby Taylor Guitar String Replacement, Guitar String Replacement: 手順 1、 3の画像 2 Baby Taylor Guitar String Replacement, Guitar String Replacement: 手順 1、 3の画像 3
    • Rotate the tuner of the string you want to replace in a clockwise direction until it's loose.

    • You can either do it by hand (First Picture) or you can use the guitar string winder (Second picture).

  2. Baby Taylor Guitar String Replacement: 手順 2、 2の画像 1 Baby Taylor Guitar String Replacement: 手順 2、 2の画像 2
    • Grab a plier and pull out the bridge pin of the string you want to replace.

    • Make sure that you've completed step 1 first. The string has to be loose before doing this step.

  3. Baby Taylor Guitar String Replacement: 手順 3、 3の画像 1 Baby Taylor Guitar String Replacement: 手順 3、 3の画像 2 Baby Taylor Guitar String Replacement: 手順 3、 3の画像 3
    • Take out the string from the bridge and the tuning pin.

    • You can now throw away the string. You will not be needing it anymore.

  4. Baby Taylor Guitar String Replacement: 手順 4、 2の画像 1 Baby Taylor Guitar String Replacement: 手順 4、 2の画像 2
    • Grab the new string and place the end (ball-end) inside the bridge.

    • The ball-end of a string is the side of the string that has a ball shape. (Shown in picture 2)

  5. Baby Taylor Guitar String Replacement: 手順 5、 2の画像 1 Baby Taylor Guitar String Replacement: 手順 5、 2の画像 2
    • Place the bridge pin inside the bridge in order to lock in the new string.

    • Lightly hammer down the bridge pin to keep it from detaching.

  6. Baby Taylor Guitar String Replacement: 手順 6、 2の画像 1 Baby Taylor Guitar String Replacement: 手順 6、 2の画像 2
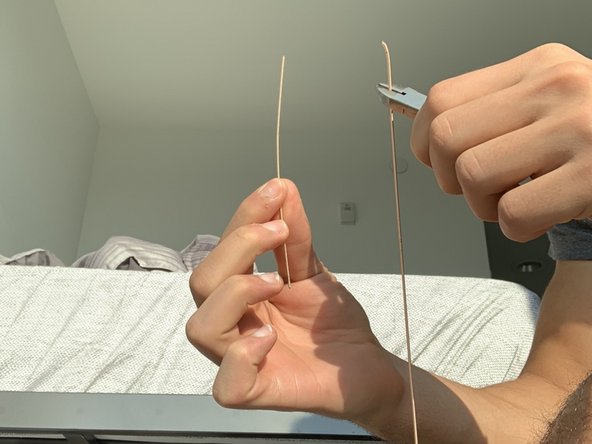
    • Cut the excess string with a plier.

    • Cut the string around 1.5 inches over the desired tuning pin. (Recommended by Taylor Guitars)

  7. Baby Taylor Guitar String Replacement: 手順 7、 1の画像 1
    • Place the new string inside the tuning pinhole.

    • It is recommended to place a really small portion of the string inside the pinhole to keep it from ripping your guitar bag. (As shown in the picture)

  8. Baby Taylor Guitar String Replacement: 手順 8、 3の画像 1 Baby Taylor Guitar String Replacement: 手順 8、 3の画像 2 Baby Taylor Guitar String Replacement: 手順 8、 3の画像 3
    • Rotate the tuners in a counter-clockwise direction to tighten the new string.

    • You can either tighten it by hand (First Picture) or you can use the guitar string winder (Second Picture).

  9. Baby Taylor Guitar String Replacement: 手順 9、 1の画像 1
    • Make sure your string is in tune and strum away!

終わりに

Most guitar strings de-tune after they’ve been recently replaced. Tune your strings every once in a while for a few days and the strings will stay in tune.

作成者

1人の作成者と共同作成されました。

Mohamed Saleh

メンバー登録日: 09/18/21

230 ポイント

1ガイドが承認済み

チーム

York University, Team F-21, Woodhouse Fall 2021 York University, Team F-21, Woodhouse Fall 2021人のメンバー

YORK-WOODHOUSE-F21SFG21

1 メンバー

1のガイドは作成済み

0 件のコメント

コメントを追加

統計データ:

過去 24時間: 1

過去 7 日: 11

過去 30 日: 20

今までの合計 627