メインコンテンツにスキップ

BLU R2 Plus Rear-Facing Camera Replacement

必要な工具と部品

  1. BLU R2 Plus Rear-Facing Camera Replacement, Power Off: 手順 1、 1の画像 1
    • Be sure that your BLU R2 Plus is completely powered off and has less than 25% battery left. This will lower the chance of your battery catching fire and your logic board/motherboard shorting out.

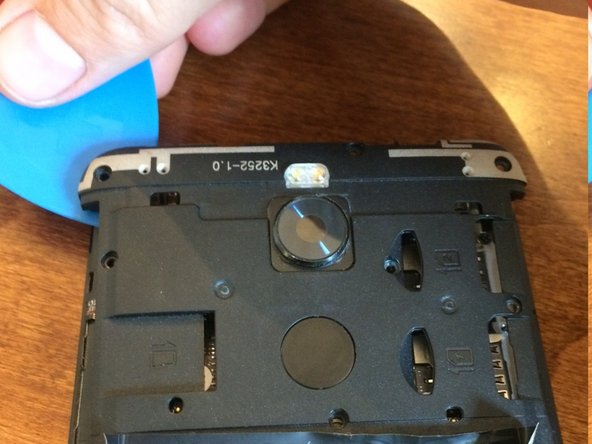
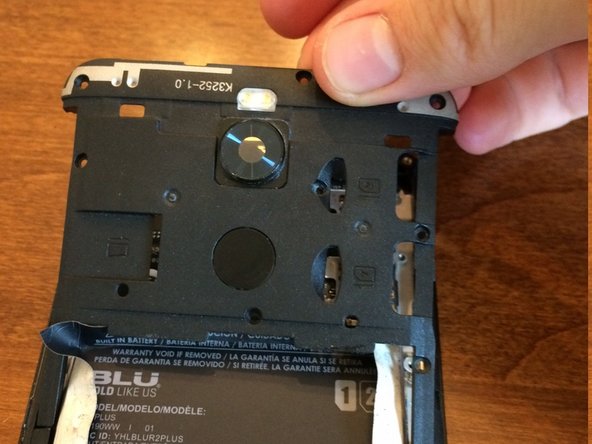
  2. BLU R2 Plus Rear-Facing Camera Replacement, Releasing the Back Cover: 手順 2、 3の画像 1 BLU R2 Plus Rear-Facing Camera Replacement, Releasing the Back Cover: 手順 2、 3の画像 2 BLU R2 Plus Rear-Facing Camera Replacement, Releasing the Back Cover: 手順 2、 3の画像 3
    • Insert your pick in the top left-hand corner where the little indent is.

    • Slide the pick all the way around the phone until the back cover is loose and ready to be released.

  3. BLU R2 Plus Rear-Facing Camera Replacement, Remove Back Cover: 手順 3、 1の画像 1
    • Remove the Back Cover to gain access to sim card trays, the memory card slot, or just to replace it.

  4. BLU R2 Plus Rear-Facing Camera Replacement, Unscrew Upper Plastic Plate: 手順 4、 2の画像 1 BLU R2 Plus Rear-Facing Camera Replacement, Unscrew Upper Plastic Plate: 手順 4、 2の画像 2
    この手順で使用する道具:
    Magnetic Project Mat
    $19.95
    購入する
    • Use a Phillips #00 screwdriver to remove the 9 screws from the upper plastic plate.

    • Use a magnetic mat to organize your screws and prevent you from losing them.

  5. BLU R2 Plus Rear-Facing Camera Replacement, Upper Plate Removal: 手順 5、 3の画像 1 BLU R2 Plus Rear-Facing Camera Replacement, Upper Plate Removal: 手順 5、 3の画像 2 BLU R2 Plus Rear-Facing Camera Replacement, Upper Plate Removal: 手順 5、 3の画像 3
    • Use an opening pick to unclip the upper plastic plate from the phone.

    • Once unclipped, slide it up and out of the phone.

    • Be careful not to break the small arms of the plate upon removal.

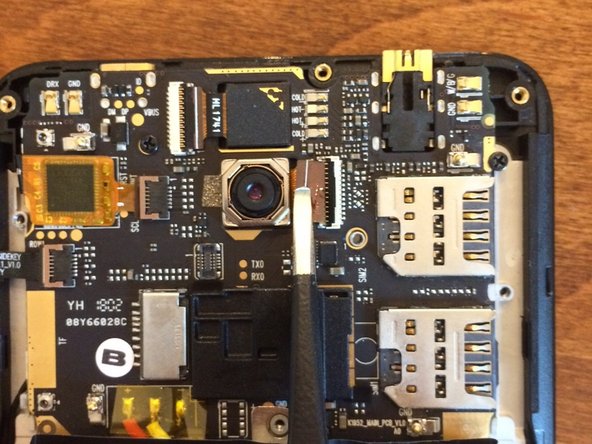
  6. BLU R2 Plus Rear-Facing Camera Replacement, Rear-Facing Camera Removal: 手順 6、 3の画像 1 BLU R2 Plus Rear-Facing Camera Replacement, Rear-Facing Camera Removal: 手順 6、 3の画像 2 BLU R2 Plus Rear-Facing Camera Replacement, Rear-Facing Camera Removal: 手順 6、 3の画像 3
    • Use a spudger to unclip the ribbon cable from the motherboard/logic board. Carefully use blunt tweezers or angled tweezers to pull the ribbon cable out of the socket. Then use the tweezers to wiggle the camera out of its socket.

    • Be very careful not to break the ribbon cable as it's very fragile. This doesn't really matter if you're taking the camera out as it's already broken.

終わりに

To reassemble your device, follow these instructions in reverse order.

ある他の人がこのガイドを完成しました。

作成者

2人の作成者と共同で作成されました。

Derek Thomas

メンバー登録日: 09/02/21

772 ポイント

5のガイドは作成済み

0 件のコメント

コメントを追加

統計データ:

過去 24時間: 0

過去 7 日: 0

過去 30 日: 1

今までの合計 24