はじめに
This guide will be helpful for repairing the speaker if the troubleshooting page recommends that you replace it. This is a necessary step when you have determined no other way to repair your current speaker. Be wary of accidentally damaging other parts of the device when replacing the speaker.
必要な工具と部品
-
-
Look at the side of the speaker that has the red interface plate. Using a Phillips head PH1 screwdriver head, remove screws on the top and bottom of the black face plate. There will be one screw on top and one on the bottom.
-
Both screws are 0.55 cm in depth
-
-
-
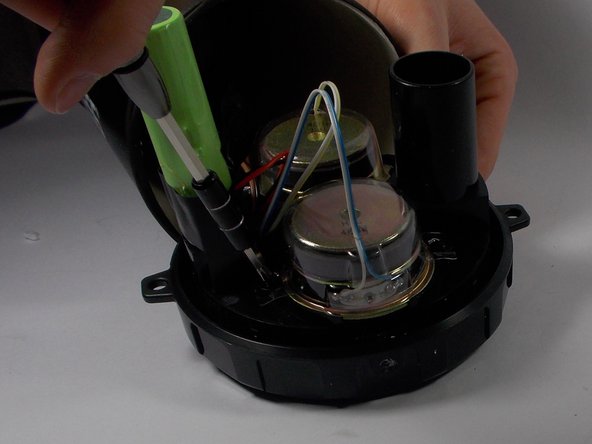
For the top horn replacement, you will be working with the blue and white wire pair.
-
For the bottom horn replacement you with the yellow and white wire pair.
-
-
-
-
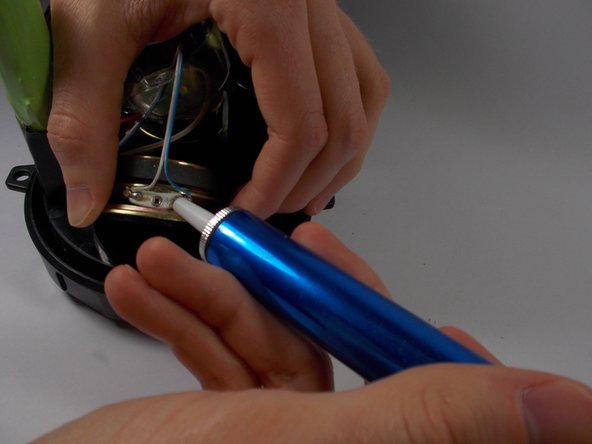
Use a soldering iron to heat the two contact points.
-
Then use a desoldering pump to remove the liquid solder.
-


To reassemble your device, follow these instructions in reverse order.
To reassemble your device, follow these instructions in reverse order.
3 の人々がこのガイドを完成させました。
チーム

UMass Dartmouth, Team 8-6, Botvin Spring 2016 UMass Dartmouth, Team 8-6, Botvin Spring 2016人のメンバー
UMASSD-BOTVIN-S16S8G6
3 メンバー
8のガイドは作成済み