メインコンテンツにスキップ

Audiovox CDM-8910 Keyboard Replacement

必要な工具と部品

  1. Audiovox CDM-8910 Keyboard Replacement, Antenna: 手順 1、 1の画像 1
    • Locate the antenna (shown in red box) at the top of the phone when closed.

  2. Audiovox CDM-8910 Keyboard Replacement: 手順 2、 1の画像 1
    • Using your thumb and index finger, grip the antenna near its base and unscrew counter clockwise. Once loose, remove the antenna by pulling it from its insert hole.

  3. Audiovox CDM-8910 Keyboard Replacement, Battery: 手順 3、 1の画像 1
    • Locate the back side of the phone.

    • The battery is the large main compartment (red box).

  4. Audiovox CDM-8910 Keyboard Replacement: 手順 4、 1の画像 1
    • Use your finger to slide the latch (circled) upwards.

    • While holding the latch up, pull the battery off the phone.

  5. Audiovox CDM-8910 Keyboard Replacement: 手順 5、 1の画像 1
    • The back of the phone will look like this when the battery is correctly removed.

  6. Audiovox CDM-8910 Keyboard Replacement, Rear Case: 手順 6、 1の画像 1
    • Peel the rubber indicated toward the top of the phone

  7. Audiovox CDM-8910 Keyboard Replacement: 手順 7、 1の画像 1
    • Remove the screw that sits underneath the rubber covering.

  8. Audiovox CDM-8910 Keyboard Replacement: 手順 8、 1の画像 1
    • Remove the five (5) total screws using a Philips head screwdriver.

  9. Audiovox CDM-8910 Keyboard Replacement: 手順 9、 1の画像 1
    • Use spudger and insert it towards the bottom of the phone as pictured.

    • Carefully working yourself around the phone with the spudger, pry it open. This may require a bit of force.

    • The volume control button will be loose, so make sure to take it out once the rear case is fully removed.

  10. Audiovox CDM-8910 Keyboard Replacement: 手順 10、 1の画像 1
    • The back case should now be completely removed and the motherboard will be visible.

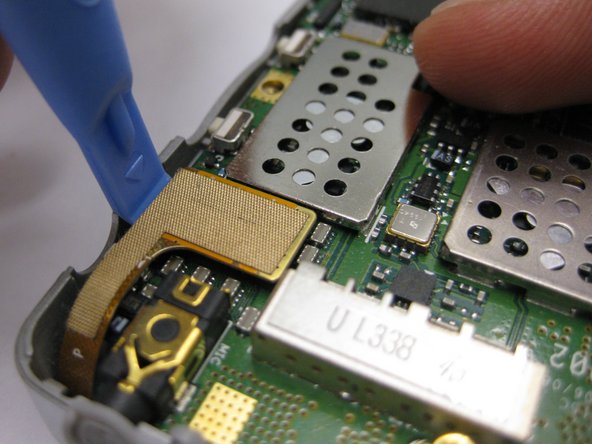
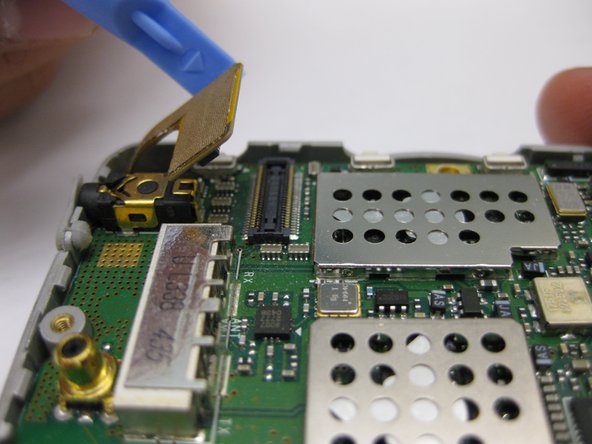
  11. Audiovox CDM-8910 Keyboard Replacement, Motherboard: 手順 11、 3の画像 1 Audiovox CDM-8910 Keyboard Replacement, Motherboard: 手順 11、 3の画像 2 Audiovox CDM-8910 Keyboard Replacement, Motherboard: 手順 11、 3の画像 3
    • Disconnect the gold connection patch

    • Use a spudger or finger to disconnect the piece.

  12. Audiovox CDM-8910 Keyboard Replacement: 手順 12、 1の画像 1
    • Using a spudger, lift the motherboard out of the phone case as pictured.

  13. Audiovox CDM-8910 Keyboard Replacement: 手順 13、 1の画像 1
    • The motherboard should now be completely removed from the phone.

  14. Audiovox CDM-8910 Keyboard Replacement, Keyboard: 手順 14、 1の画像 1
    • Once the motherboard has been removed, peel the keyboard as pictured.

終わりに

To reassemble your device, follow these instructions in reverse order.

作成者

4人の作成者と共同で作成されました。

Carlos Guerrero

メンバー登録日: 10/04/10

1 ポイント

2のガイドは作成済み

チーム

Cal Poly, Team 3-24, Regan Fall 2010 Cal Poly, Team 3-24, Regan Fall 2010人のメンバー

CPSU-REGAN-F10S3G24

4 メンバー

12のガイドは作成済み

0 件のコメント

コメントを追加

統計データ:

過去 24時間: 1

過去 7 日: 1

過去 30 日: 1

今までの合計 1,385