メインコンテンツにスキップ

この修理ガイドは変更されています。最新の未承認バージョンに切り替えます。

Audiovox CDM-8900 Logic Board Replacement

必要な工具と部品

  1. Audiovox CDM-8900 Logic Board Replacement, Battery: 手順 1、 2の画像 1 Audiovox CDM-8900 Logic Board Replacement, Battery: 手順 1、 2の画像 2
    • Hold the phone in one hand, slide the latch up, and pull the battery up to remove it.

  2. Audiovox CDM-8900 Logic Board Replacement, Antenna: 手順 2、 3の画像 1 Audiovox CDM-8900 Logic Board Replacement, Antenna: 手順 2、 3の画像 2 Audiovox CDM-8900 Logic Board Replacement, Antenna: 手順 2、 3の画像 3
    • Grasp the antenna at its base and twist to unscrew.

    • Remove the antenna along with its plastic casing from inside the battery housing. Keep the antenna in the plastic casing for reassembly.

  3. Audiovox CDM-8900 Logic Board Replacement, Logic Board: 手順 3、 3の画像 1 Audiovox CDM-8900 Logic Board Replacement, Logic Board: 手順 3、 3の画像 2 Audiovox CDM-8900 Logic Board Replacement, Logic Board: 手順 3、 3の画像 3
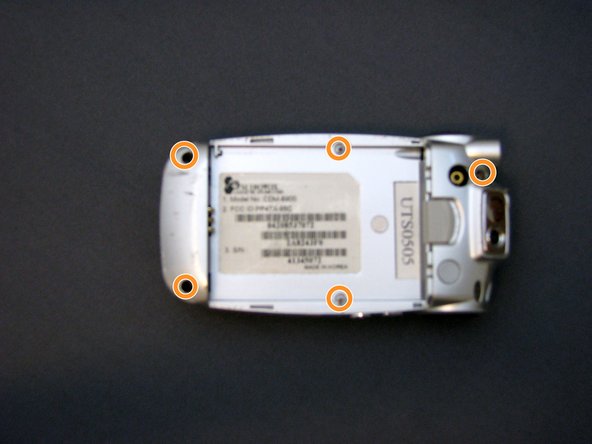
    • Remove the small rubber insert from the top of the phone to access the top screw.

    • Warning: Screws are very small and may be difficult to see while unscrewing.

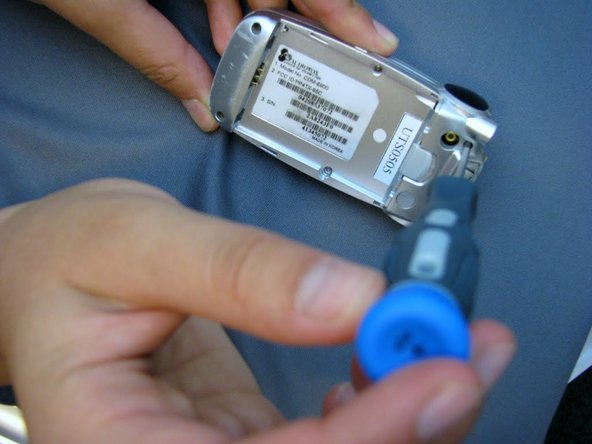
    • Unscrew all five (5) screws on the back of cell phone.

    • If screws do not remove after fully unthreading, gently invert and tap phone in hand until the screws come loose.

  4. Audiovox CDM-8900 Logic Board Replacement: 手順 4、 3の画像 1 Audiovox CDM-8900 Logic Board Replacement: 手順 4、 3の画像 2 Audiovox CDM-8900 Logic Board Replacement: 手順 4、 3の画像 3
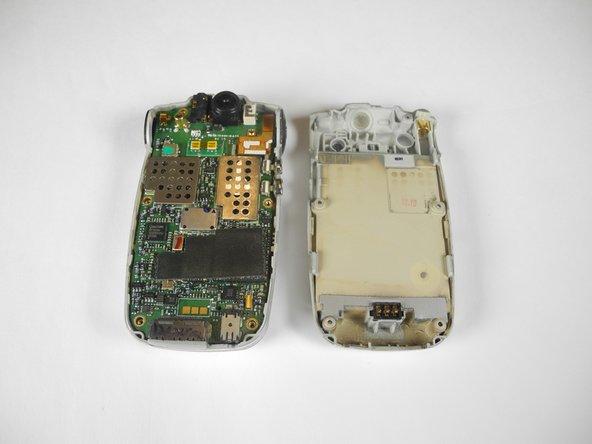
    • Wedge back plate away from cell phone using the leverage from the plastic spudger.

    • The volume control button on the left side of the phone will be loose. Make sure to carefully reinsert during reassembly.

    • Detach logic board from LCD screen connector by gently detaching the small copper plate on the top right of the logic board (shown circled in blue and detached).

  5. Audiovox CDM-8900 Logic Board Replacement: 手順 5、 3の画像 1 Audiovox CDM-8900 Logic Board Replacement: 手順 5、 3の画像 2 Audiovox CDM-8900 Logic Board Replacement: 手順 5、 3の画像 3
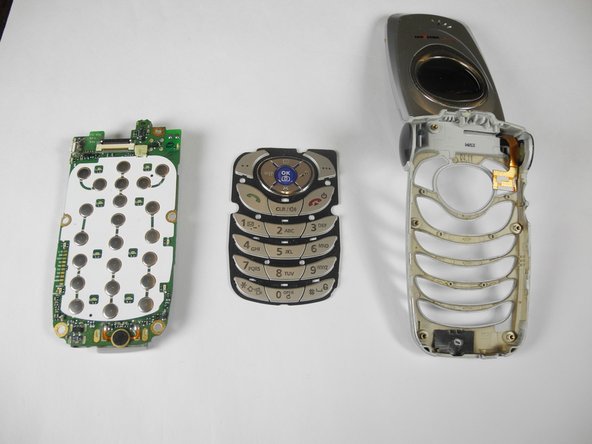
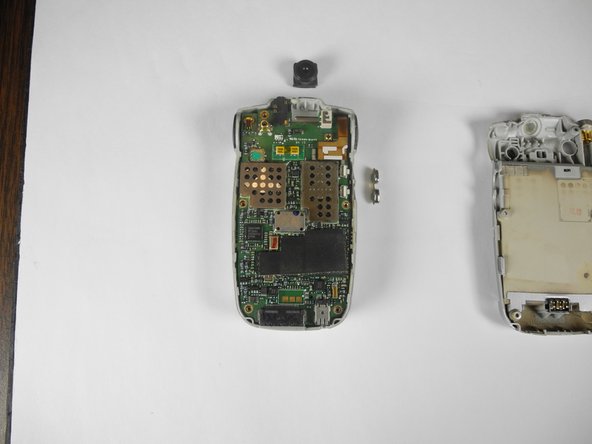
    • Pop the logic board out from the front of the cell phone.

    • Before reassembly, be sure keypad is lined up with logic board.

    • Before reassembly, be sure camera lens is properly aligned at the top of the logic board and volume controls are in place.

終わりに

To reassemble your device, follow these instructions in reverse order.

ある他の人がこのガイドを完成しました。

作成者

14人の作成者と共同で作成されました。

Aaron Shaw

メンバー登録日: 04/15/10

159 ポイント

6のガイドは作成済み

チーム

Cal Poly, Team 28-31, Regan Spring 2010 Cal Poly, Team 28-31, Regan Spring 2010人のメンバー

CPSU-REGAN-S10S28G31

4 メンバー

12のガイドは作成済み

0 件のコメント

コメントを追加

統計データ:

過去 24時間: 0

過去 7 日: 0

過去 30 日: 3

今までの合計 2,800