メインコンテンツにスキップ

Asus Zenfone 4 Max Screen Replacement

必要な工具と部品

  1. Asus Zenfone 4 Max Screen Replacement, Battery: 手順 1、 2の画像 1 Asus Zenfone 4 Max Screen Replacement, Battery: 手順 1、 2の画像 2
    • Using a removable head screwdriver and a T3 bit, begin by removing the two screws located on either side of the charging port.

  2. Asus Zenfone 4 Max Screen Replacement: 手順 2、 1の画像 1
    • Gently wedge the opening tool between the phone and the back casing.

    • Move the opening tool up and down to pry the back off of the device.

  3. Asus Zenfone 4 Max Screen Replacement: 手順 3、 3の画像 1 Asus Zenfone 4 Max Screen Replacement: 手順 3、 3の画像 2 Asus Zenfone 4 Max Screen Replacement: 手順 3、 3の画像 3
    • Once the back has been removed, you will need to unscrew the four screws on the bottom panel with an AT3 bit.

  4. Asus Zenfone 4 Max Screen Replacement: 手順 4、 1の画像 1
    • Remove the bottom panel.

  5. Asus Zenfone 4 Max Screen Replacement: 手順 5、 2の画像 1 Asus Zenfone 4 Max Screen Replacement: 手順 5、 2の画像 2
    • Wedge an opening tool between the battery and phone.

    • Gently pry the battery out of the device.

    • You can move the opening on either side of the battery as well as the bottom to aid in removal.

  6. Asus Zenfone 4 Max Screen Replacement: 手順 6、 1の画像 1
    • Remove the battery and replace it with the new battery.

  7. Asus Zenfone 4 Max Screen Replacement, Camera: 手順 7、 1の画像 1
    • Using a removable head screwdriver and a T4 bit, remove the screws on the base of the phone on either side of the charging port.

  8. Asus Zenfone 4 Max Screen Replacement: 手順 8、 1の画像 1
    • Starting near either of the 4 corners of the device notice the seam of the case around the front of the device.

    • Begin using the opening tool with a moderate amount of force to wedge between the back case and the phone.

    • Gently move the tool around the edges towards each corner until the back is removed.

    • You will be able to hear the back casing pulling apart from the phone. Do not be alarmed, but work gently with the device.

  9. Asus Zenfone 4 Max Screen Replacement: 手順 9、 2の画像 1 Asus Zenfone 4 Max Screen Replacement: 手順 9、 2の画像 2
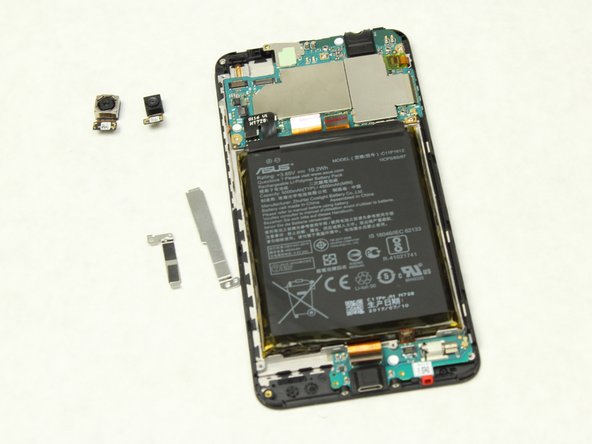
    • Using a removable head screwdriver and a PH0 bit, begin removing the panel beneath the two cameras by unscrewing the screw.

  10. Asus Zenfone 4 Max Screen Replacement: 手順 10、 3の画像 1 Asus Zenfone 4 Max Screen Replacement: 手順 10、 3の画像 2 Asus Zenfone 4 Max Screen Replacement: 手順 10、 3の画像 3
    • Use the tweezers to gently pull up on the flaps beneath the two cameras.

    • Completely remove the cameras and replace with the new cameras.

  11. Asus Zenfone 4 Max Screen Replacement, Screen: 手順 11、 3の画像 1 Asus Zenfone 4 Max Screen Replacement, Screen: 手順 11、 3の画像 2 Asus Zenfone 4 Max Screen Replacement, Screen: 手順 11、 3の画像 3
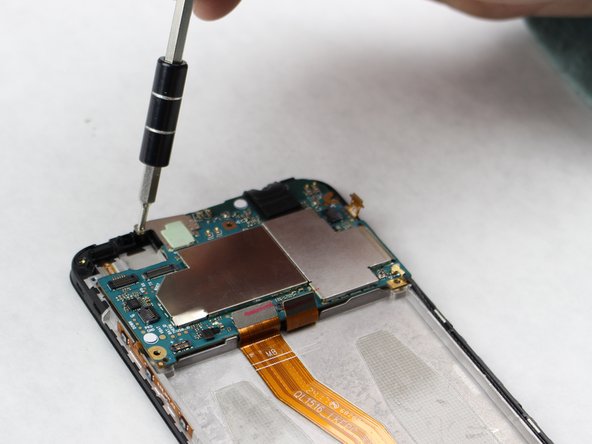
    • Using the screwdriver with the PH0 bit, unscrew all screws found on the circuit board.

  12. Asus Zenfone 4 Max Screen Replacement: 手順 12、 1の画像 1
    • Carefully disconnect the power cable on the right side of the circuit board.

    • Leave the disconnected cable hanging as it will be used again later.

    • Use as little force as possible seeing that the power cable is very fragile.

  13. Asus Zenfone 4 Max Screen Replacement: 手順 13、 1の画像 1
    • Gently lift and remove the circuit board.

  14. Asus Zenfone 4 Max Screen Replacement: 手順 14、 2の画像 1 Asus Zenfone 4 Max Screen Replacement: 手順 14、 2の画像 2
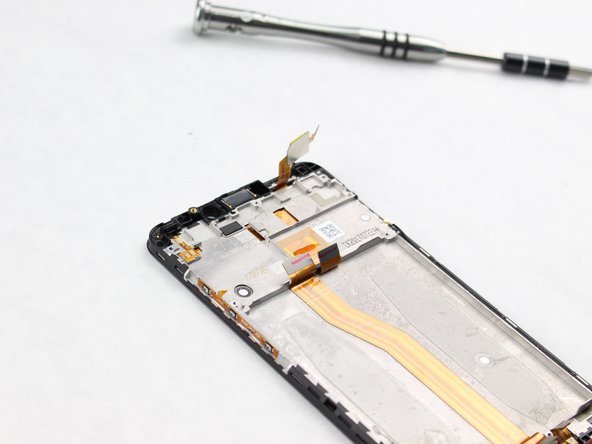
    • Disconnect the power cable on the right side of the device and leave it hanging in place.

  15. Asus Zenfone 4 Max Screen Replacement: 手順 15、 1の画像 1
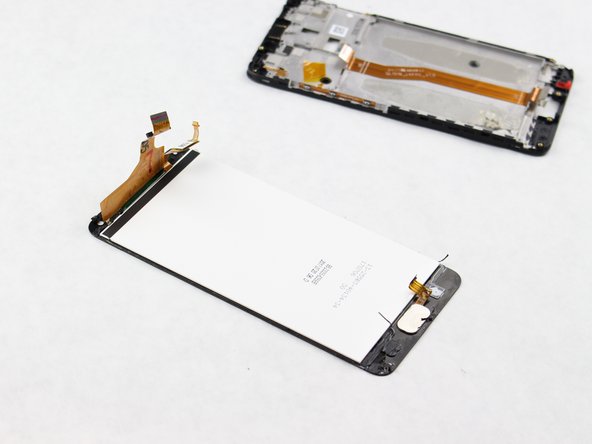
    • Using a metal spudger, separate the screen from the entire device by gently moving the tool around all edges.

    • It could be useful to use a blow-dryer to heat the screen for a smoother removal.

  16. Asus Zenfone 4 Max Screen Replacement: 手順 16、 3の画像 1 Asus Zenfone 4 Max Screen Replacement: 手順 16、 3の画像 2 Asus Zenfone 4 Max Screen Replacement: 手順 16、 3の画像 3
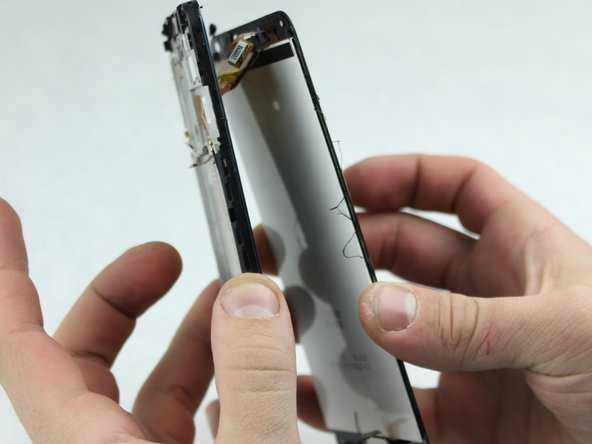
    • Gently separate the screen from the phone by pulling the two apart.

    • The power cables will be fed through the slots of the phone. Make sure the top power cable is disconnected and is removed along with the screen.

終わりに

To reassemble your device, follow these instructions in reverse order.

4 の人々がこのガイドを完成させました。

作成者

3人の作成者と共同で作成されました。

Rachel Hodgdon

メンバー登録日: 10/02/18

245 ポイント

1ガイドが承認済み

チーム

Sam Houston State, Team S11-G6, Blackburne Fall 2018 Sam Houston State, Team S11-G6, Blackburne Fall 2018人のメンバー

SHSU-BLACKBURNE-F18S11G6

4 メンバー

10のガイドは作成済み

2 件のコメント

in one step it says use a T3 for to the left and right of the charging port, later it says T4. also, the guide has what i believe to be a typo, as it mentions an “AT3” bit for removal of the internal bottom panel. just wanted to alert you to these inconsistencies. overall seems to be a good guide, i shall be replacing my screen soon as i have cracked the corner and find it unsightly. thank you, have a nice evening.

Ronald Bloodworth - 返信

This was a fun fix, usually I fix iPad or iPhone, so this was my first time fixing an Asus and was easier than I thought it was gonna be. Just take your time as I didn't now I'm fixing something else .

Sir Frank Macias - 返信

コメントを追加

統計データ:

過去 24時間: 2

過去 7 日: 11

過去 30 日: 46

今までの合計 7,226