はじめに
If your phone fails to charge, it could be due to a malfunctioning charging port. A charging port can be easily damaged by water, corrosion, and debris. This guide will help you replace your damaged charging port
必要な工具と部品
-
-
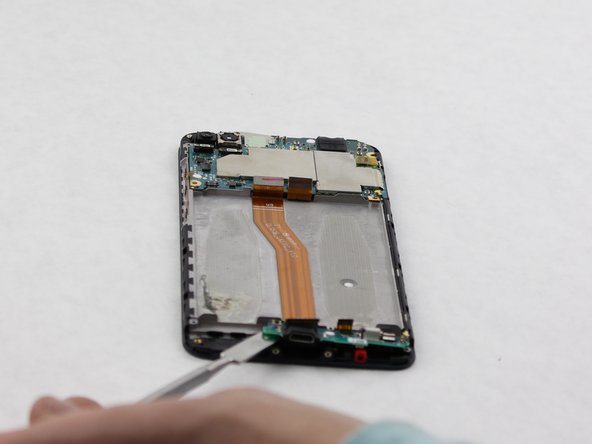
Using a removable head screwdriver and a T3 bit, begin by removing the two screws located on either side of the charging port.
-
-
-
Gently wedge the opening tool between the phone and the back casing.
-
Move the opening tool up and down to pry the back off of the device.
-
-
-
-
Remove the battery and replace it with the new battery.
why do you need to replace the battery with a new one after removing it? Is this step because you wanted new batteries or is it a requirement?
-
-
-
Once the battery has been removed, gently wedge the metal spudger beneath the green panel.
-
Lift the panel along with the charging port out the device and replace with the new charging port.
What do you call the plastic wrapped around the usb port?
Just completed the guide, three things to note:
1) You don’t need to remove the battery if you are just changing the charging port board, it just pops out after the screws are out
2) The rubber around the port just peels off, so if your replacement part didn’t come with it you can just move it over
3) Remove the SD/SIM card tray before trying to disassemble the phone, or you will bust yours up like I did
-


To reassemble your device, follow these instructions in reverse order.
To reassemble your device, follow these instructions in reverse order.
3 の人々がこのガイドを完成させました。
チーム

Sam Houston State, Team S11-G6, Blackburne Fall 2018 Sam Houston State, Team S11-G6, Blackburne Fall 2018人のメンバー
SHSU-BLACKBURNE-F18S11G6
4 メンバー
10のガイドは作成済み
2 件のコメント
repair microfone asus zenfone 4 selfie pro please
I have managed to replace the charging port but now it shows Charging Port Temperatures Abnormalities Reminder which is loud and annoying to see every time. I also see that one of my sensors in the cpu-z program (thermal sensor pa_therm0) hitting a constant 75-84 degree centigrade and another sensor (chg_temp) hitting 65 constantly. Any help in regards to this manner?
Max Orwell - 返信
A T3 FEELS too small and a T4 IS too big,the T3 sits in the screw but when I turn it,it strips.
Sir Frank Macias - 返信
préciser de retirer le tiroir de la carte sim
SKRAF Durand - 返信