メインコンテンツにスキップ

Asus X751L Screen Replacement

必要な工具と部品

  1. Asus X751L Screen Replacement, Keyboard: 手順 1、 1の画像 1
    • With the screen closed, place your laptop upside-down with the front facing you.

    • Remove the six 14.6mm Phillips #00 screws.

    • Remove the four 6.6mm Phillips #00 screws.

  2. Asus X751L Screen Replacement: 手順 2、 1の画像 1
    • Flip the laptop over and open the lid.

    • Pry around the edges of the laptop base using the plastic opening tool.

    • Prying too hard can break the plastic clips.

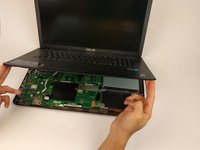
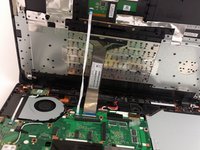
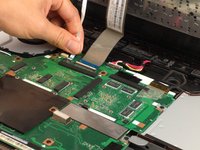
  3. Asus X751L Screen Replacement: 手順 3、 3の画像 1 Asus X751L Screen Replacement: 手順 3、 3の画像 2 Asus X751L Screen Replacement: 手順 3、 3の画像 3
    • Carefully lift the keyboard up.

    • Be very careful when lifting the keyboard up. Two zero insertion force (ZIF) cables are between the keyboard assembly and the motherboard. Do not lift the assembly too high.

    • Disconnect the two ZIF connectors from the motherboard using your fingernail to lift the cream-colored tab.

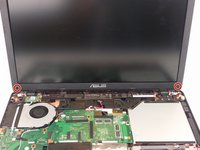
  4. Asus X751L Screen Replacement, Screen: 手順 4、 2の画像 1 Asus X751L Screen Replacement, Screen: 手順 4、 2の画像 2
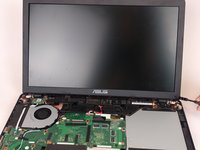
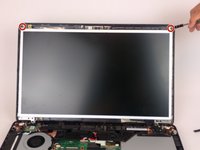
    • Remove the two rubber screw covers and the Phillips #00 screws beneath them.

  5. Asus X751L Screen Replacement: 手順 5、 1の画像 1
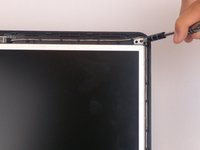
    • Pry around the edges of the panel using the plastic opening tool.

    • Prying too hard can break the plastic clips.

    • Carefully pull off the screen cover.

  6. Asus X751L Screen Replacement: 手順 6、 2の画像 1 Asus X751L Screen Replacement: 手順 6、 2の画像 2
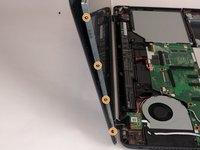
    • Remove the two 4.7mm Phillips#00 screws to free the screen-holding bracket from the back panel.

  7. Asus X751L Screen Replacement: 手順 7、 3の画像 1 Asus X751L Screen Replacement: 手順 7、 3の画像 2 Asus X751L Screen Replacement: 手順 7、 3の画像 3
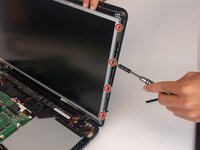
    • Remove the four 3.6mm Phillips#00 screws on the right side of the screen.

    • Remove the four 3.6mm Phillips#00 screws on the left side of the screen.

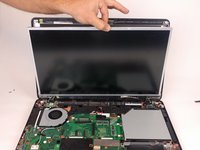
    • Make sure you hold the screen so it doesn't fall forward when removed from the bracket.

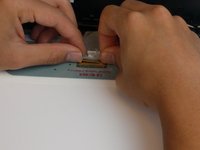
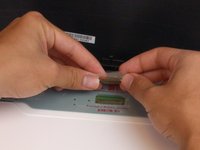
  8. Asus X751L Screen Replacement: 手順 8、 2の画像 1 Asus X751L Screen Replacement: 手順 8、 2の画像 2
    • Gently lay the screen down to reveal the back side.

    • Remove the tape over top of the display cable connector.

    • Disconnect the display cable connector using your fingers.

終わりに

To reassemble your device, follow these instructions in reverse order.

8 の人々がこのガイドを完成させました。

作成者

2人の作成者と共同で作成されました。

Sanwal Hussain

メンバー登録日: 02/05/17

231 ポイント

1ガイドが承認済み

チーム

USF Tampa, Team 17-2, Blackwell Spring 2017 USF Tampa, Team 17-2, Blackwell Spring 2017人のメンバー

USFT-BLACKWELL-S17S17G2

4 メンバー

5のガイドは作成済み

2 件のコメント

Great presentation. My screen develops purple and pink vertical lines and no picture but if I adjust screen backward or forwards it clears up…but the problem is getting worse. Another observation is that if I apply a lot of pressure on area between the power button and the left hinge that it will clear up at certain angles of the screen.

Is it possible/probable that I have a loose connection below that pressure point where the screen cable connects with the computer board or is it more likely that the cable has simply worn out and the wires are actually breaking? Or is there another conclusion?

Scott

wscottsnyder@gmail.com

Scott Snyder - 返信

great pictures, how do i solve my screen if it is completely disturbed but gets back to normal if i press the base on the left front corner,

it also helps if i move the screen forward and backward.

does someone has a recommendation what to do, or what the root/cause is? It happens more often every week.

Harm - 返信

コメントを追加

統計データ:

過去 24時間: 0

過去 7 日: 0

過去 30 日: 20

今までの合計 5,107