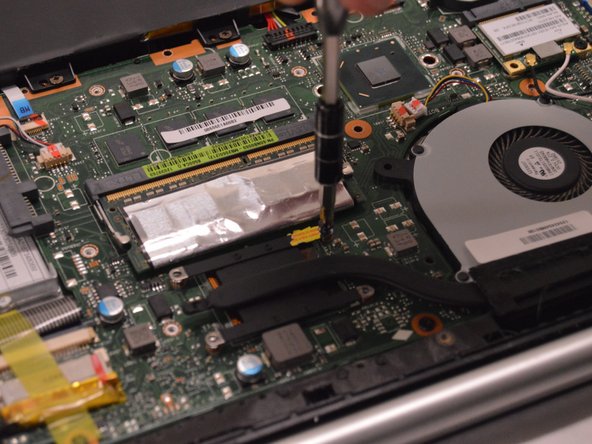
メインコンテンツにスキップ

Asus Vivobook S500CA Fan Replacement

必要な工具と部品

  1. Asus Vivobook S500CA Fan Replacement, Cooling Fan: 手順 1、 1の画像 1
    • Turn the device over so the back plate is facing up.

  2. Asus Vivobook S500CA Fan Replacement: 手順 2、 1の画像 1
    • Use a Phillips Head PH1 screwdriver to remove 10 screws around the perimeter of the back plate.

    • It may be helpful to lay out the screws in the orientation in which they are taken out, in order to help remember where they go.

  3. Asus Vivobook S500CA Fan Replacement: 手順 3、 1の画像 1
    • Remove the back plate by lifting it straight up.

  4. Asus Vivobook S500CA Fan Replacement: 手順 4、 2の画像 1 Asus Vivobook S500CA Fan Replacement: 手順 4、 2の画像 2
    • Remove 2 (.5 cm) Phillips Head screws found around the fan and 4 (.3 cm) Phillips Head screws found around the heat sink connector.

  5. Asus Vivobook S500CA Fan Replacement: 手順 5、 1の画像 1
    • Unhook the electronic connection located above the fan by pulling the white connector straight out of the brown socket.

    • This photo is for demonstration purposes only. Do not remove by pulling the wires. Instead, remove by pulling on the edges of the white socket.

  6. Asus Vivobook S500CA Fan Replacement: 手順 6、 1の画像 1
    • Remove the fan and connected heat sink by lifting straight out of the assembly.

  7. Asus Vivobook S500CA Fan Replacement: 手順 7、 1の画像 1
    • Replace fan and follow steps 1-5 in reverse order to complete repair.

終わりに

To reassemble your device, follow these instructions in reverse order.

ある他の人がこのガイドを完成しました。

作成者

1人の作成者と共同作成されました。

Brad Shipman

メンバー登録日: 01/17/17

137 ポイント

1ガイドが承認済み

チーム

Western Carolina University, Team 1-3, Virtue Spring 2017 Western Carolina University, Team 1-3, Virtue Spring 2017人のメンバー

WCU-VIRTUE-S17S1G3

4 メンバー

5のガイドは作成済み

0 件のコメント

コメントを追加

統計データ:

過去 24時間: 0

過去 7 日: 5

過去 30 日: 11

今までの合計 1,796