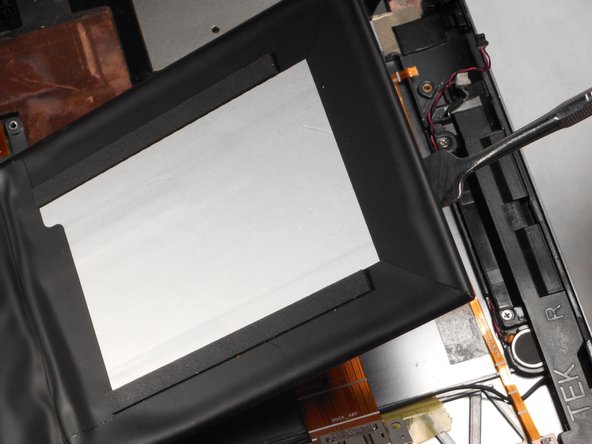
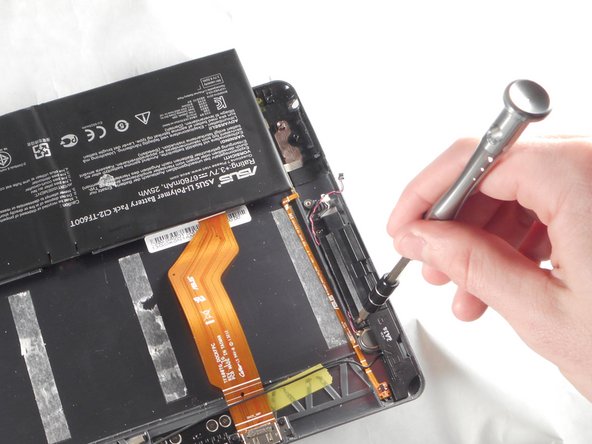
メインコンテンツにスキップ

Asus VivoTab RT TF600T Speaker Replacement

必要な工具と部品

  1. Asus VivoTab RT TF600T Speaker Replacement, Speaker: 手順 1、 3の画像 1 Asus VivoTab RT TF600T Speaker Replacement, Speaker: 手順 1、 3の画像 2 Asus VivoTab RT TF600T Speaker Replacement, Speaker: 手順 1、 3の画像 3
    • Make sure the tablet is turned off.

    • Remove the tablet from the attached keyboard.

    • To remove the keyboard, simply depress the switch on the left side of the screen and pull the tablet portion off.

  2. Asus VivoTab RT TF600T Speaker Replacement: 手順 2、 3の画像 1 Asus VivoTab RT TF600T Speaker Replacement: 手順 2、 3の画像 2 Asus VivoTab RT TF600T Speaker Replacement: 手順 2、 3の画像 3
    • Rotate the device 180°, and remove the two 1.59 mm #000 screws at the bottom of the device.

    • Use the Phillips screwdriver size PH000 to remove the two 1.59 mm #000 screws.

  3. Asus VivoTab RT TF600T Speaker Replacement: 手順 3、 2の画像 1 Asus VivoTab RT TF600T Speaker Replacement: 手順 3、 2の画像 2
    • Use the plastic opening tool to help detach the screen from the back panel.

    • Insert the plastic opening tool into the bottom right corner and gently start to pry off the screen.

    • Once the screen begins to separate from the body of the device, start working the tool around the outer edges until the entire screen becomes detached.

  4. Asus VivoTab RT TF600T Speaker Replacement: 手順 4、 2の画像 1 Asus VivoTab RT TF600T Speaker Replacement: 手順 4、 2の画像 2
    • Now that the screen is completely detached, lay the back panel flat on a smooth surface.

    • Lift the screen to view the inside of the tablet.

  5. Asus VivoTab RT TF600T Speaker Replacement: 手順 5、 2の画像 1 Asus VivoTab RT TF600T Speaker Replacement: 手順 5、 2の画像 2
    • Before disconnecting the display cables, turn off the switch labeled DIP; this switch is used to de-energize the system.

    • The battery is connected to the motherboard. To avoid any short circuiting of the device, you must place the switch labeled DIP to OFF.

  6. Asus VivoTab RT TF600T Speaker Replacement: 手順 6、 3の画像 1 Asus VivoTab RT TF600T Speaker Replacement: 手順 6、 3の画像 2 Asus VivoTab RT TF600T Speaker Replacement: 手順 6、 3の画像 3
    • Remove the yellow tape covering the end of the cables.

  7. Asus VivoTab RT TF600T Speaker Replacement: 手順 7、 2の画像 1 Asus VivoTab RT TF600T Speaker Replacement: 手順 7、 2の画像 2
    • After lifting the yellow tape, you should be able to see a white strip. The white strip is actually a lever.

    • Use the plastic opening tool to push in the levers.

  8. Asus VivoTab RT TF600T Speaker Replacement: 手順 8、 3の画像 1 Asus VivoTab RT TF600T Speaker Replacement: 手順 8、 3の画像 2 Asus VivoTab RT TF600T Speaker Replacement: 手順 8、 3の画像 3
    • With all three white levers pushed in, gently pull on each display cable until the cable disconnects.

  9. Asus VivoTab RT TF600T Speaker Replacement: 手順 9、 1の画像 1
    • Lift the screen upwards to remove.

  10. Asus VivoTab RT TF600T Speaker Replacement: 手順 10、 2の画像 1 Asus VivoTab RT TF600T Speaker Replacement: 手順 10、 2の画像 2
    • Turn the tablet clockwise, so the speaker is facing the right.

    • Use the nylon or metal spudger to pry the battery from the back panel.

  11. Asus VivoTab RT TF600T Speaker Replacement: 手順 11、 2の画像 1 Asus VivoTab RT TF600T Speaker Replacement: 手順 11、 2の画像 2
    • Remove two 0.79 mm #00 screws from the speaker with a Phillips screwdriver size #00.

  12. Asus VivoTab RT TF600T Speaker Replacement: 手順 12、 2の画像 1 Asus VivoTab RT TF600T Speaker Replacement: 手順 12、 2の画像 2
    • Remove the speaker with the plastic opening tool.

終わりに

To reassemble your device, follow these instructions in reverse order.

ある他の人がこのガイドを完成しました。

作成者

3人の作成者と共同で作成されました。

Joseph C Reneau

メンバー登録日: 10/15/15

276 ポイント

2のガイドは作成済み

チーム

Sam Houston State, Team 1-2, Blackburne Fall 2015 Sam Houston State, Team 1-2, Blackburne Fall 2015人のメンバー

SHSU-BLACKBURNE-F15S1G2

3 メンバー

5のガイドは作成済み

0 件のコメント

コメントを追加

統計データ:

過去 24時間: 0

過去 7 日: 0

過去 30 日: 0

今までの合計 242