メインコンテンツにスキップ

Asus VivoBook X202E-DB21T Hard Drive Replacement

必要な工具と部品

  1. Asus VivoBook X202E-DB21T Hard Drive Replacement, Battery: 手順 1、 2の画像 1 Asus VivoBook X202E-DB21T Hard Drive Replacement, Battery: 手順 1、 2の画像 2
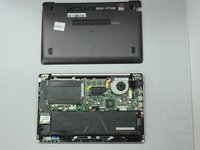
    • Flip the device such that the labels are on top.

    • Use a Phillips #1 screwdriver to remove the four 8mm screws near the back.

    • Use the same screwdriver to remove the four 5mm screws in the front.

    • Use the same screwdriver to remove the single 9mm screw in the center.

    • Make sure that the device is powered down and unplugged.

  2. Asus VivoBook X202E-DB21T Hard Drive Replacement: 手順 2、 2の画像 1 Asus VivoBook X202E-DB21T Hard Drive Replacement: 手順 2、 2の画像 2
    • Remove the back cover by gently prying with a spudger.

  3. Asus VivoBook X202E-DB21T Hard Drive Replacement: 手順 3、 2の画像 1 Asus VivoBook X202E-DB21T Hard Drive Replacement: 手順 3、 2の画像 2
    • Remove the eight 5mm screws using a Phillips #1 screwdriver.

    • Do not puncture the battery.

  4. Asus VivoBook X202E-DB21T Hard Drive Replacement: 手順 4、 1の画像 1
    • Disconnect the battery ribbon cable from the motherboard.

  5. Asus VivoBook X202E-DB21T Hard Drive Replacement: 手順 5、 1の画像 1
    • Remove the battery from the laptop.

  6. Asus VivoBook X202E-DB21T Hard Drive Replacement, Hard Drive: 手順 6、 2の画像 1 Asus VivoBook X202E-DB21T Hard Drive Replacement, Hard Drive: 手順 6、 2の画像 2
    • Unscrew the three 4mm screws holding the hard drive to the board.

  7. Asus VivoBook X202E-DB21T Hard Drive Replacement: 手順 7、 2の画像 1 Asus VivoBook X202E-DB21T Hard Drive Replacement: 手順 7、 2の画像 2
    • Pull on the tab on the left side of the hard drive and slowly disconnect it from the board.

終わりに

To reassemble your device, follow these instructions in reverse order.

作成者

3人の作成者と共同で作成されました。

John Thomas

メンバー登録日: 01/13/19

756 ポイント

6のガイドは作成済み

チーム

0 件のコメント

コメントを追加

統計データ:

過去 24時間: 2

過去 7 日: 4

過去 30 日: 9

今までの合計 963